Duo Web SDK v2 (Deprecated)
Last updated:
End of Support Information
The traditional Duo Prompt offered with Web SDK v2 reached its end of support on March 30, 2024.
Duo's Universal Prompt offers greater integration flexibility and a refreshed login experience. Build new integrations and migrate your existing ones to the Duo Web SDK v4 featuring Duo Universal Prompt support today!
The Duo Web SDK v2 repositories were deprecated on July 18th, 2022. Learn more about how this affects your existing applications in the Duo Web SDK v2 Repository Deprecation FAQ.
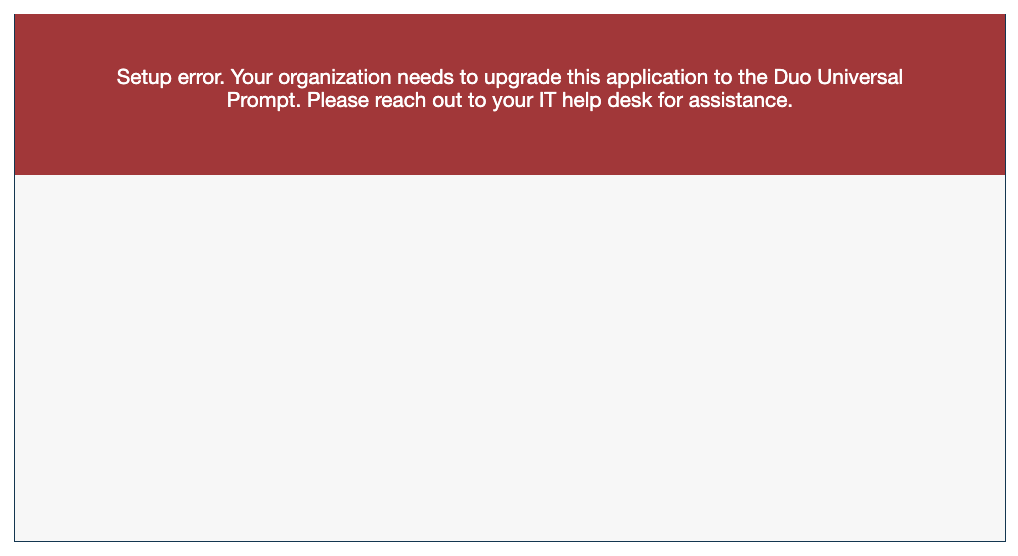
If you create new Duo web applications using Web SDK v2 after April 2024, users of your application will receive a setup error during authentication instead of the Duo authentication prompt.
Overview
Implementing Duo two-factor authentication into your site involves adding a second login page and splitting your login handler into two parts. You should be familiar with your web application's programming language and authentication process.
For example, a typical single factor login process looks something like this:
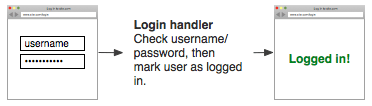
After adding Duo authentication it will look more like this:

There are three things you need to do to set this up: call sign_request(), add the JavaScript and IFRAME, and then call verify_response().
Duo Web SDKs
Duo Web SDKs are available on GitHub.
- Python (duo_python)
- ASP.NET (duo_dotnet)
- Classic ASP (duo_classicasp)
- ColdFusion (duo_coldfusion)
- Java (duo_java)
- Node.js (duo_nodejs)
- Perl (duo_perl)
- PHP (duo_php)
- Ruby (duo_ruby)
First Steps
Before starting:
-
Log in to the Duo Admin Panel and navigate to Applications → Application Catalog.
-
Locate the entry for Web SDK with the "2FA" label in the catalog. Click the + Add button to create the application and get your Client ID, Client secret, and API hostname. You'll need this information to complete your setup. See Protecting Applications for more information about protecting applications with Duo and additional application options.
Previously, the Client ID was called the "Integration key" and the Client secret was called the "Secret key".
If you plan to permit use of WebAuthn authentication methods (security keys, U2F tokens, or Touch ID), Duo recommends configuring allowed hostnames for this application and any others that show the inline Duo Prompt before onboarding any end-users. This option becomes available after you authenticate with your Web SDK v2-based application.
-
No active Duo users can log in to new applications until you grant access. Update the User access setting to grant access to this application to users in selected Duo groups, or to all users. Learn more about user access to applications. If you do not change this setting now, be sure to update it so that your test user has access before you test your setup.
This setting only applies to users who exist in Duo with "Active" status. This does not affect application access for existing users with "Bypass" status, existing users for whom the effective Authentication Policy for the application specifies "Bypass 2FA" or "Skip MFA", or users who do not exist in Duo when the effective New User Policy for the application allows access to users unknown to Duo without MFA. -
Download and install a supported client library (Python, Ruby, Classic ASP, ASP.NET, Java, PHP, Node.js, ColdFusion, Perl).
-
Use NTP to ensure that your server's time is correct.
Universal Prompt
When you first create your Duo Web SDK application, you'll see the option to activate the Duo Universal Prompt for your users. Note that the Web SDK v2 does not support the Duo Universal Prompt, so as soon as you authenticate to Duo using this application and a Web SDK v2 application then the Universal Prompt status will show as "Waiting on App Provider" and the activation option is unavailable.
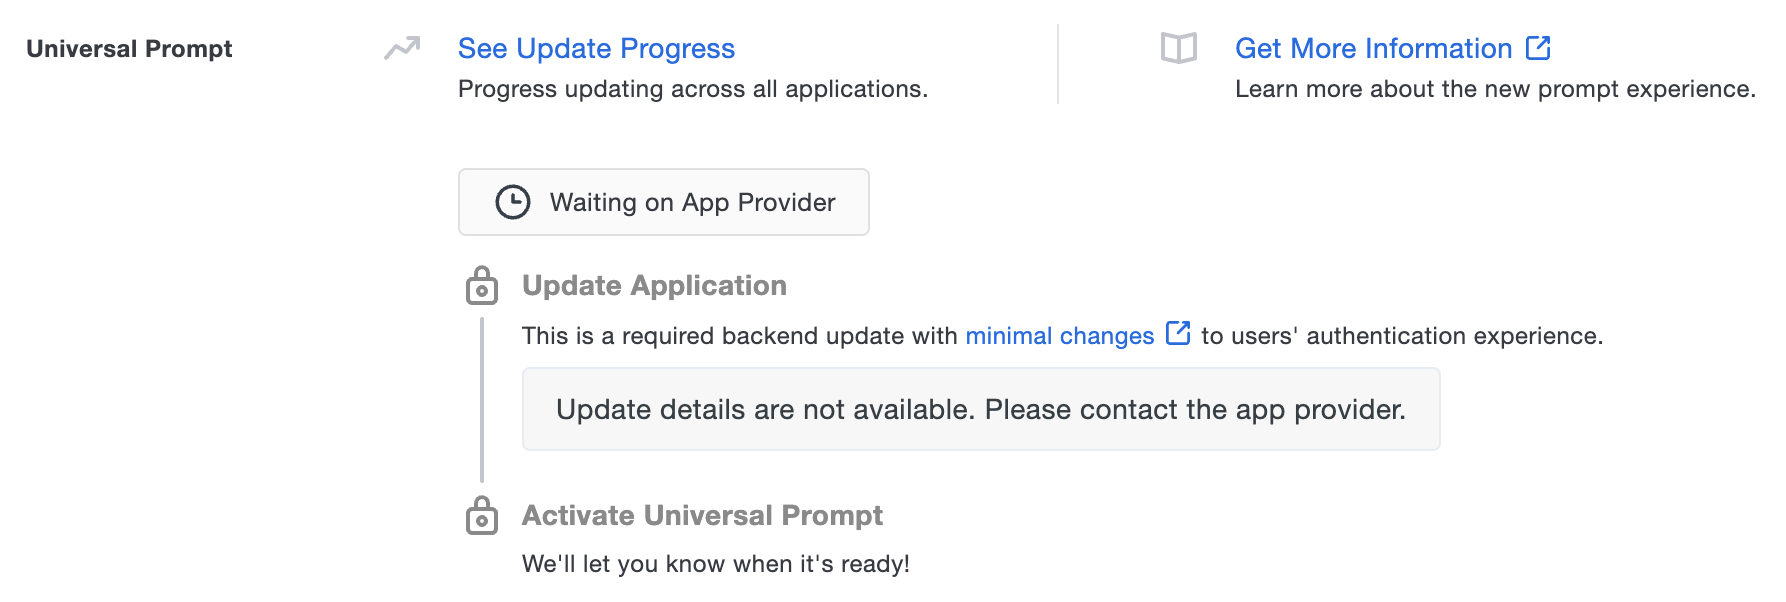
Your users continue to see the current Duo traditional prompt experience until you update your application to use Duo Web SDK v4 instead of Web SDK v2, authenticate using the updated application, and activate the Universal Prompt.
Duo Prompt UI Support per Delivery Method
| OIDC Redirect (Web SDK v4) | Iframe (Web SDK v2) | |
|---|---|---|
| Universal Prompt | YES | NO |
| Traditional Prompt | YES | YES |
Instructions
1. Generate an akey
Your application secret key akey is a string that you generate and keep secret from Duo (a value distinct from the secret key provided by Duo for your WebSDK application). It should be at least 40 characters long and stored alongside your Web SDK application's integration key (ikey) and secret key (skey) in a configuration file.
You can generate a random string in Python with:
import os, hashlib
print(hashlib.sha1(os.urandom(32)).hexdigest())
The security of your Duo application is tied to the security of your skey and akey. Treat these pieces of data like a password. They should be stored in a secure manner with limited access, whether that is in a database, a file on disk, or another storage mechanism. Always transfer them via secure channels, and do not send them over unencrypted email, enter them into chat channels, or include them in other communications with Duo.
2. Call sign_request()
After you perform primary authentication (e.g. look up a user's username and password in your database), you should call sign_request() which initializes the secondary authentication process.
sign_request() takes your Duo Web application's ikey (the Client ID) and skey (the Client secret), the akey you generated, and the username of the user who just successfully completed primary authentication. (If users can change their usernames, you'll probably want to use something that won't change, like an email address or primary key.)
For example, in Python:
sig_request = sign_request(ikey, skey, akey, username)
sign_request() performs a HMAC-SHA1 of the username, ikey, and an expiration timestamp, using the application's skey as the HMAC key. By generating this server-side and after primary authentication, Duo is assured that the user is indeed authorized to proceed to the secondary stage of authentication.
3. Show the IFRAME
After generating the signed request, your server should now display a second page that will contain the Duo IFRAME used for secondary authentication and user self-enrollment.
Duo's JavaScript handles the setup and communication between the IFRAME, the user, and your server. First, you will need to include a short snippet of JavaScript in the page.
You can find the JavaScript library here, or the minified version here.
<script src="/path/to/Duo-Web-v2.js"></script>
<script>
  Duo.init({
    'host': 'host',
    'sig_request': 'sig_request',
    'post_action': 'post_action'
  });
</script>
In this example, Duo.init() takes the following options:
host
|
Your API hostname (i.e. api-XXXXXXXX.duosecurity.com
|
sig_request
|
The signed request generated by sign_request()
|
post_action
|
The server-side URI of where the secondary authentication results (the signed response) should be POSTed to |
Refer to the full list of Duo.init() arguments for more options.
Then, you will need to include an IFRAME on the page with an id of duo_iframe. This is where the secondary authentication prompt will appear.
If you would like the frame to fit on smaller screen devices, like phones and tablets, you should use CSS to set the frame's dimensions:
<iframe id="duo_iframe">
</iframe>
<style>
  #duo_iframe {
    width: 100%;
    min-width: 304px;
    max-width: 620px;
    height: 330px;
    border: none;
  }
</style>
To make sure the page's width and zoom is set correctly for smaller screen devices, you may want to add a viewport meta tag to your page's header:
<head>
  <meta name="viewport" content="width=device-width, initial-scale=1">
  ...
</head>
To ensure that Internet Explorer renders the page in standards mode, add this meta tag to the top of your HTML <head>.
<meta http-equiv="X-UA-Compatible" content="IE=edge">
When this page loads, the JavaScript snippet will set up the IFRAME, prompt the user for secondary authentication, and POST back the results to your server.
Duo Prompt in an iframe:

4. Call verify_response()
After the user is successfully verified by Duo (e.g. authentication approval via phone call, SMS passcode, Duo Push, etc. or permitted access with bypass of interactive authentication after Duo policy evaluation) the IFRAME will generate a signed response called sig_response and POST it back to the post_action URL. Your server-side code should then call verify_response() to verify that the signed response is legitimate.
As the signed response is an assertion that the user completed both primary and secondary authentication, ensure that it is transmitted securely as sensitive data.
verify_response() takes your integration key (ikey), secret key (skey), integration secret key (akey), and the signed response as inputs. It will return the username of the authenticated user if the response is valid, or null (None in Python, Nil in Ruby, etc.) if the response is invalid.
For example, in Python:
sig_response = self.get_argument("sig_response") # for example (if using Tornado: http://www.tornadoweb.org/en/stable)
authenticated_username = verify_response(ikey, skey, akey, sig_response)
if authenticated_username:
  log_user_in(authenticated_username)
After ensuring that the username returned by verify_response() is not null, your application can set whatever identifier is necessary (e.g. cookie, session state, etc.) to indicate that the user has successfully authenticated. If your application preserves state and you know the login username, you should verify that authenticated_username returned from verify_response() matches that username before proceeding.
verify_response() verifies the HMAC-SHA1 signature on the signed response to ensure it was properly signed by Duo and not modified by the client in any way.
Add Ownership and Risk Information
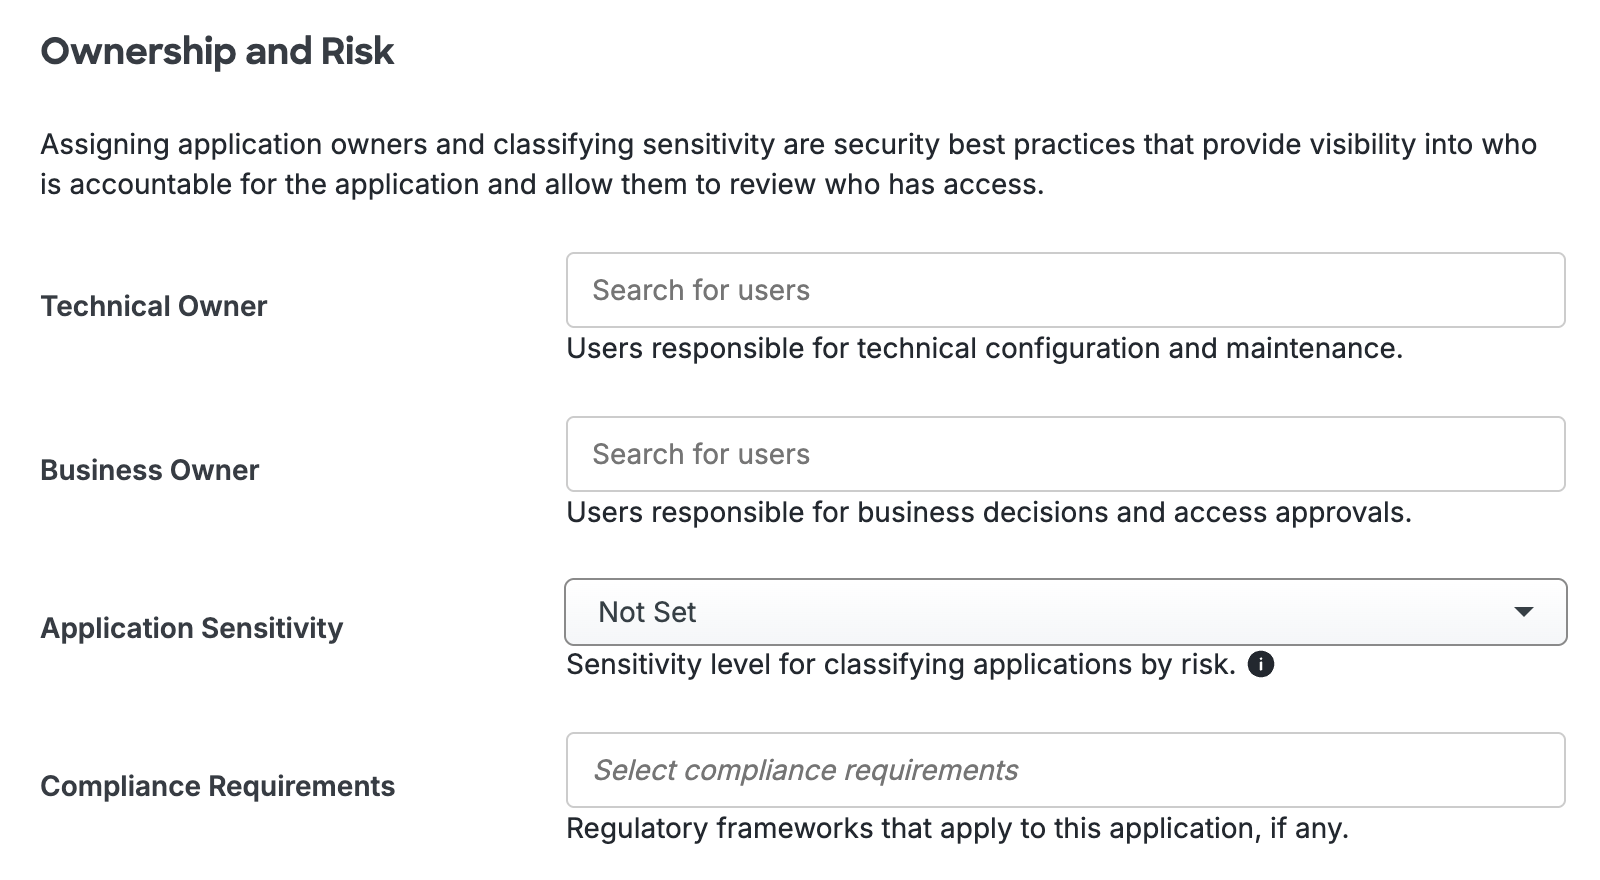
Go to the "Ownership and Risk" section of the application's page in the Duo Admin Panel to assign application owners and classify the application's risk level. Cisco Identity Intelligence automatically imports this information to populate relevant fields for Duo Advantage and Premier customers. Duo Essentials and Duo Federal plans exclude Cisco Identity Intelligence features.
You may set any of the following:
- Technical Owner: Search for and assign Duo users responsible for technical configuration and maintenance of this application.
- Business Owner: Search for and assign Duo users responsible for business decisions and access approvals related to this application.
- Application Sensitivity: Select this application's risk level from the drop-down list. Default: Not Set.
- Compliance Requirements: Select any applicable regulatory frameworks for this application (SOX (Sarbanes-Oxley), HIPAA, PCI-DSS, etc.) from the list.
Scroll to the bottom of the page and click Save to apply your changes.
Grant Access to Users
If you did not already grant user access to the Duo users you want to use this application be sure to do that before inviting or requiring them to log in with Duo.
Appendices
Duo.init() arguments
| Argument | Value | Required? | Default |
|---|---|---|---|
host
|
Your API hostname (i.e. api-XXXXXXXX.duosecurity.com
|
Required | |
sig_request
|
The signed request generated by sign_request() | Required | |
post_action
|
The URL to POST the signed response to | Optional | "" (i.e. post back to same page, like a form with an empty action) |
post_argument
|
The argument for signed response in post_action
|
Optional |
sig_response
|
submit_callback
|
Callback to execute, with the reference to the duo_form object. If provided, the Duo Web SDK will not submit the form on 2fa, it will only call the specified callback. This can be used to prevent the webpage from reloading.
|
Optional |
|
iframe configuration attributes
| Attribute Name | Value | Required? | Default |
|---|---|---|---|
data-host
|
Your API hostname (i.e. api-XXXXXXXX.duosecurity.com)
|
Required | |
data-sig-request
|
The signed request generated by sign_request() | Required | |
data-iframe
|
The id of the iframe to initialize
|
Optional |
duo_iframe
|
data-post-action
|
The URL to POST the signed response to | Optional | "" (i.e. post back to same page, like a form with an empty action) |
data-post-argument
|
The argument for signed response in post_action
|
Optional |
sig_response
|
Using Auth API with Duo Web
You may wish to contact Duo's cloud service before initializing the Duo frame. For example, you may want to verify that the Duo service is available and responding before invoking your 2FA authentication handler, or you may want to validate the Duo integration information is correct when configuring your application.
To accomplish this, you may utilize Duo's Auth API ping endpoint to implement a liveness check for the Duo service (which doesn't require any Duo integration information), or use the Auth API check endpoint to verify the integration information and signature.
These are the only two Auth API endpoints recommended for use by Duo Web applications. Incorporating any other Auth API endpoint calls in your Duo Web application may have unpredictable results.
Passing additional POST arguments with the signed response
Duo's JavaScript will pass additional arguments found in a duo_form form with the signed response. For example:
<form method="POST" id="duo_form">
 <input type="hidden" name="next" value="next" />
</form>
Note that while the signed response is protected from spoofing by its signature and expiration, you must provide any such protection for these additional arguments yourself.
Example: Duo for WordPress
Take a look at the duo_wordpress code for an example implementation of Duo Web.
Troubleshooting
Need some help? Take a look at our WebSDK Knowledge Base articles or Community discussions. For further assistance, contact Support.
Network Diagram
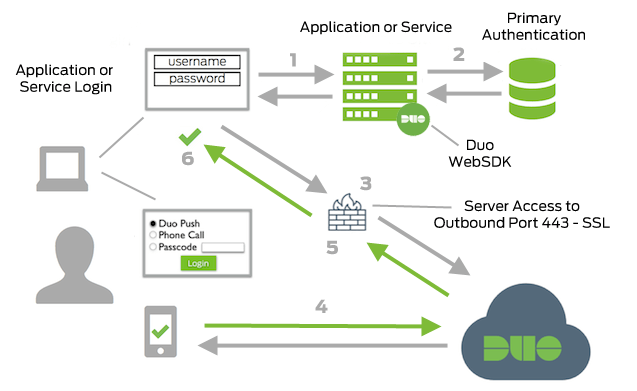
- Web Application or Service connection initiated
- Primary authentication
- Web Application or Service connection established to Duo Security over TCP port 443
- Secondary authentication via Duo Security’s service
- Web Application or Service receives authentication response
- Web Application or Service session logged in