Duo Single Sign-On for OAuth 2.0 Client Credentials
Last updated:
About Duo Single Sign-On
Duo Single Sign-On is our cloud-hosted SSO product which layers Duo's strong authentication and flexible policy engine on top of application logins using the Security Assertion Markup Language (SAML) 2.0 or OpenID Connect (OIDC) authentication standards. Duo Single Sign-On acts as an OpenID provider (OP), authenticating your users using existing on-premises Active Directory (AD) or any SAML 2.0 IdP and prompting for two-factor authentication before permitting access to your service provider application.
Duo Single Sign-On is available in Duo Premier, Duo Advantage, and Duo Essentials plans, which also include the ability to define policies that enforce unique controls for each individual SSO application. For example, you can require that users of one application complete two-factor authentication at every login, but only once every seven days when accessing a different application. Duo checks the user, device, and network against an application's policy before allowing access to the application.
Duo Single Sign-On can also act as an OAuth 2.0 authorization server supporting the client credentials grant type allowing secure machine-to-machine interactions by generating an access token with scoped permissions for one machine which can be sent and then validated by another machine.
Configure Single Sign-On
Before configuring your relying party application you'll first need to configure a working authentication source.
Once you have your SSO authentication source working, continue to the next step of creating the relying party (RP) application in Duo.
Create Your Cloud Application in Duo
-
Log in to the Duo Admin Panel and navigate to Applications → Application Catalog.
-
Locate the entry for OAuth 2.0 Client Credentials with the "SSO" label in the catalog. Click the + Add button to start configuring OAuth 2.0 Client Credentials. See Protecting Applications for more information about protecting applications with Duo and additional application options. You'll need the information on the OAuth 2.0 Client Credentials page later to complete your setup.
-
The Metadata section is where you can get OAuth provider information about Duo Single Sign-On to provide to your relying party.
Name Description Issuer Unique entity related to the OAuth 2.0 provider that issues a set of claims. This is also the base URL of every endpoint below. Discovery URL Returns basic information about OAuth 2.0 provider such as endpoint URLs and supported configuration methods. This will also include the supported scopes for this OAuth 2.0 provider once you save the Duo application. Token URL URL used by a relying party to retrieve an access token from the OAuth 2.0 provider. JWKS URL URL that returns a list of signing keys to validate the signatures of JWTs signed by this OAuth 2.0 provider. Token Introspection URL URL where relying party can validate an access token. 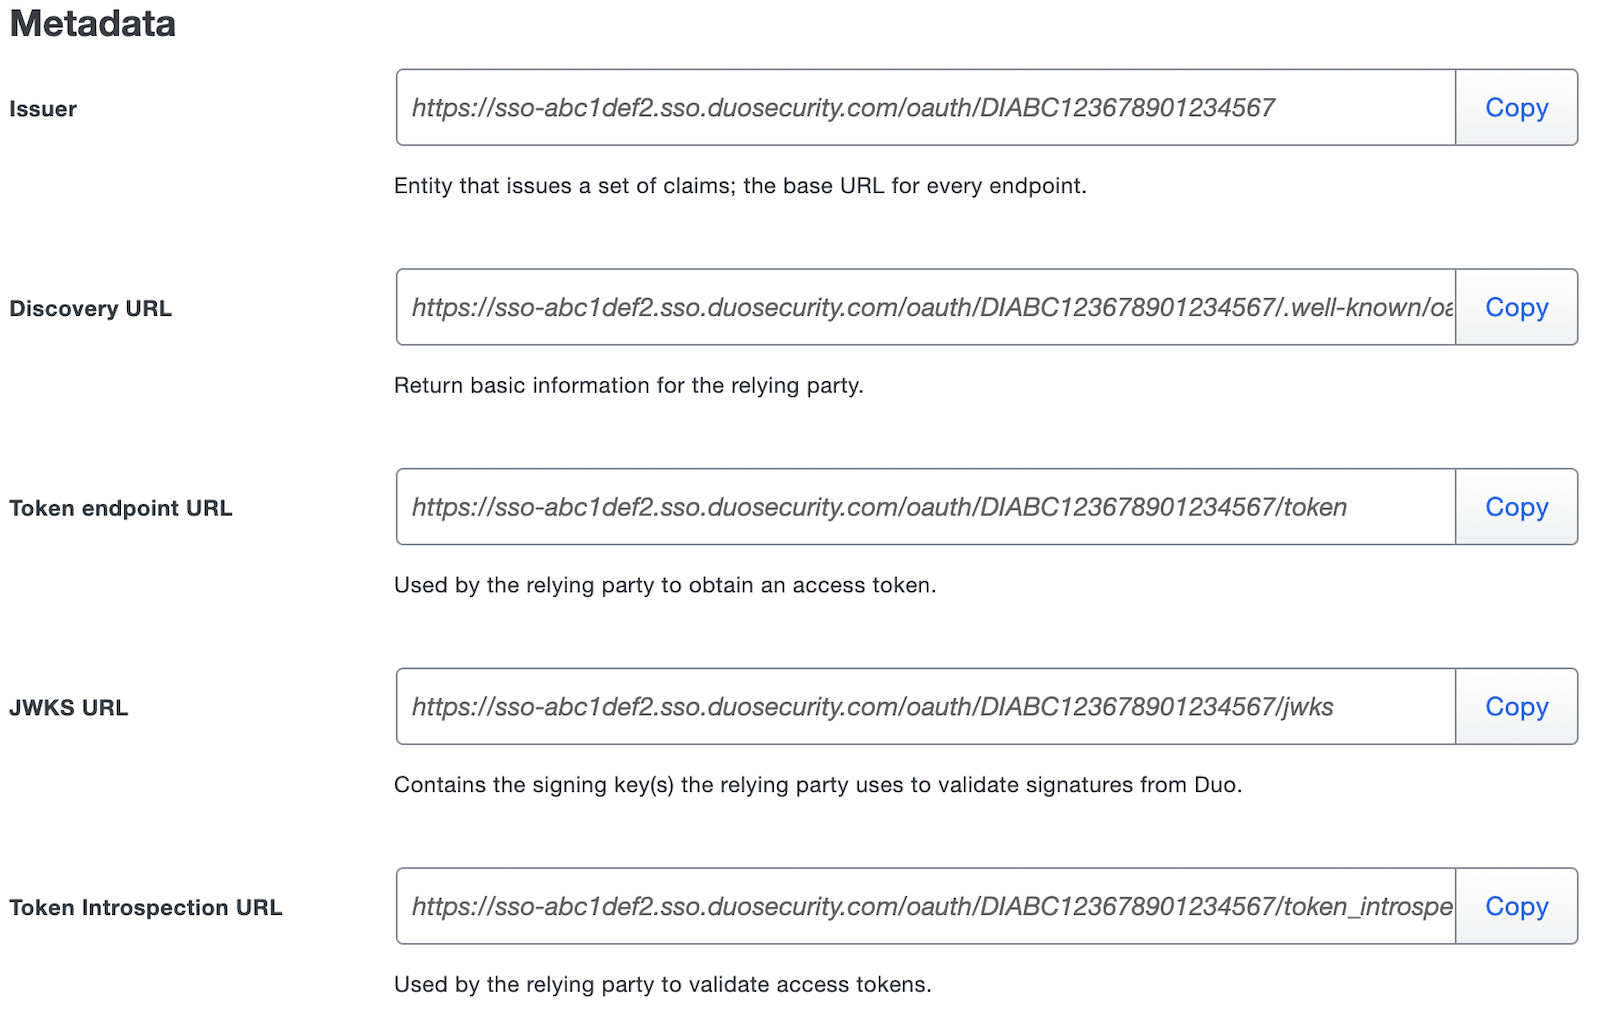
-
Scopes are used determine the permissions that a specific access token can have when issued by the OAuth 2.0 provider for a specific client. You will create clients further down the page and associate them with the scopes they are allowed to request.
Refer to your relying party documentation to complete the Scopes section.
You can enter a new scope under the Scope header by typing its name in such as
calendar:write. Next to the name of the scope under Description you can optionally type a description about what this scope does. You can add additional scopes by clicking Add Scope or remove scopes by clicking the trashcan icon next to Description. You must always have at least one scope.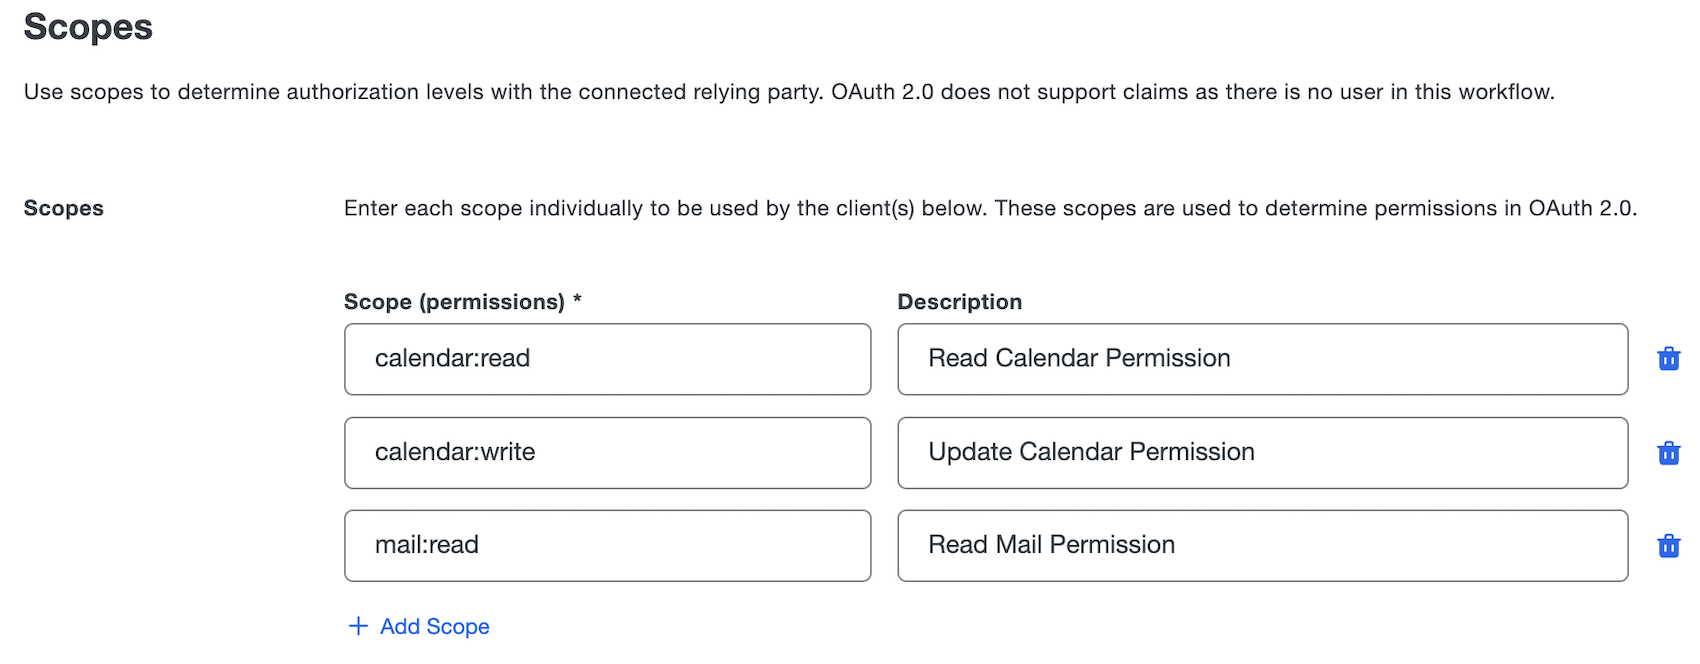
-
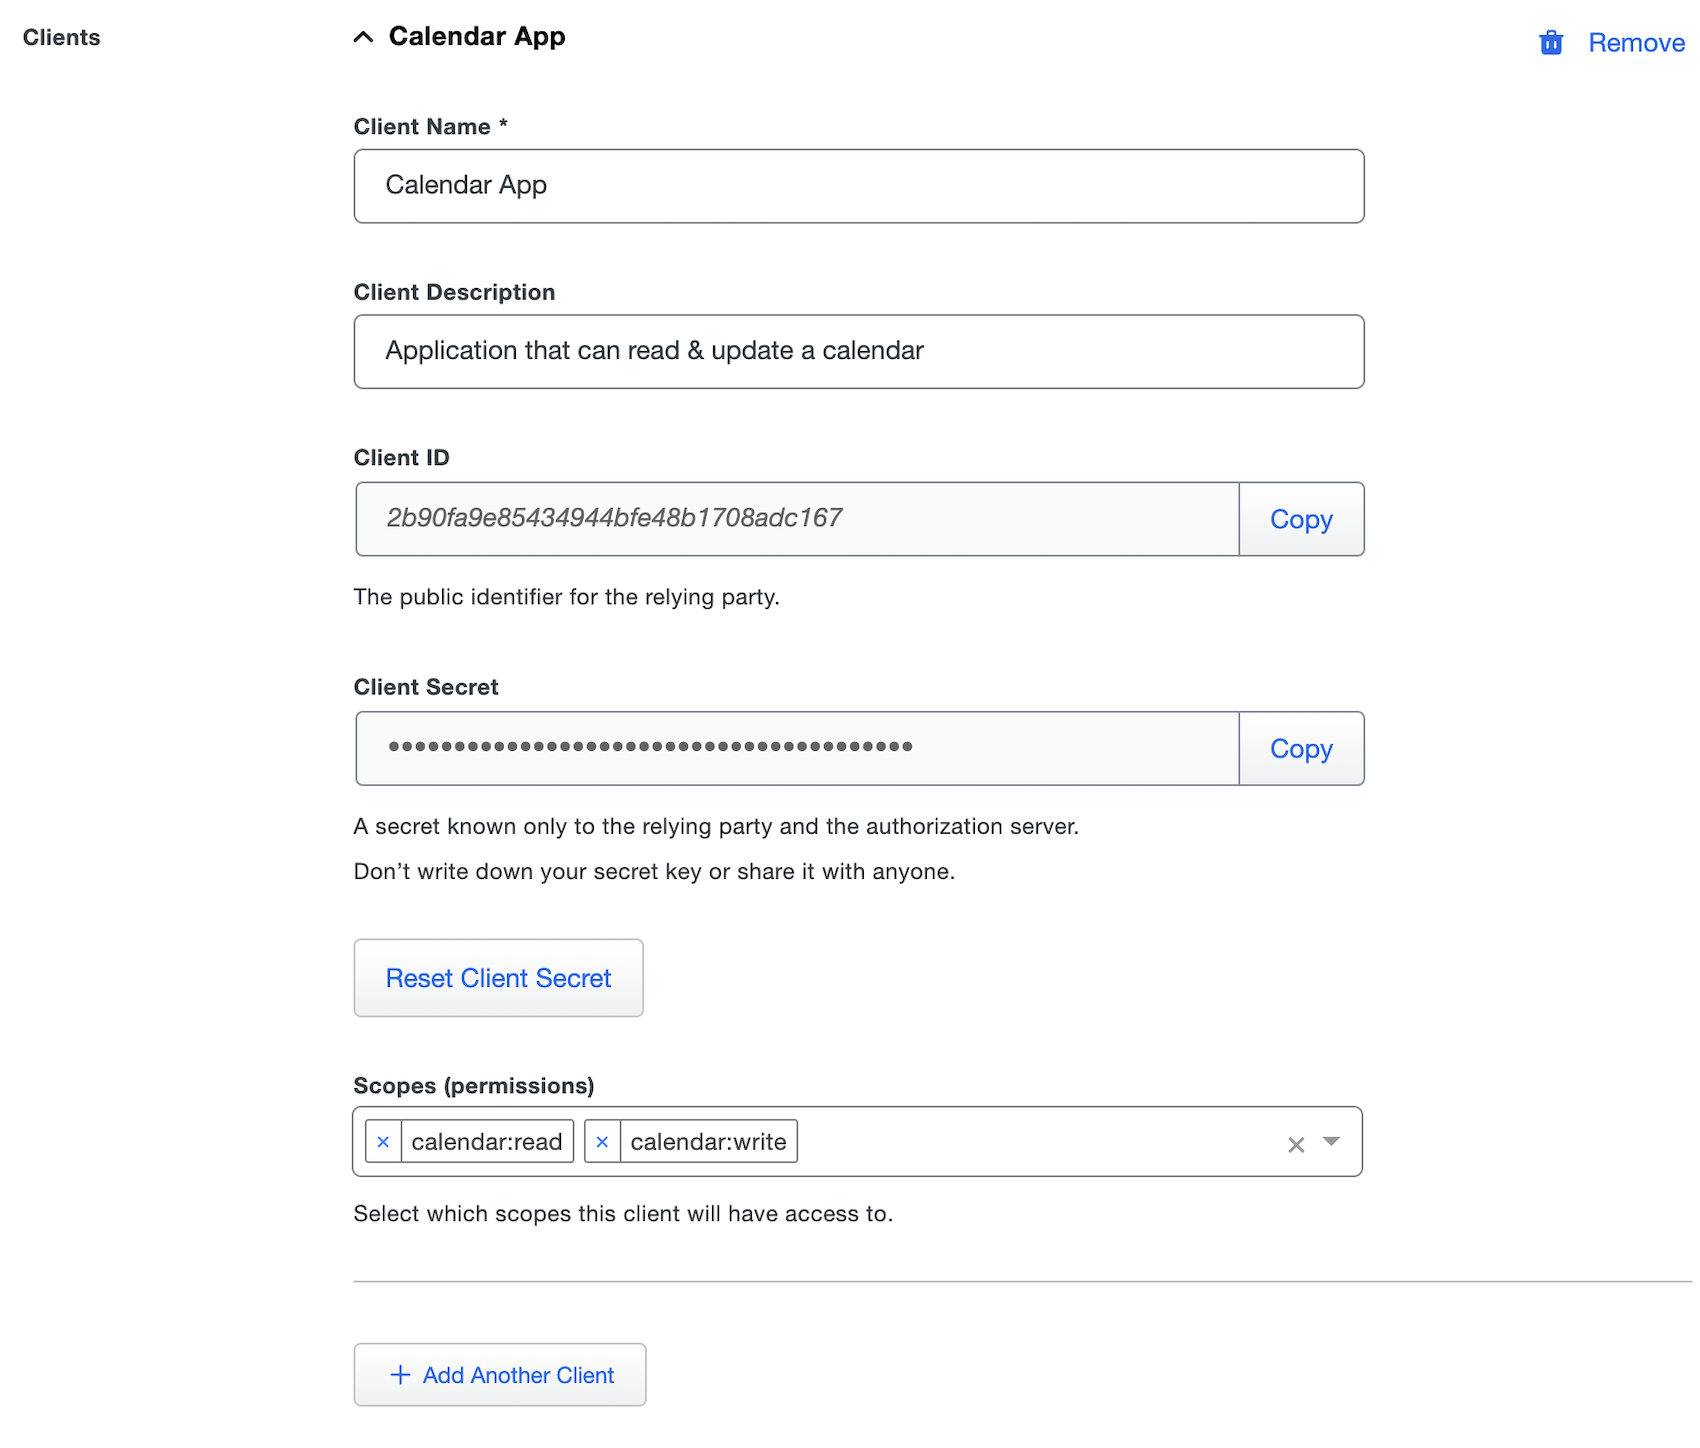
Once scopes have been added you can create clients by scrolling down to the *Clients section. Clients are the relying parties that will make calls to either generate an access token or validate an access token from the OAuth 2.0 provider.
Use the table below to fill out the section for each client you'd like to create:
Name Description Client Name A friendly name for the client that allows you to identify it. Client Description A description of how this client is used. Optional. Client ID The public identifier of the relying party. Client Secret A secret that is only held by the relying party and OAuth 2.0 provider. This secret is used to make authenticated requests against the OAuth 2.0 provider. You must save the page to generate the secret for a new client. You can reset the secret by clicking the Reset Client Secret button. Once the secret is reset the old secret will be rejected. Scopes You can select the different scopes you added in step 4 above. Only scopes added here will be available for the client to request when generating an access token. If you'd like to add additional clients you can click Add Another Client and repeat step 5.
-
You can adjust additional settings for your new application at this time — like changing the application's name from the default value or adding notes.
-
Scroll down to the bottom of the page and click Save. This will allow you view the "Client Secret" for any new clients created during this save.
Global token introspection for Duo SSO provides a centralized and secure method for validating access tokens across OIDC and OAuth applications, enhancing security and efficiency. For more information about global token introspection, see KB article 8875.
Configure Your Relying Party
You'll need to provide some information about Duo Single Sign-On to your cloud application provider, like URL information, client ID, and client secret. You can find this information in the Metadata and Scopes section of the details page for your OAuth 2.0 application in the Duo Admin Panel.
Refer to your relying party's configuration guide for instructions.
Test Your Setup
Your OAuth 2.0 Client Credential application is now setup in Duo!
Refer to your relying party's configuration guide for instructions for testing the setup.
Add Ownership and Risk Information
Go to the "Ownership and Risk" section of the application's page in the Duo Admin Panel to assign application owners and classify the application's risk level. Cisco Identity Intelligence automatically imports this information to populate relevant fields for Duo Advantage and Premier customers. Duo Essentials and Duo Federal plans exclude Cisco Identity Intelligence features.
You may set any of the following:
- Technical Owner: Search for and assign Duo users responsible for technical configuration and maintenance of this application.
- Business Owner: Search for and assign Duo users responsible for business decisions and access approvals related to this application.
- Application Sensitivity: Select this application's risk level from the drop-down list. Default: Not Set.
- Compliance Requirements: Select any applicable regulatory frameworks for this application (SOX (Sarbanes-Oxley), HIPAA, PCI-DSS, etc.) from the list.
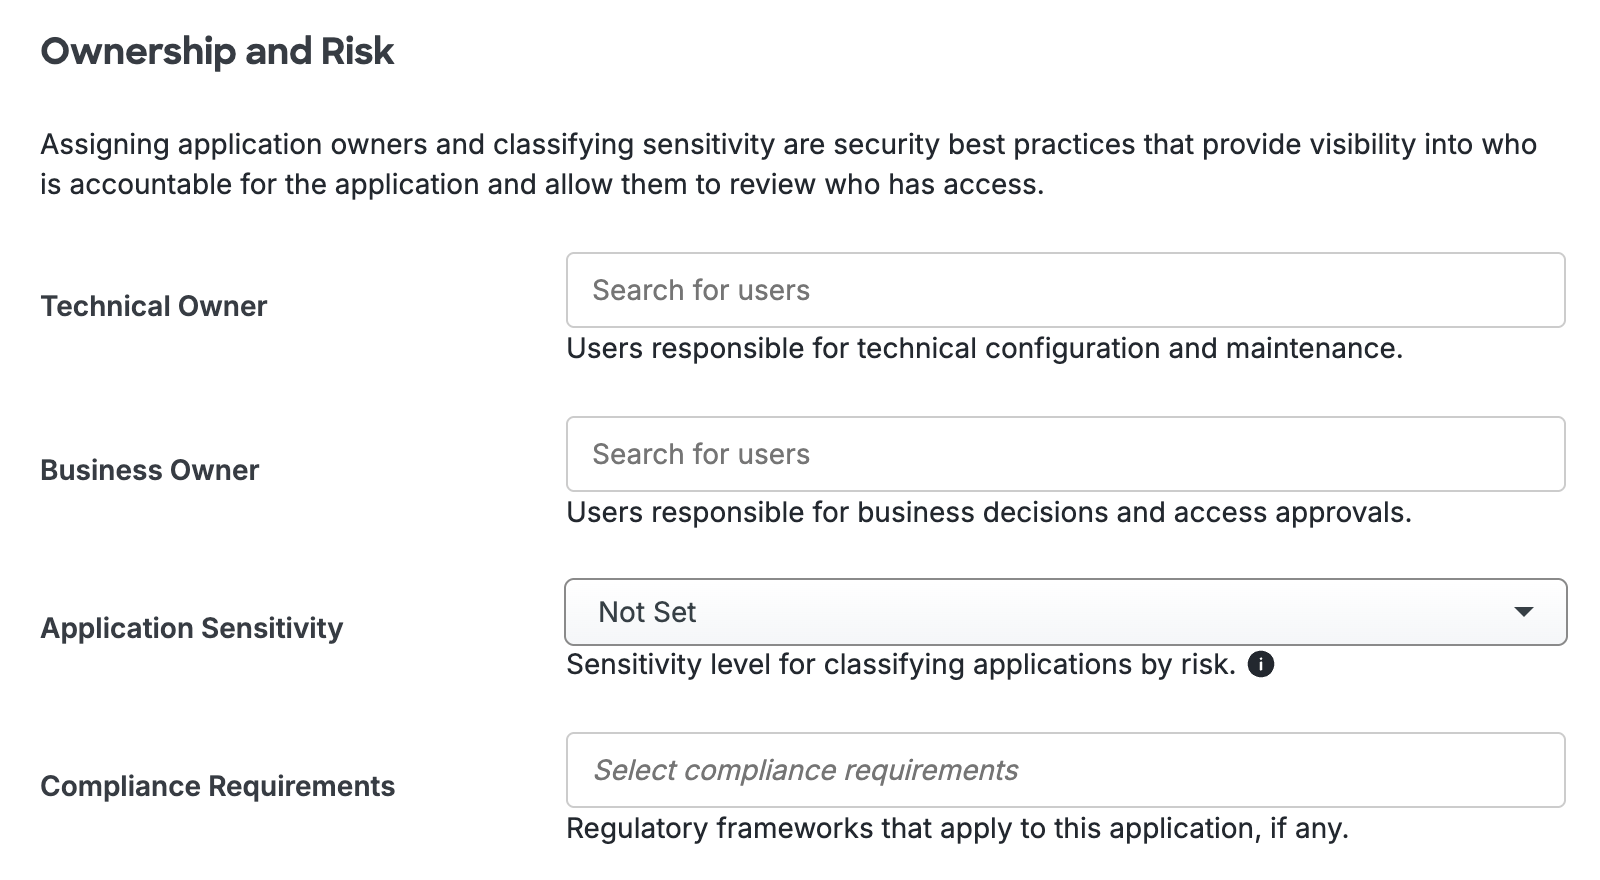
Scroll to the bottom of the page and click Save to apply your changes.
Automated Provisioning
This application does not support automated creation and management of users and groups from Duo using SCIM 2.0 provisioning.
Troubleshooting
Need some help? Try searching our Knowledge Base articles or Community discussions. For further assistance, contact Support.