Duo Administration - Manage 2FA Devices
Last updated:
Overview
Manage phones, hardware tokens, and other two-factor authentication devices from the Duo Admin Panel.
To access the Duo Admin Panel:
-
Navigate to Duo Admin Panel.
-
Enter your Duo administrator account credentials.
-
Complete two-factor authentication.
See Accessing the Duo Admin Panel for detailed Duo Admin Panel login instructions.
The browser used to access the Duo Admin Panel must support TLS 1.2, which most modern browsers do by default. If you have issues accessing the site, please update your browser to a recent version of Chrome, Firefox, Edge, Safari, etc. or check your browser’s SSL implementation here: https://www.ssllabs.com.
Duo no longer supports use of Internet Explorer to access the Admin Panel. Microsoft ended Internet Explorer desktop application support on June 15, 2022. Please use one of Duo's supported browsers.
Managing Phones
Listing Phones
-
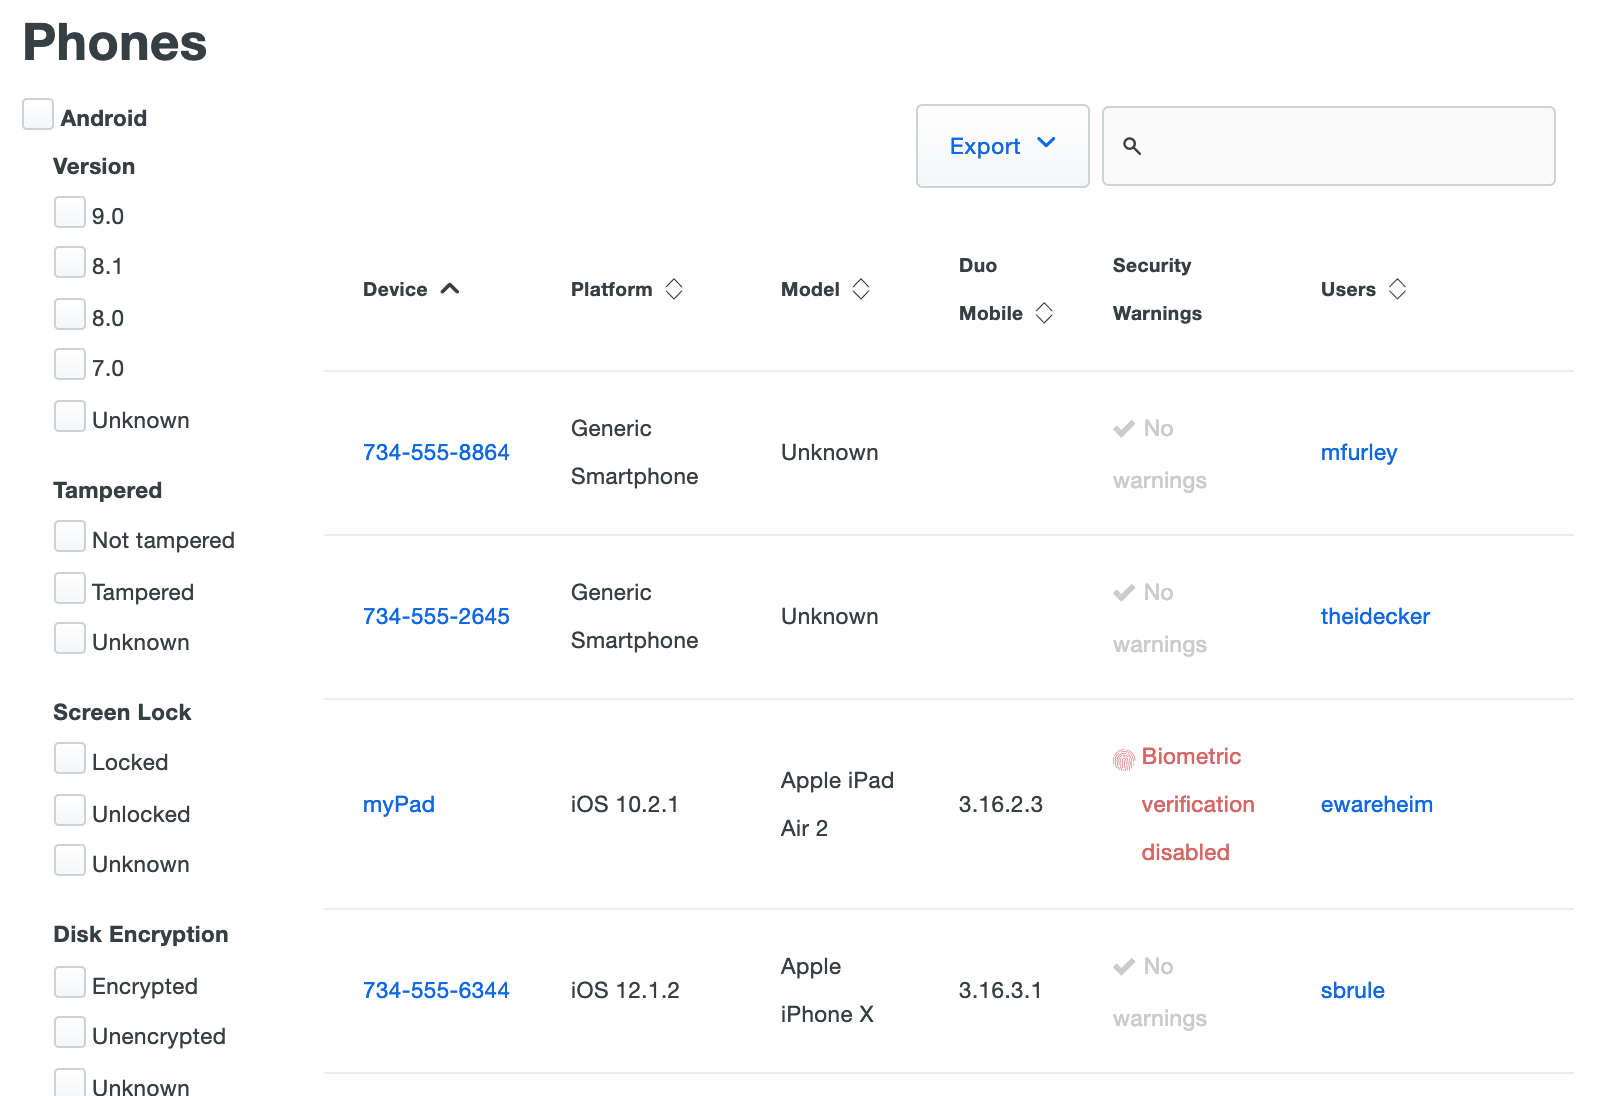
Log in to the Duo Admin Panel and navigate to Devices → Phones in the left sidebar. A list of phones and tablets is shown, along with the attached user(s), if any.
If you're using Duo's Duo Premier or Duo Advantage plans, the "Phones" page includes a number of selectable filters on the left side. You can narrow down the list of devices by OS platform, version, or security feature.
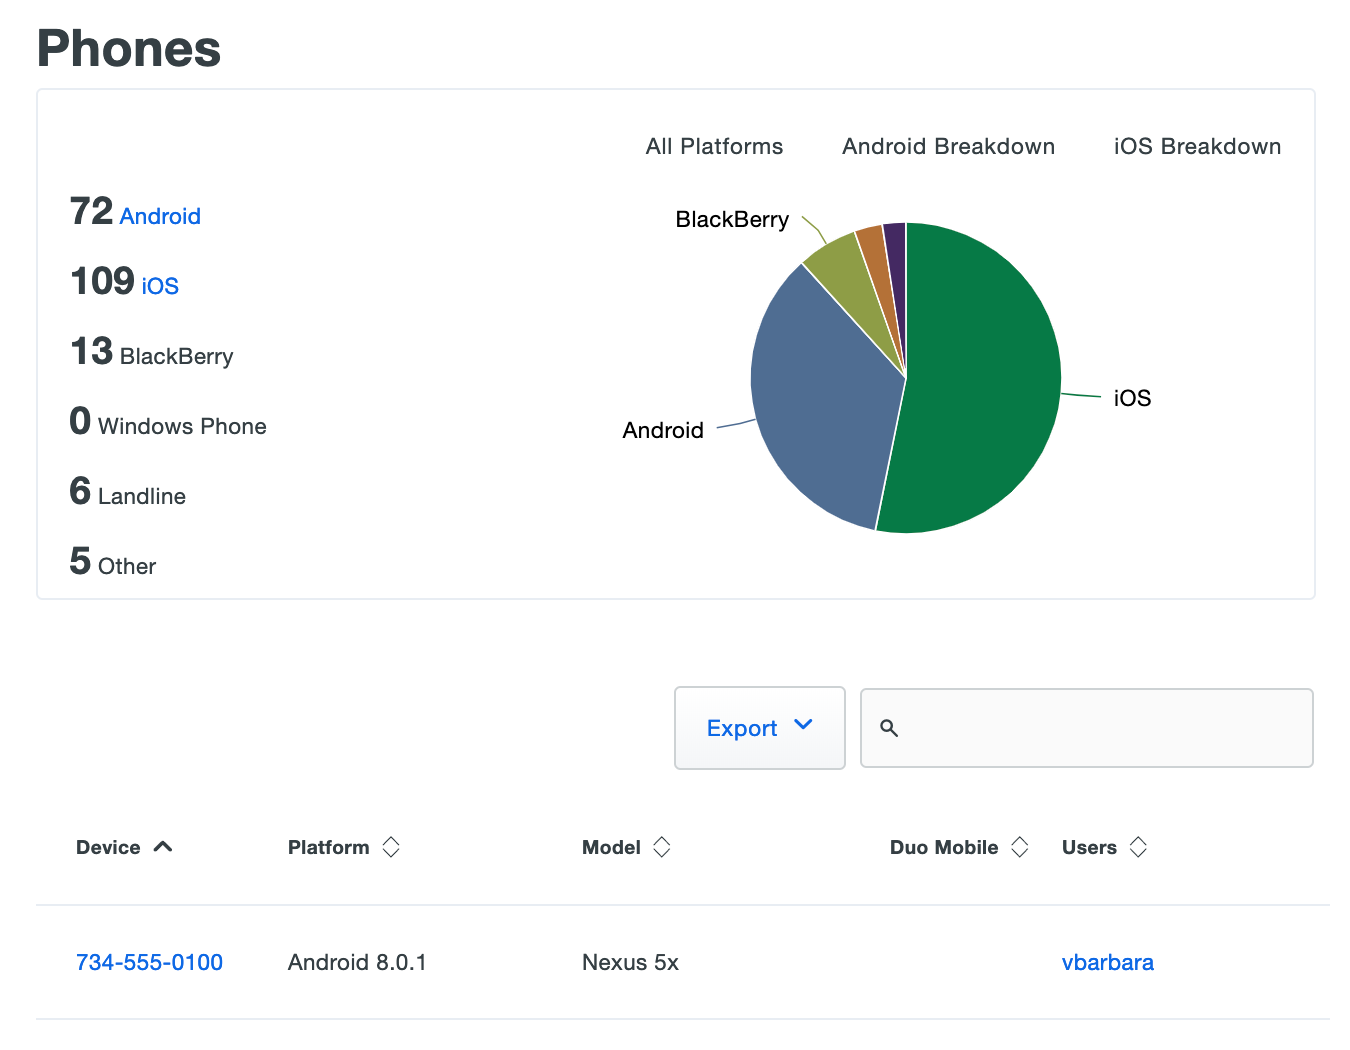
Duo Essentials and Free editions see a breakdown of phone devices by type, followed by the device list.
Click the Export button in the upper right side of the devices list and select CSV, JSON, or PDF to download a a list of devices. You can also select URL to obtain a direct link to your current view. If you've filtered your current view, the report only includes the filtered results.
-
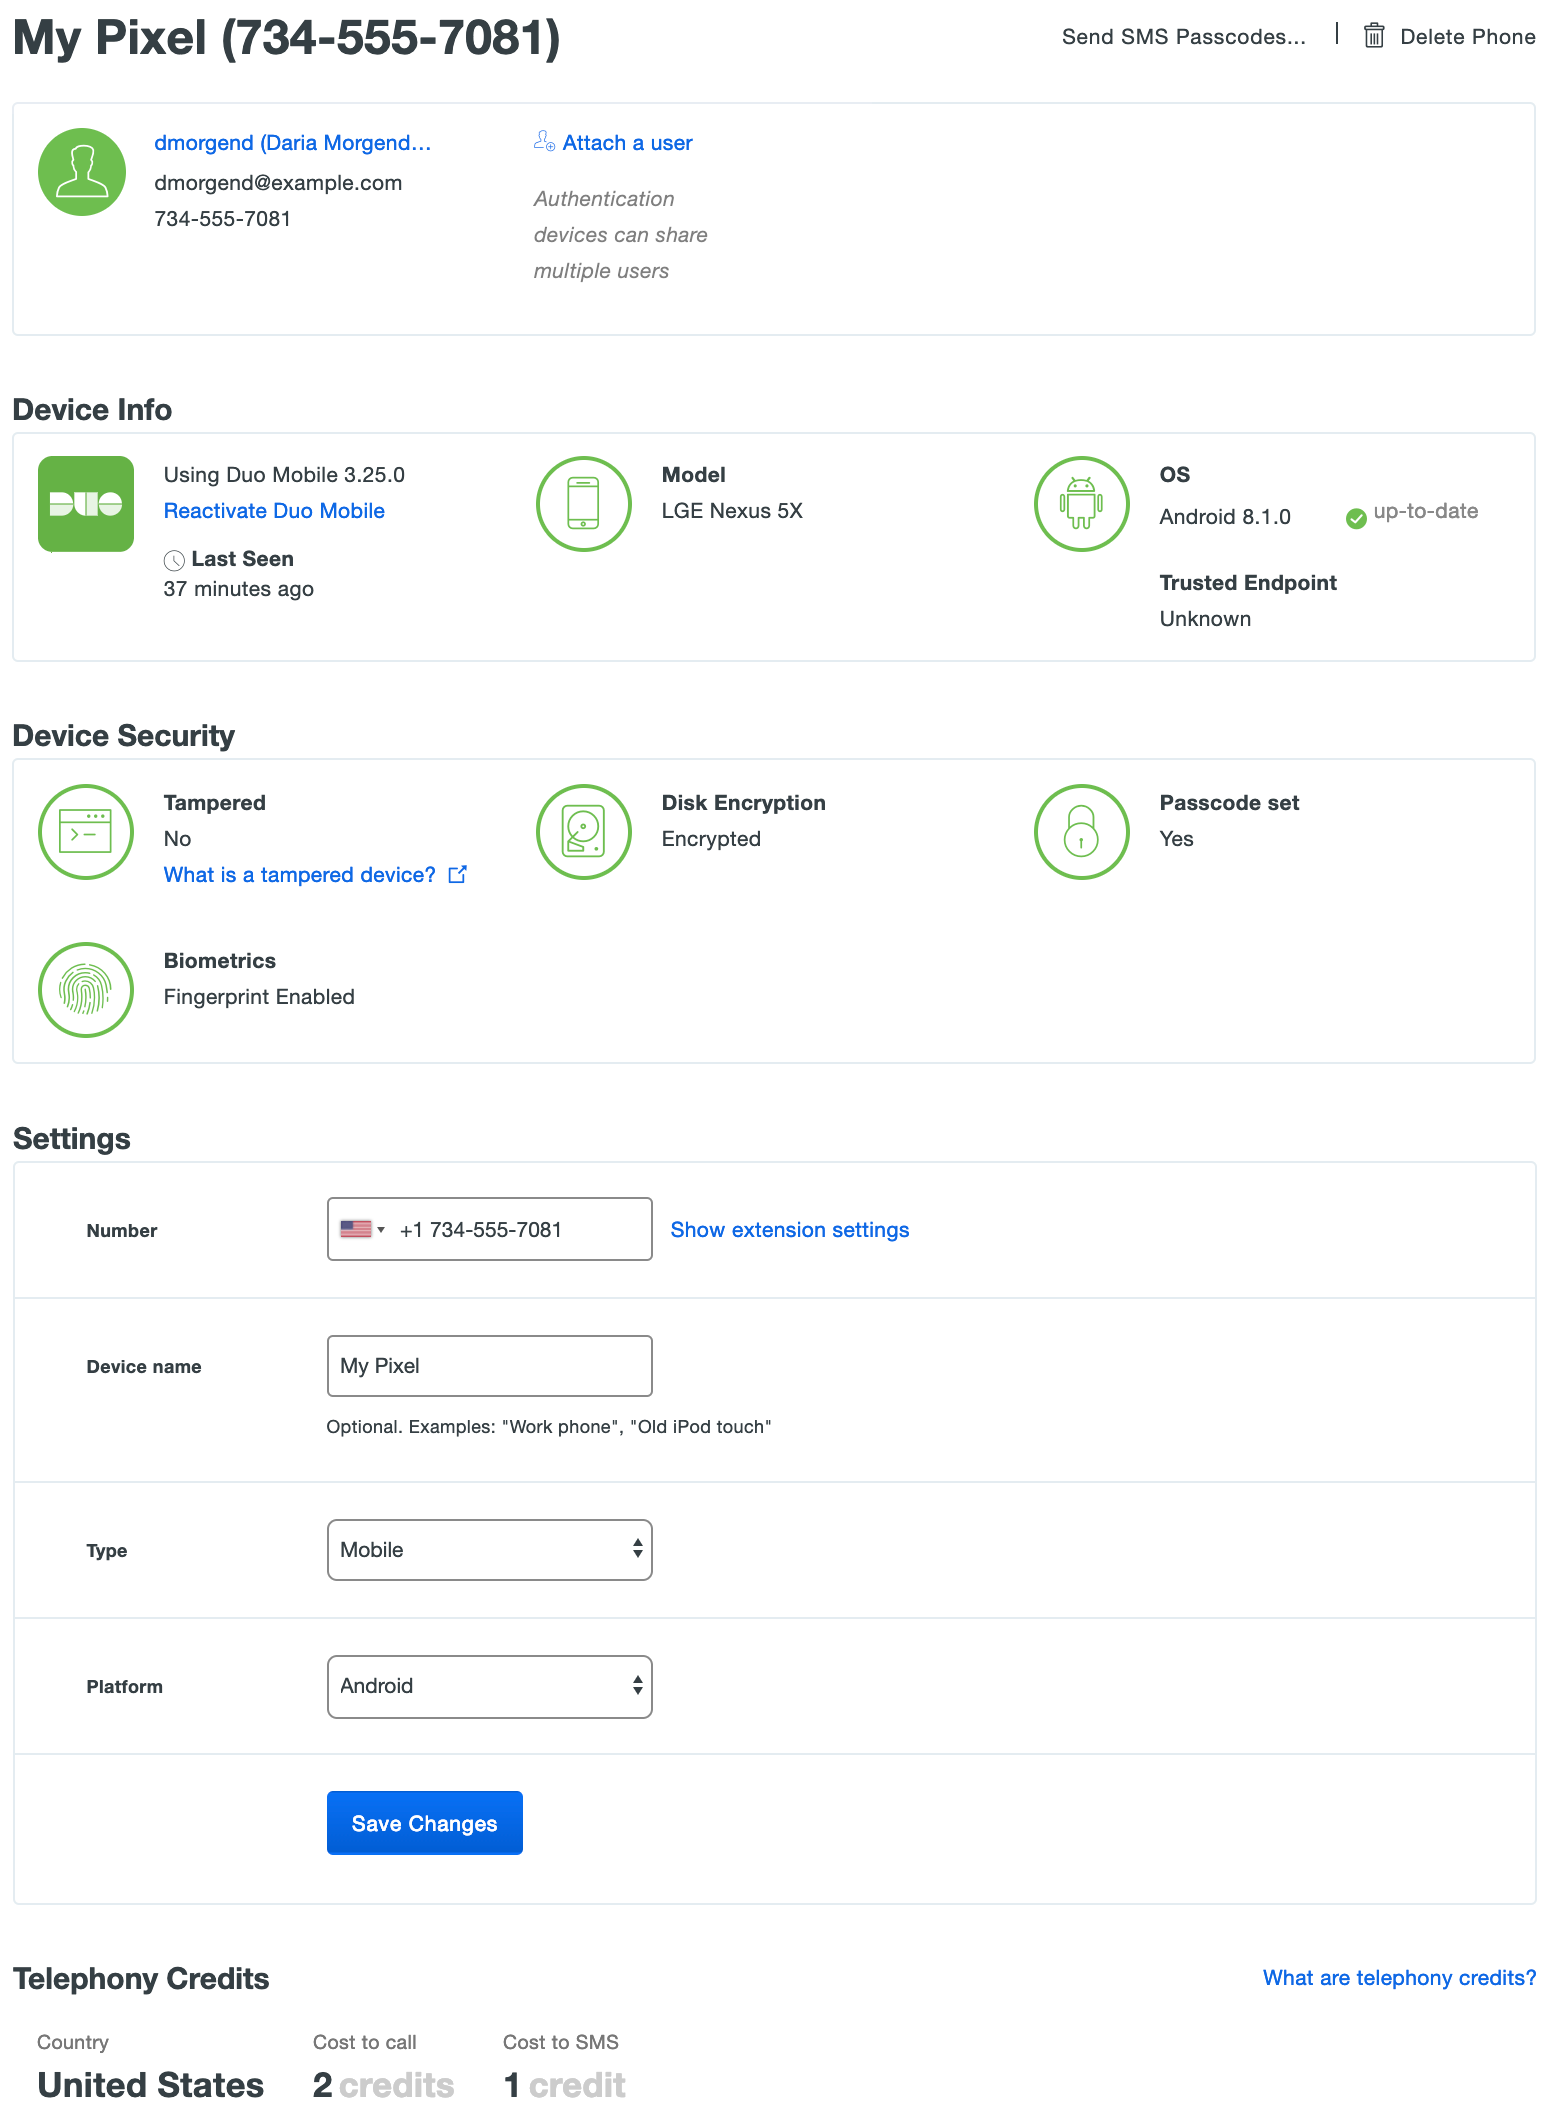
Select a phone by clicking the identifier in the "Device" column. This loads the properties page for that phone or tablet. The device page shows the user(s) attached to that phone, and other information and properties like the phone number, the type of device, the model and operating system, etc.
Duo Premier and Duo Advantage plan customers van view device security information about enrolled devices, like the screen lock status.
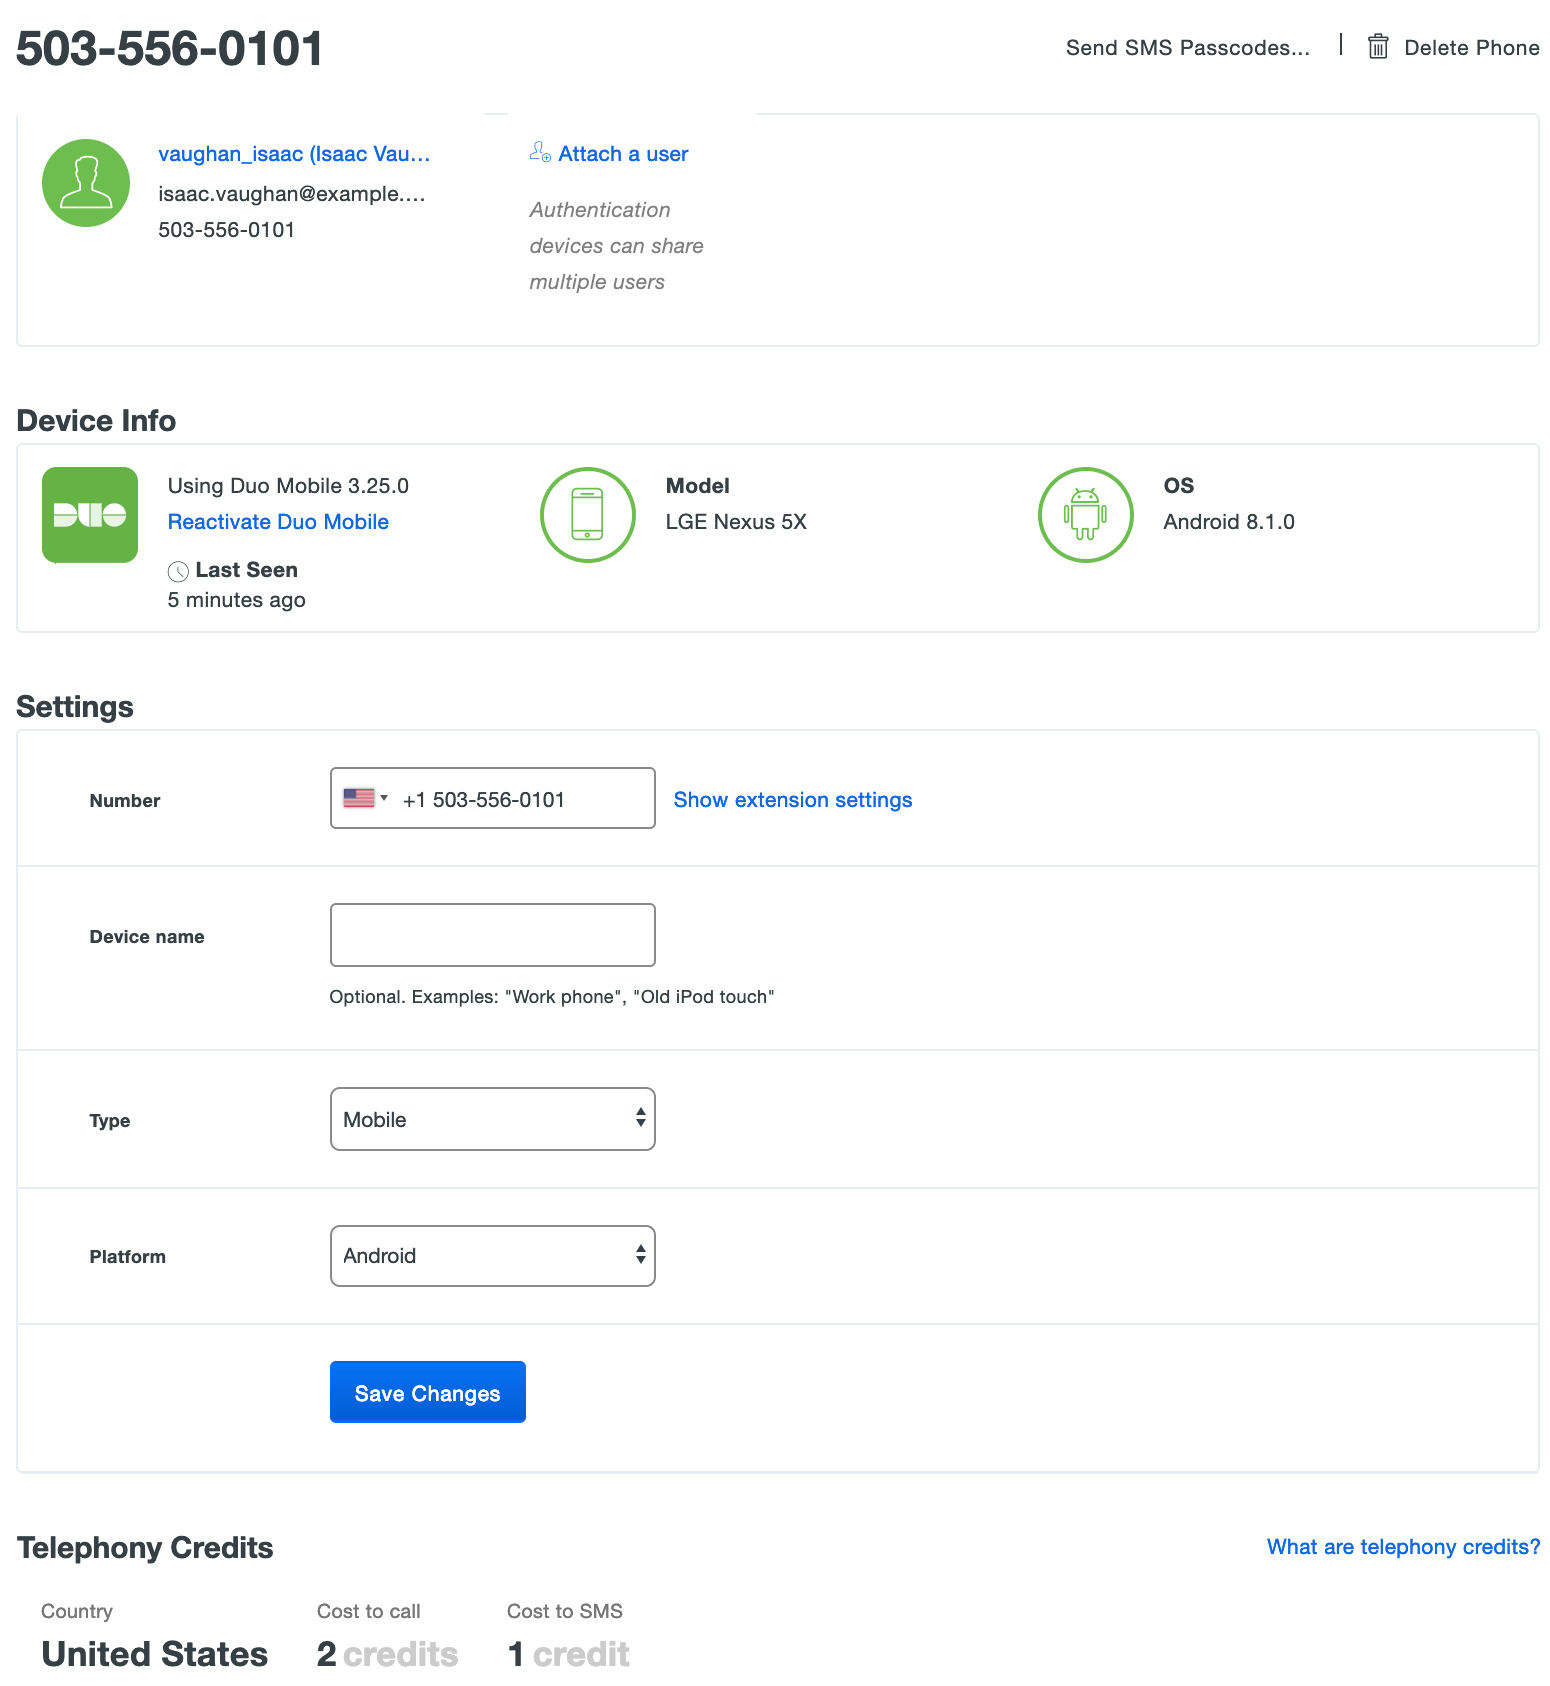
Duo Essentials plan users do not see the "Device Security" information, but all other details are present.
To learn more about the additional 2FA device information visible in the Duo Premier and Duo Advantage plans, see the Device Insight documentation.
Adding a Phone to a User
Role required: Owner, Administrator, User Manager, Security Analyst, or Help Desk.
Administrators can create a new phone or tablet device in Duo and attach it to an existing user. To do this:
-
Log in to the Duo Admin Panel and navigate to Users → Users in the left sidebar, or enter a username into the search bar at the top of the page.
-
Select a user by clicking their username. Scroll down to the "Phones" table on the user's properties page and then click the Add Phone button (you can also add a tablet to the user this way).

-
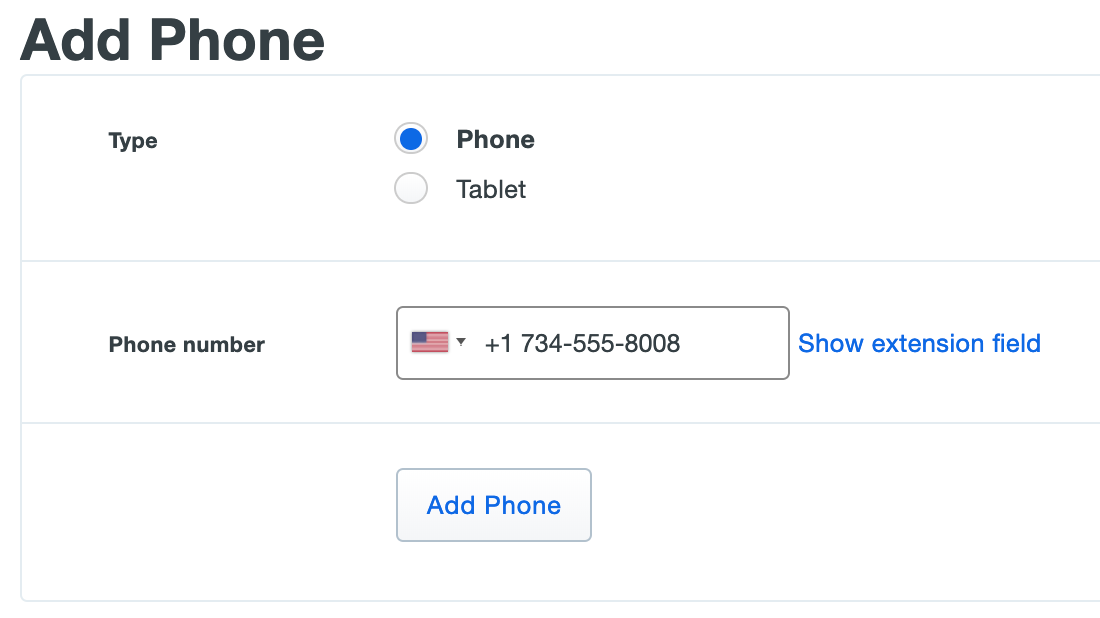
Select the type of device. If you're adding a phone, you'll also need to enter the phone number. If you're adding a tablet, then the phone number field disappears. Click the Add Phone button.
-
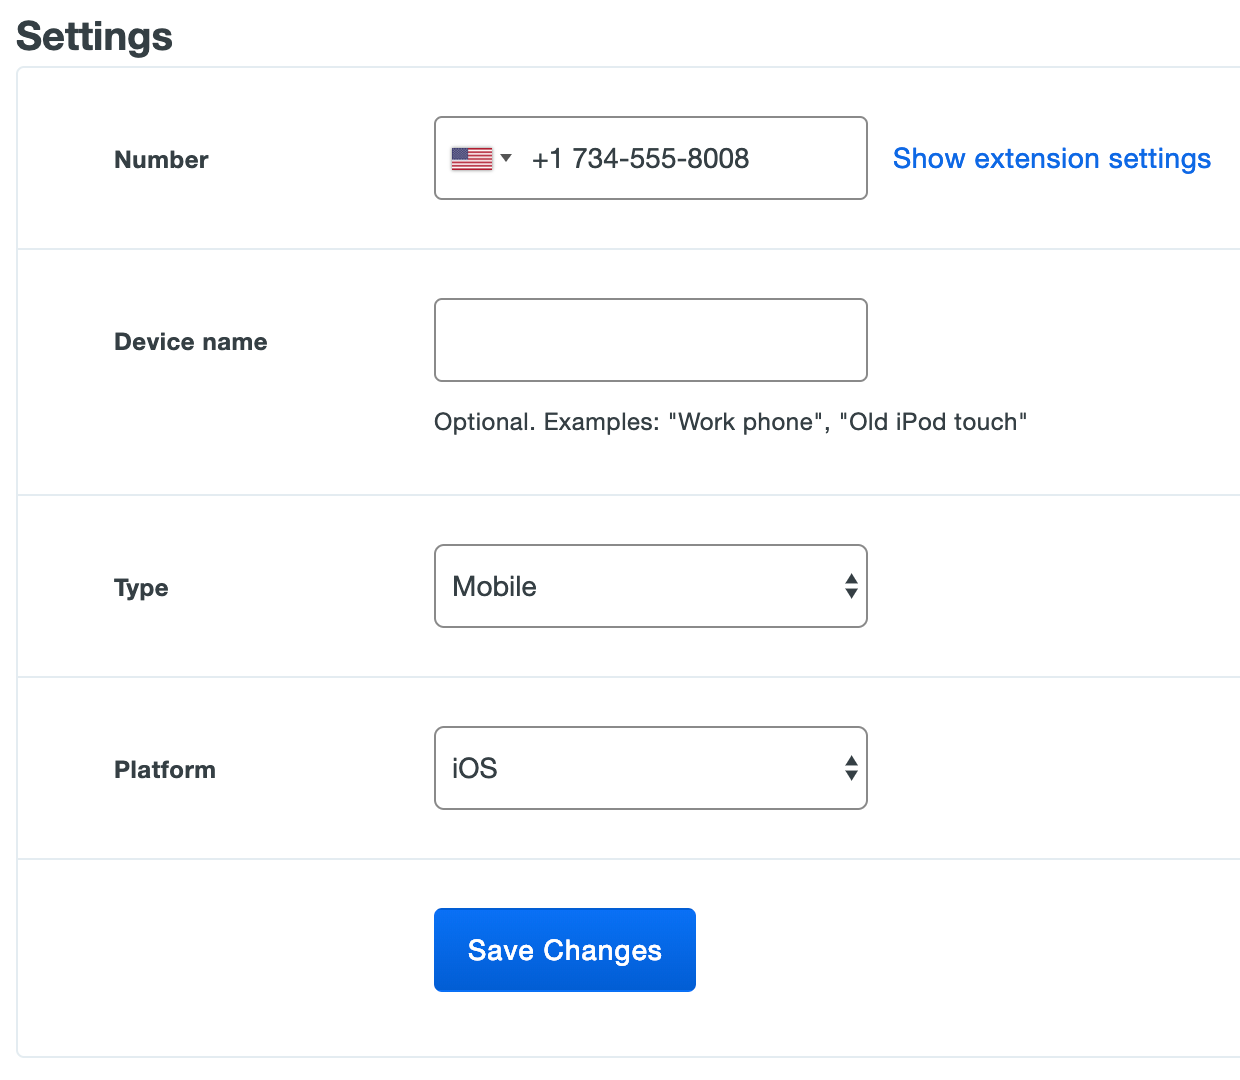
On the next page you'll be asked to add details about the new phone. Choose the appropriate phone "Type" and "Platform" from the drop-down menus and enter a "Device name" (this field can be left blank). If you know the device is a smartphone but aren't sure exactly what the platform is, choose "Generic Smartphone" and the actual platform will be set when the user completes Duo Mobile activation. You can also chose to assign a "Device name", which may be helpful when users have several numberless mobile devices (like tablets). When you've finished entering details, click Save Changes.
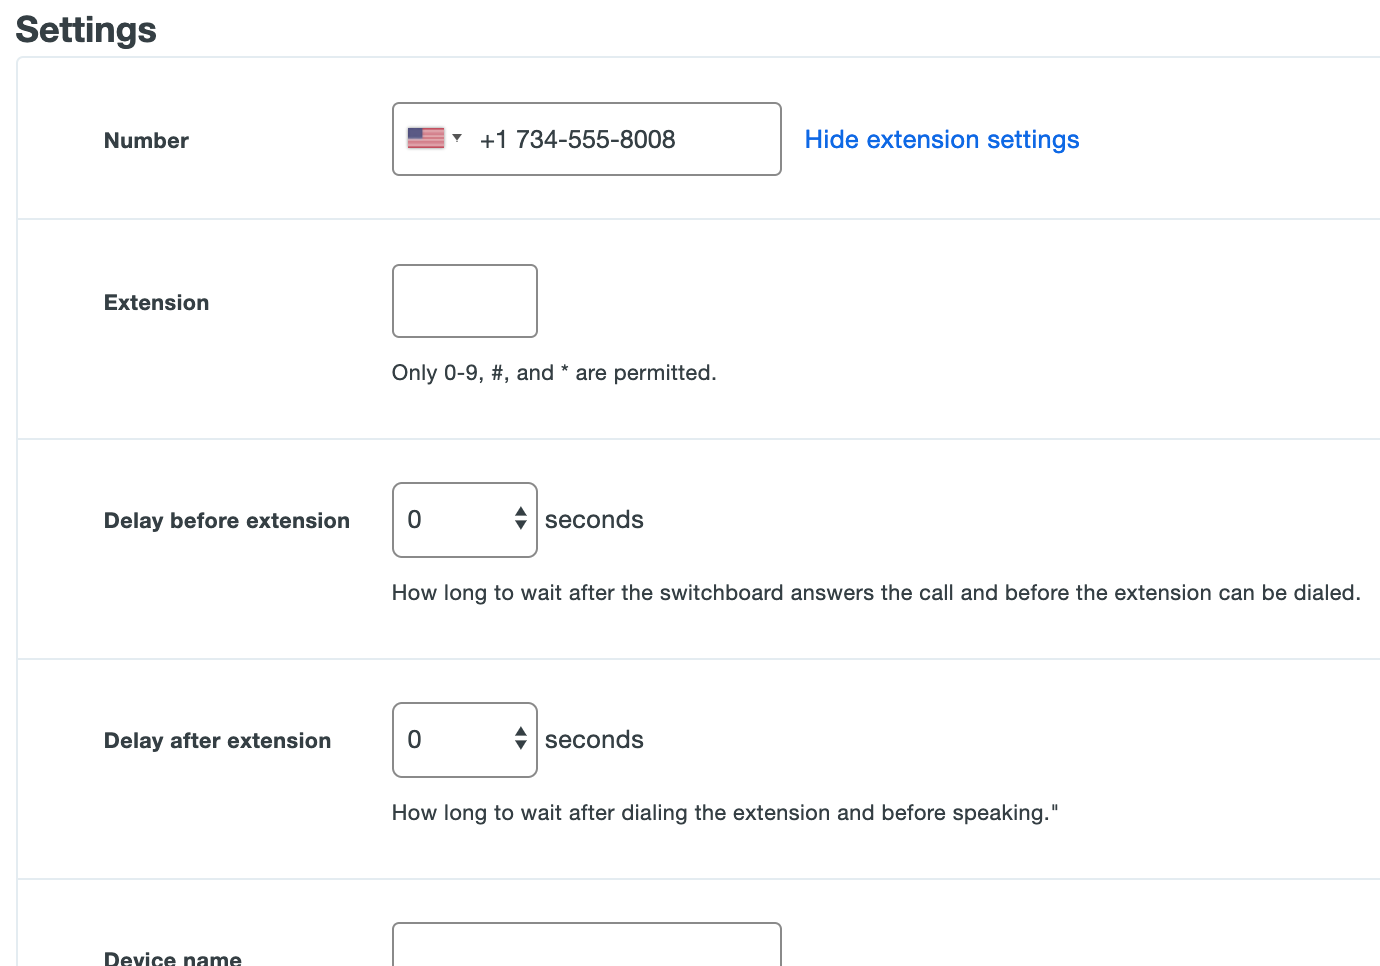
If you've added an office phone dialed via extension, click Show extension settings to expose additional fields for entering the phone extension and adding a delay before or after dialing the extension (helpful if the Duo call needs to wait for an audio prompt to complete before continuing).
Administrators can also attach an existing phone or tablet device to multiple Duo users.
-
Log in to the Duo Admin Panel and navigate to Devices → Phones in the left sidebar.
-
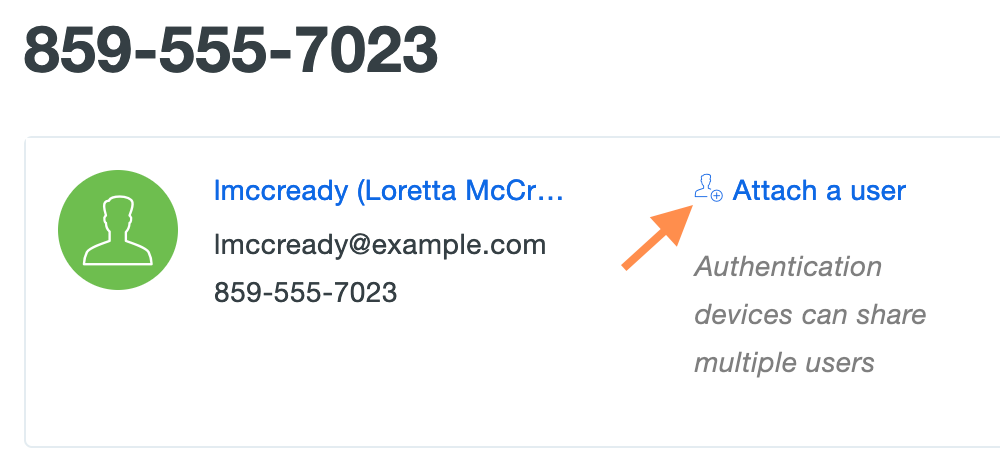
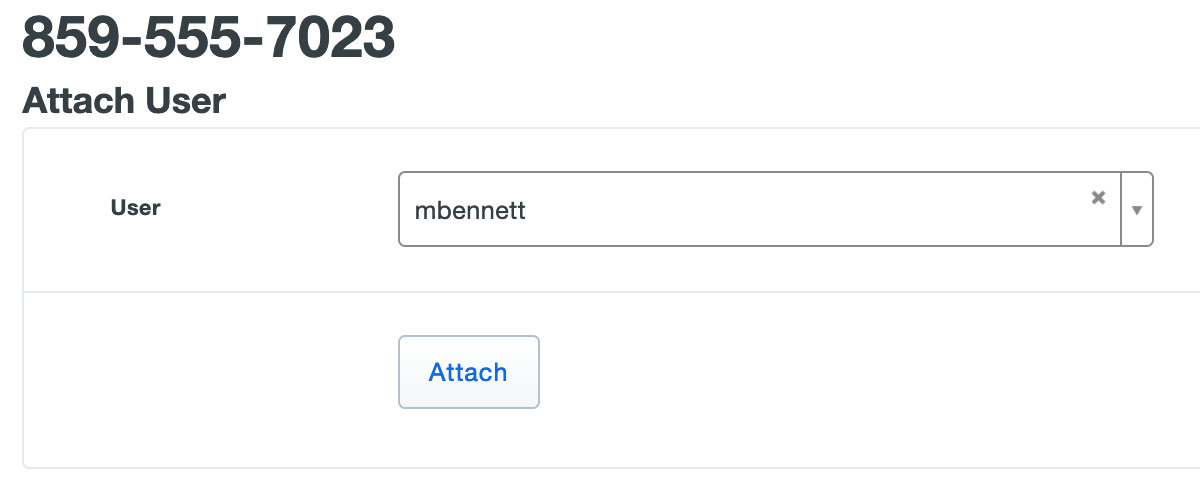
Select a phone by clicking the identifier in the "Device" column. Click the Attach a user link on the device's properties page.
-
Select a Duo user from the drop-down list and click Attach.
-
The additional user is attached to the device. A notification bar across the top alerts you that the device is shared between more than one user.
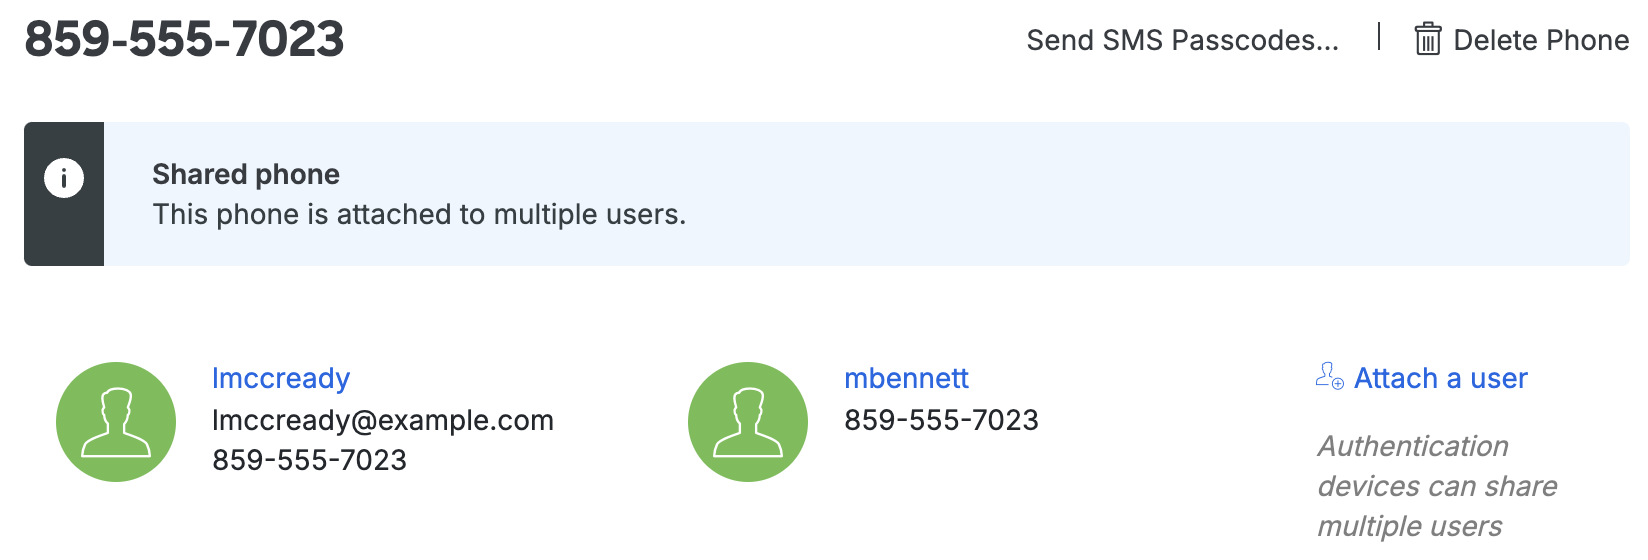
You can add up to 100 phone and tablet devices to a user, or associate one device with up to 100 users.
Activating Duo Mobile
Administrators can send Duo Mobile activation codes from the Admin Panel. See Managing Users: Activating Duo Mobile.
Troubleshooting Duo Mobile Push
If users have issues completing activation of Duo Mobile for push, have them verify that they have internet connectivity from their smartphones, and that Duo Mobile is installed.
Should your iOS users have issues receiving Duo Push requests after activation, you can instruct them to run the Duo Mobile Push Troubleshooting tool.
-
In Duo Mobile, have the user tap the Edit button in the top left of the accounts list screen, then tap the name of the account for which they aren't receiving push requests.
-
Next, the user should tap the Get Started button in the "Missing Notifications?" section of the "Account Details" screen.
For additional troubleshooting steps, see our guides to push troubleshooting for iOS and Android.
Reordering User Devices
Role required: Owner, Administrator, User Manager, Security Analyst, or Help Desk.
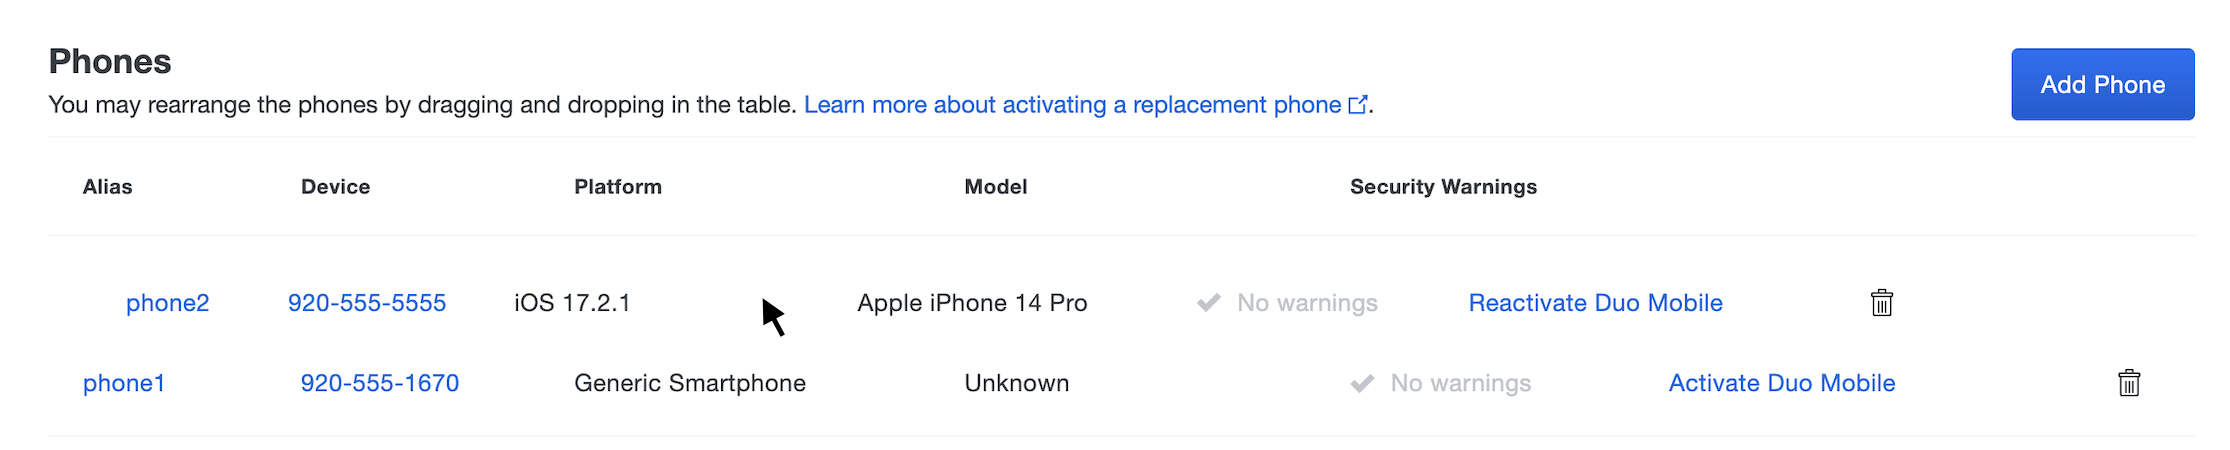
When using Duo's automatic push or phone call authentication the service contacts the first device listed in the user's Devices table (phone1). Attached devices can be reordered so that a different one is used for primary authentication.
-
Log in to the Duo Admin Panel and navigate to Users → Users in the left sidebar.
-
Select a user by clicking the username in the "Username" column. Scroll down to the "Phones" table on the user's properties page, click on the device that should be listed first and drag it into place.
-
The device aliases automatically update (e.g. phone2 becomes phone1).
Dealing With Lost or Stolen Phones
Role required: Owner, Administrator, User Manager, Security Analyst, or Help Desk.
If a user loses a mobile device or reports it stolen, you can entirely delete the device from Duo, simultaneously removing it from all associated users. Deleted devices can easily be added back later.
To delete a device:
-
Log in to the Duo Admin Panel and navigate to Users → Users in the left sidebar.
-
Select a user by clicking their username. Scroll down to the "Phones" table on the user's properties page and then click on the Alias or Device of the phone to delete.
-
Click on Delete Phone near the top of the phone properties page. You'll need to confirm deletion of the phone.

Deleting a phone in this manner removes it from all associated users immediately. When the device is recovered, you can add it to the user again and re-activate Duo Mobile. If you have deployed a Duo application that uses inline enrollment, the user can self-enroll a replacement device. For extra security, you may want to disable the user in Duo until they are ready to enroll a replacement device.
If a user has started a remembered device session for any browser-based application and you delete or remove a phone device from that user from the Admin Panel, the session will be revoked and the user will have to perform two-factor authentication again the next time they try to log into a browser-based application with that remembered devices policy.
If you only need to remove a shared device from a specific user's profile (leaving other users sharing the device unaffected), you can do so:
-
Log in to the Duo Admin Panel and navigate to Users → Users in the left sidebar.
-
Select a user by clicking their username. Scroll down to the "Phones" table on the user's properties page and click the trash icon next to the lost or stolen device to remove it.
You can later add the device to the user again and re-activate Duo Mobile. If you have deployed a Duo application that uses inline enrollment, the user can self-enroll a replacement device.
If a device is removed from all users sharing it, the device is permanently deleted from Duo.
Managing OTP Hardware Tokens
Duo supports authentication using one-time password (OTP) hardware tokens. These can be tokens purchased directly from Duo, or certain token models purchased from a third-party and imported into Duo. Once a token is present in Duo, it can be assigned to end users or administrators (or both).
Listing Hardware Tokens
-
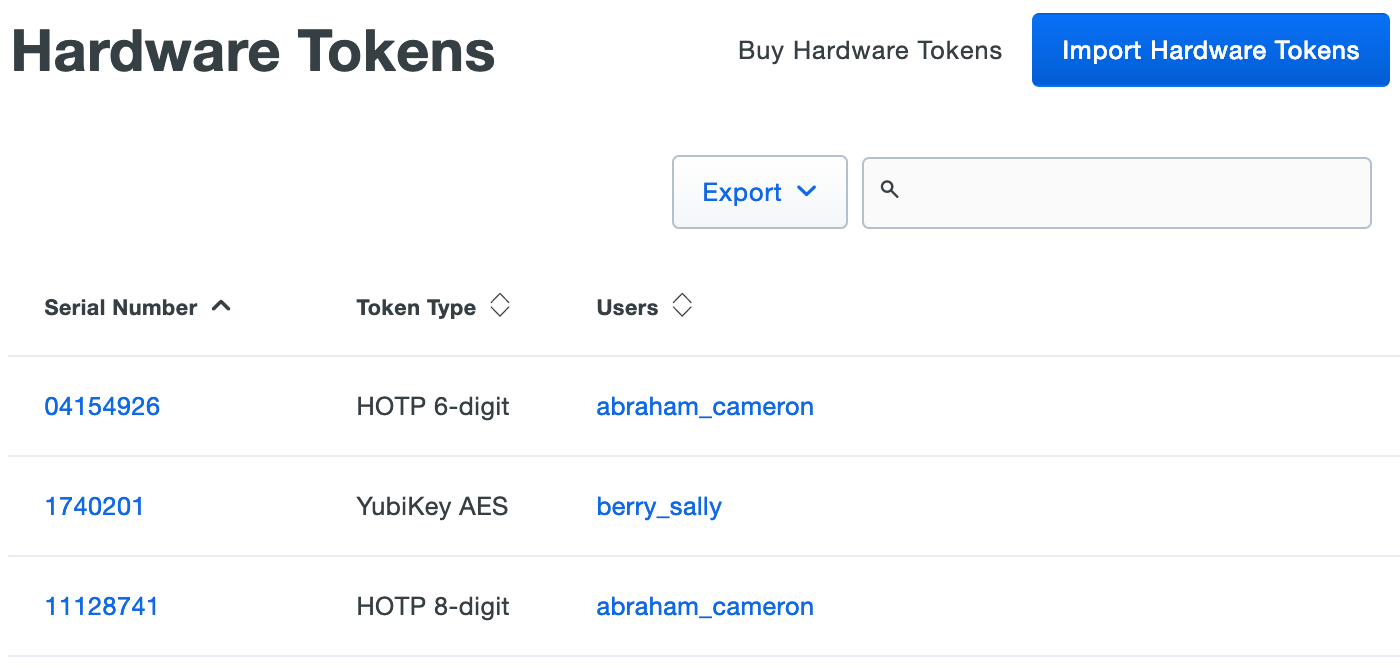
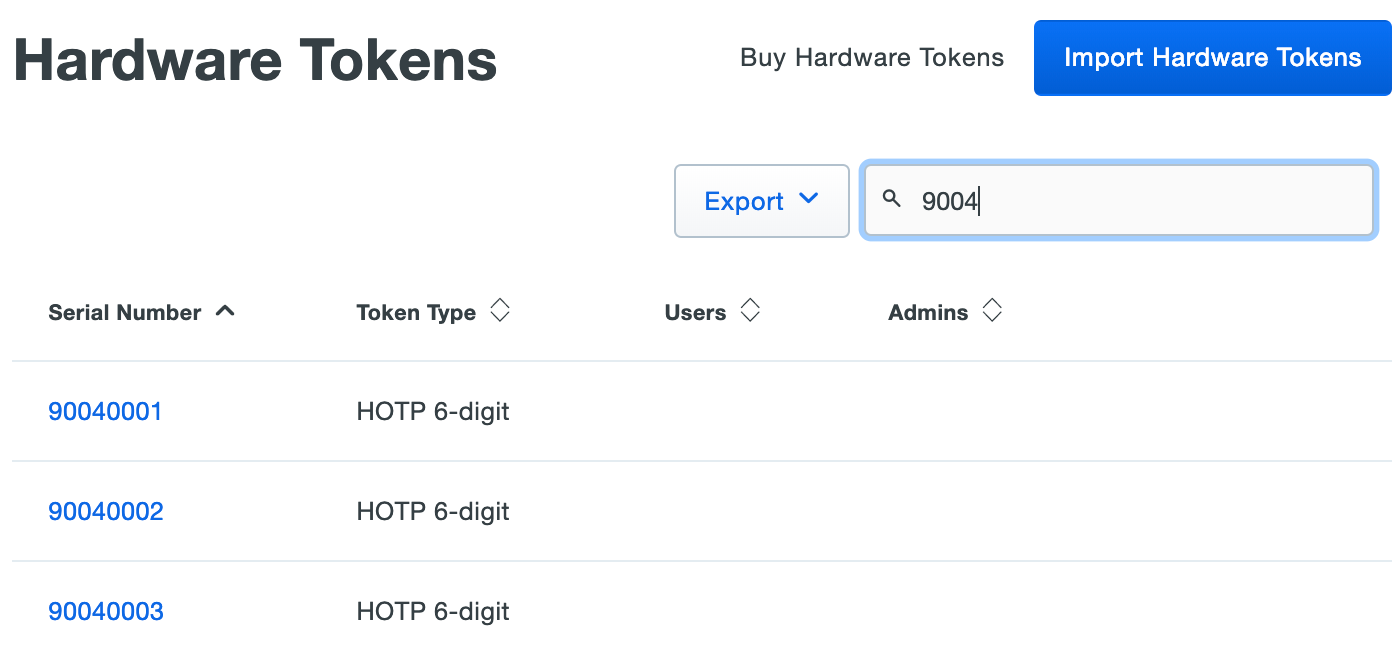
Log in to the Duo Admin Panel and navigate to Devices → Hardware Tokens in the left sidebar. A list of hardware tokens is shown, along with the attached end user, if any.
Administrators with the Owner role see an additional column of administrators attached to hardware tokens.
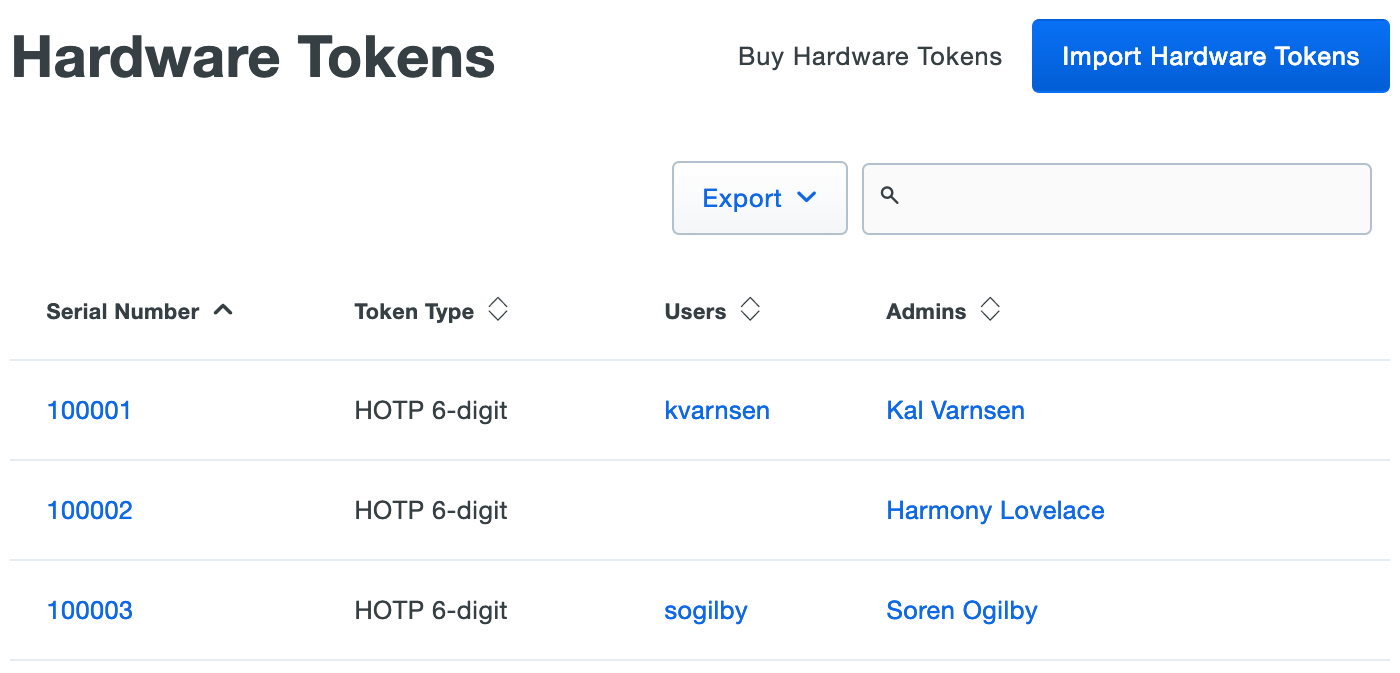
Click the Export button in the upper right side of the token list and select from the available export options, which may include CSV or JSON, to download a copy of the tokens list.
-
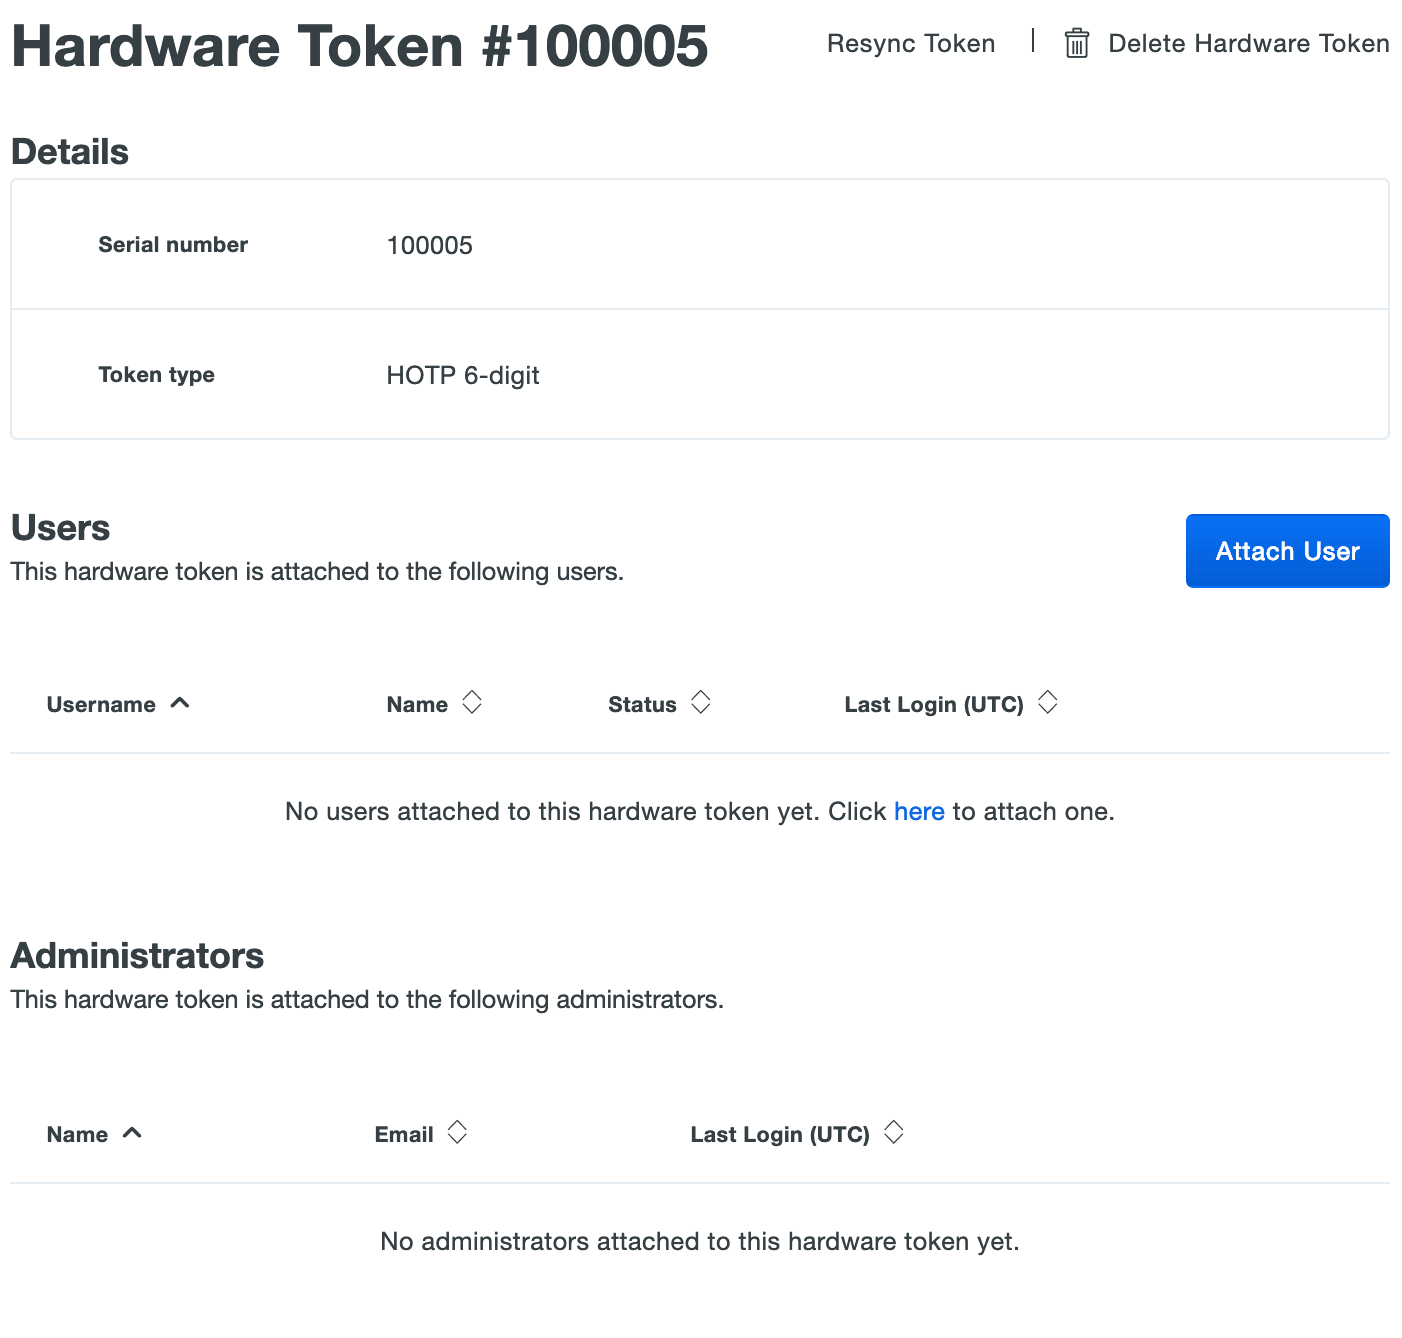
Select a token by clicking the identifier in the "Serial Number" column. This loads the properties page for that token. The token page lists the token type and attached end user information.
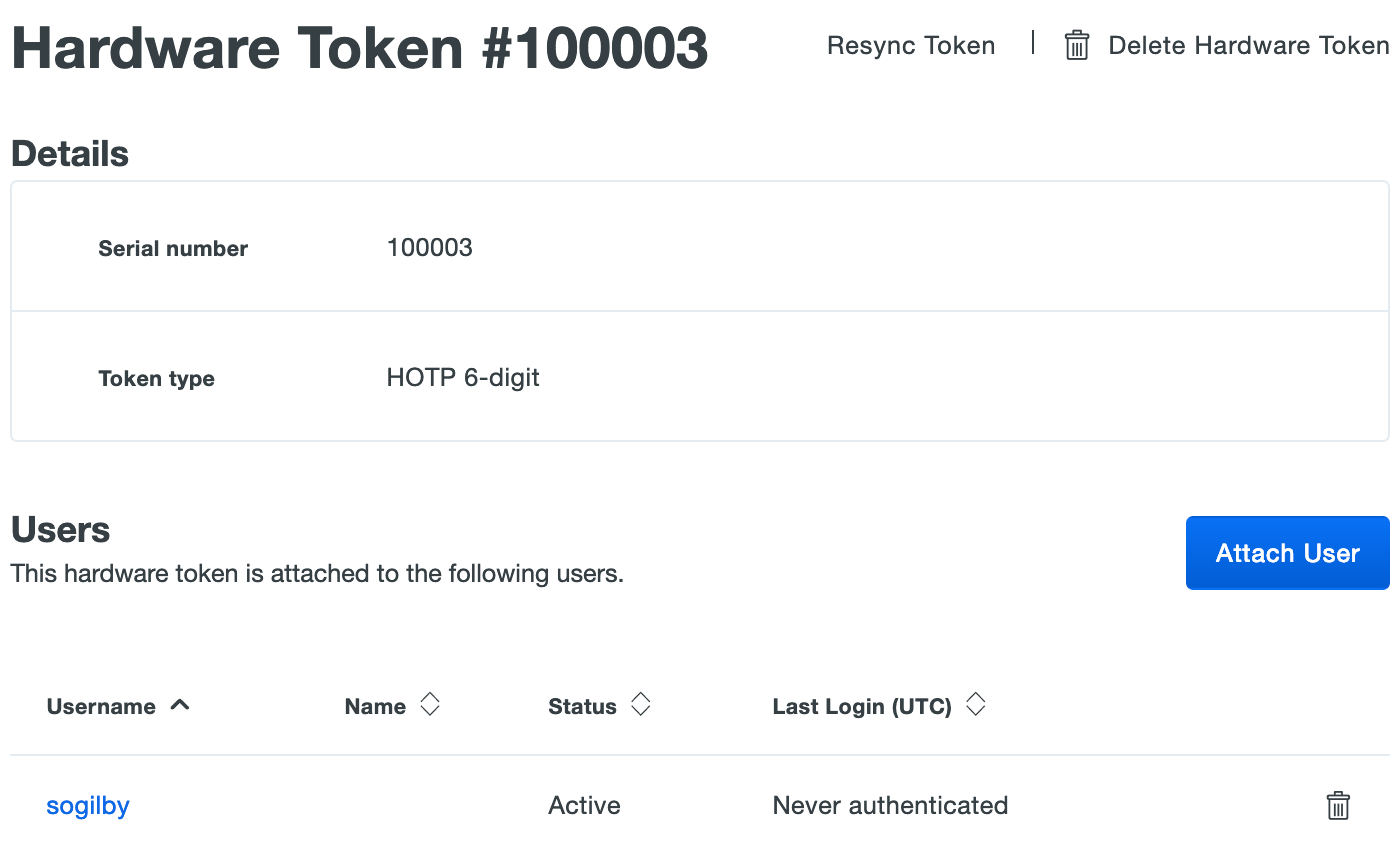
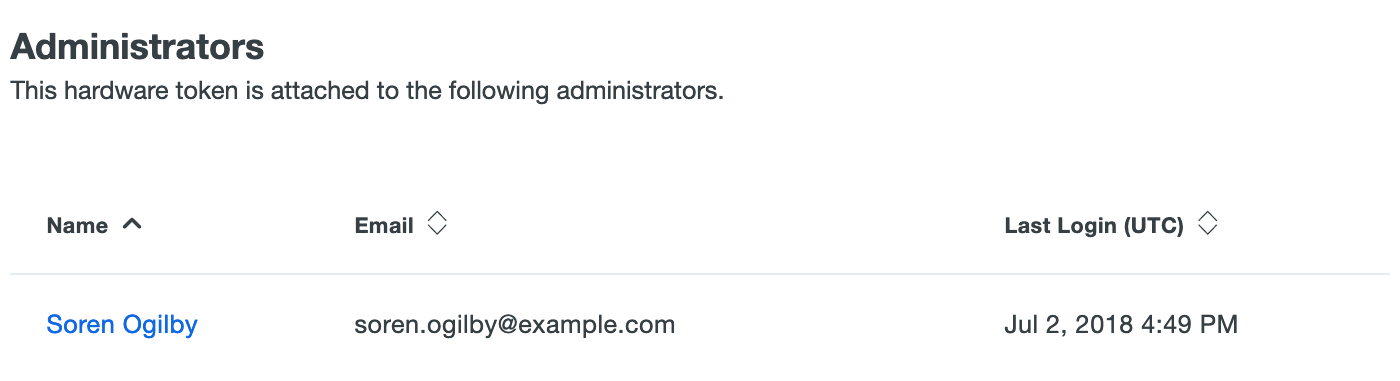
Administrators with the Owner role see an additional table with attached administrator user information.
Purchasing Duo Hardware Tokens
Role required: Owner or Billing.
To purchase tokens from Duo, click Billing in the left sidebar of the Duo Admin Panel then click Hardware Tokens in the submenu. Enter your payment information if not already present, then select the number of tokens you wish to purchase and enter your shipping information and click the "Place Order" button.
Tokens purchased from Duo are automatically imported into your account, therefore Duo does not provide the token seeds directly to you (nor can you export the seed information from your account). This protects the integrity and confidentiality of your Duo token seeds and minimizes the likelihood of token compromise. If you wish to maintain control of your token seeds, please purchase third-party tokens from another vendor and import them into Duo.
Importing Third-Party Hardware Tokens
Role required: Owner, Administrator, User Manager, Security Analyst, or Help Desk.
Duo also works with third-party one-time password (OTP) hardware tokens, such as YubiKey OTP or any other non-proprietary SHA-1 OATH HOTP-compatible 6-digit or 8-digit tokens. TOTP tokens are not recommended for use with Duo, as full support for TOTP token drift and TOTP resync is not available.
Admins need to manually import third-party OTP token information into Duo. When importing tokens, keep in mind that tokens should be unique between Duo customer accounts.
Protect your third-party token seed information as sensitive and confidential information. A compromise of your token seeds could potentially result in 2FA bypass.
To import third-party OTP tokens into Duo:
-
Log in to the Duo Admin Panel and navigate to Devices → Hardware Tokens in the left sidebar.
-
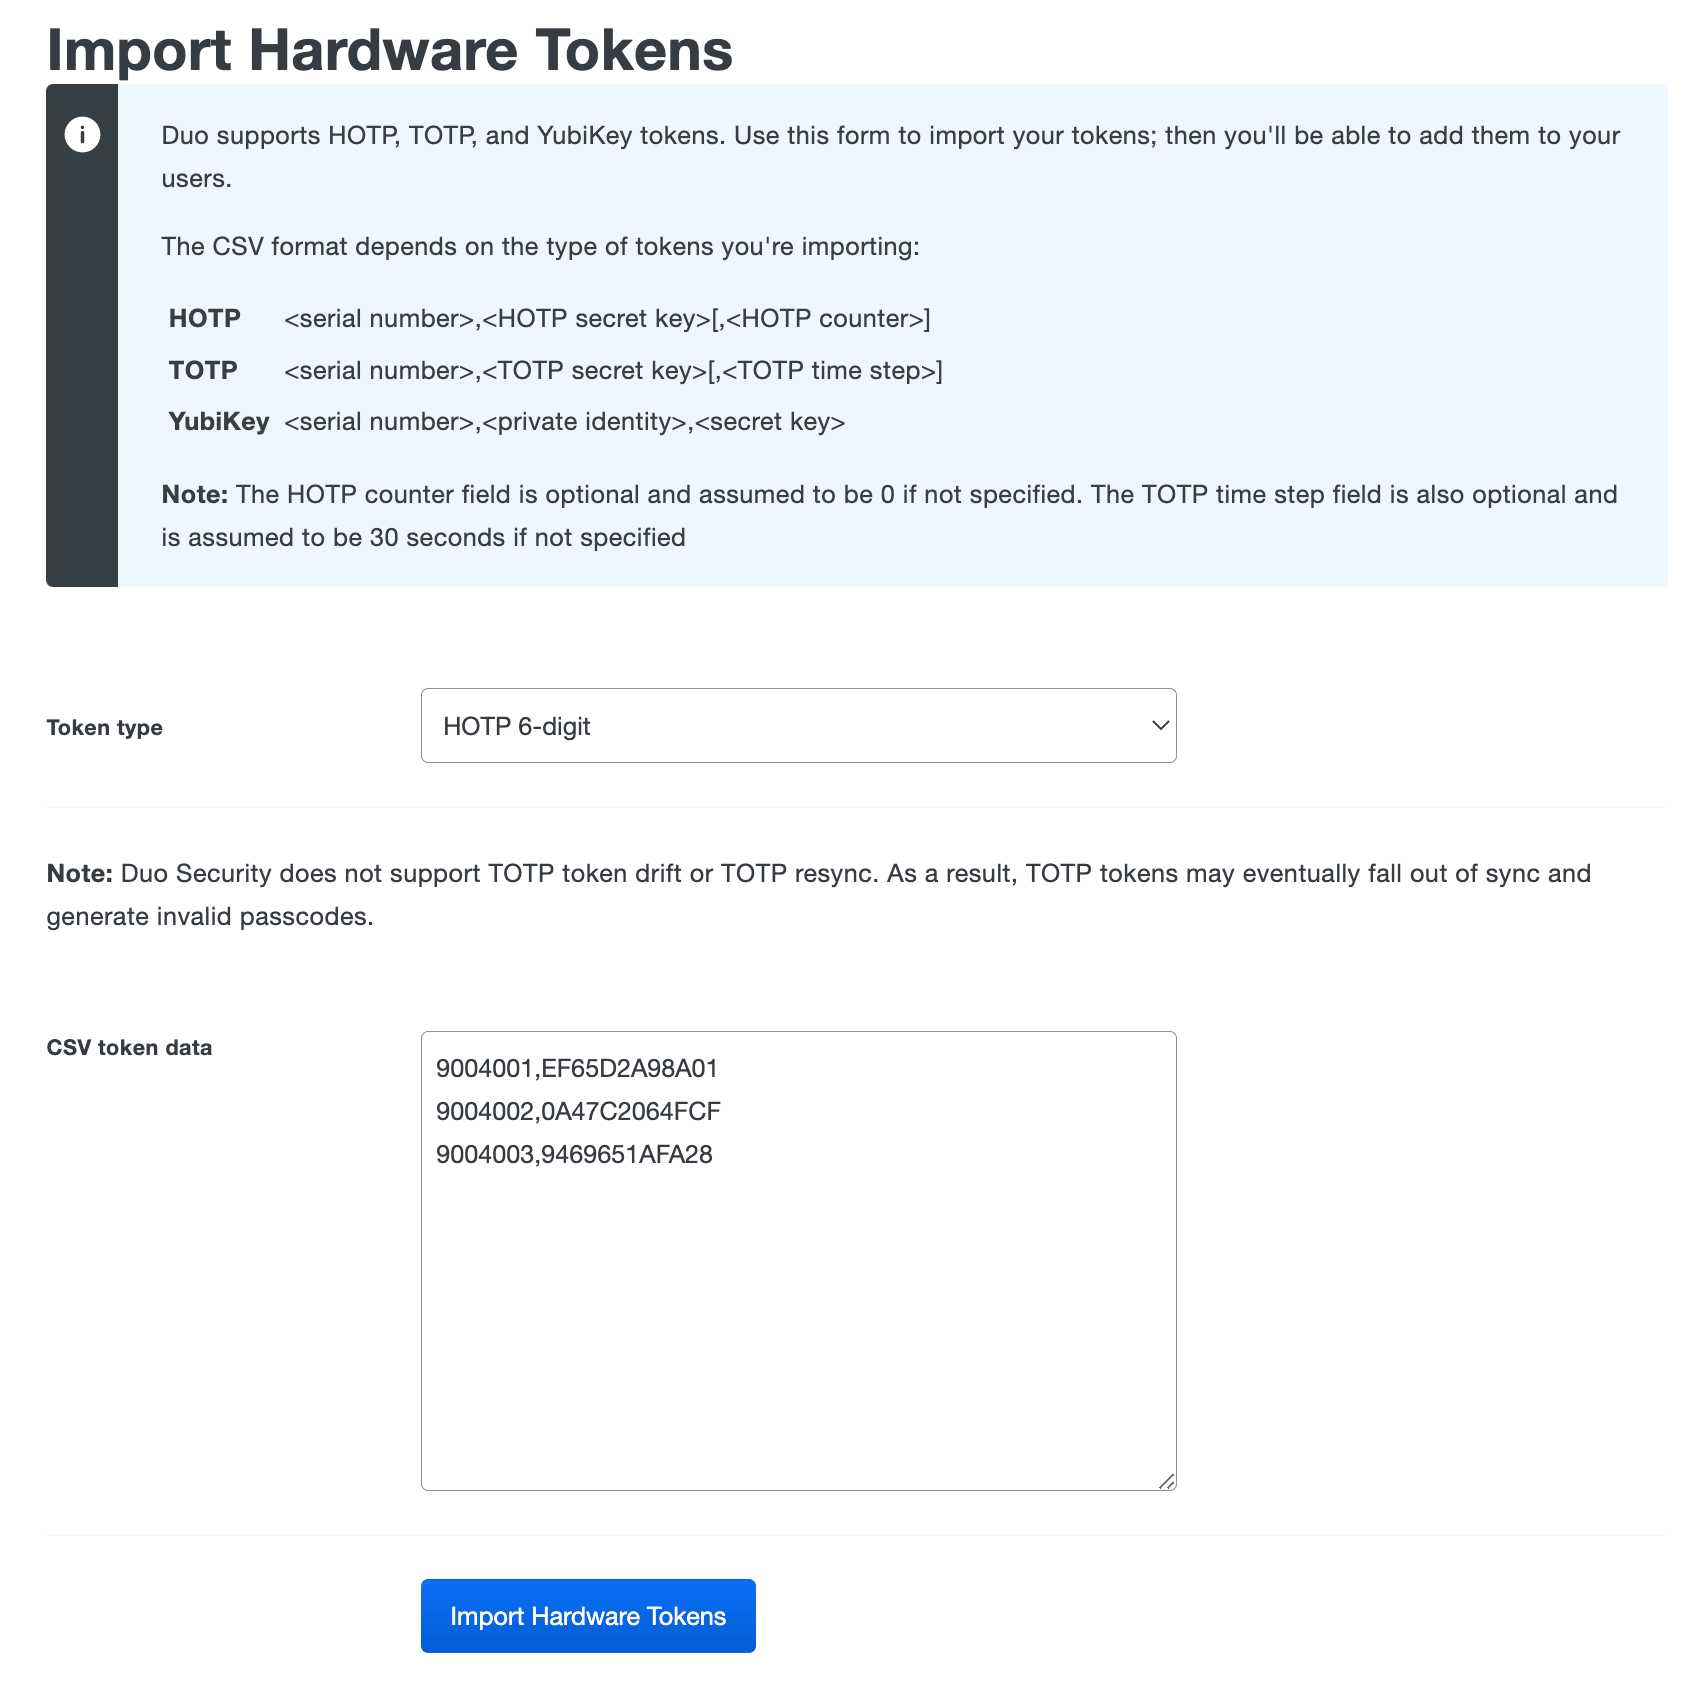
Click the Import Hardware Tokens button.
-
Select the type of token to import from the drop-down menu and then paste in the token information in CSV format. This information is provided by the hardware token manufacturer or vendor. The token serial number cannot exceed 128 characters. The token secret key should be in hexadecimal format. Do not include any spaces. Click Import Hardware Tokens when finished entering the token information.
-
The tokens are immediately imported and listed in the "Hardware Tokens" table.
If you need to import a large number of YubiKey tokens you can use Yubico's personalization tool to configure multiple tokens quickly and export a CSV file with the serial number and key information you need to import the YubiKeys into Duo. Deploying more than 500 YubiKeys? Contact us for more information about how to make it easier.
Assigning a Hardware Token to an End User
Role required: Owner, Administrator, User Manager, Security Analyst, or Help Desk.
To assign an OTP token to an end user:
-
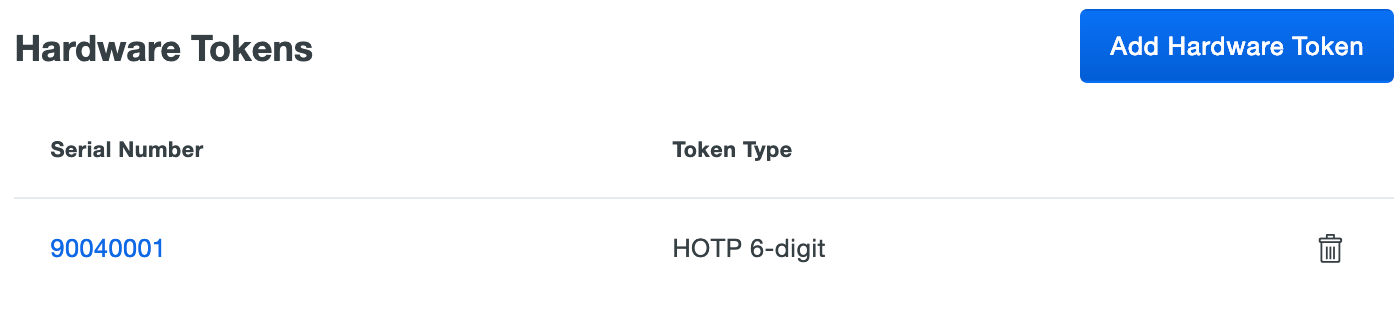
Navigate to Users → Users in the left sidebar. Select a user by clicking their username. Scroll down to the "Hardware Tokens" table on the user's properties page and then click the Add Hardware Token button.

-
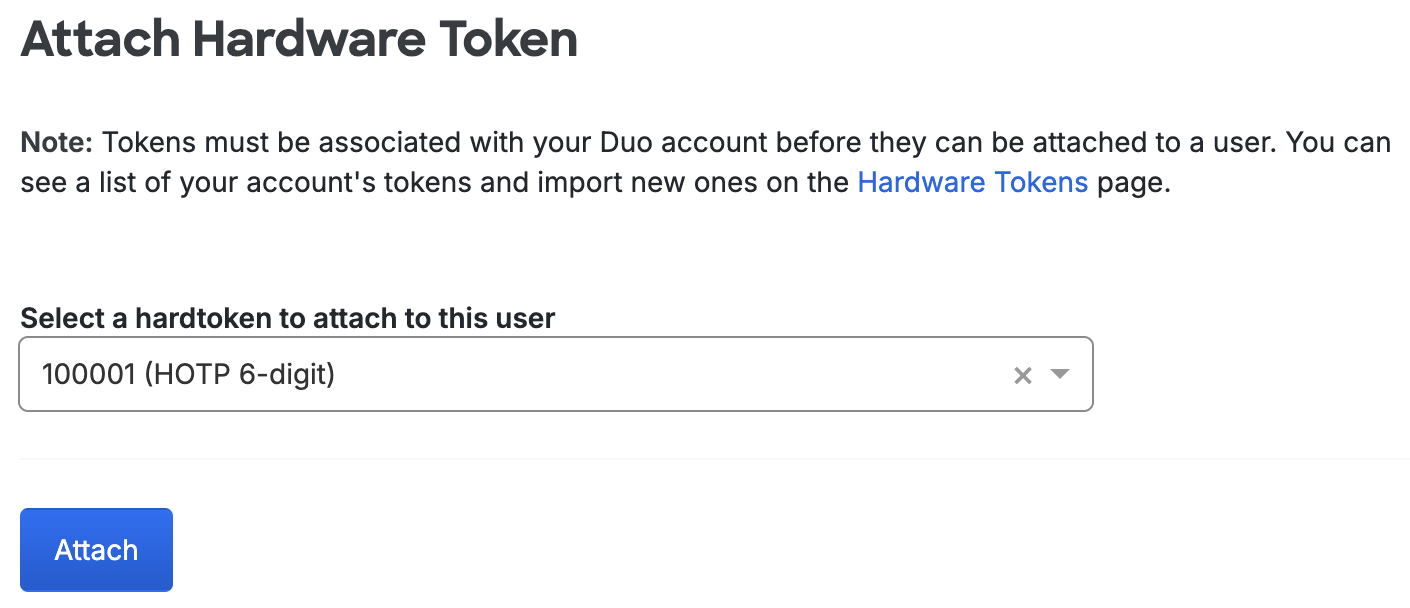
Click the drop-down menu to see a list of available tokens. You can also search for a token by typing in the serial number. Click a token to select it, and then click Attach.
-
The user's properties page now lists the newly added token.
OTP Tokens can also be associated with users from the token's properties page. A hardware token may be assigned to multiple end users, and a given Duo user can be associated with up to 100 tokens.
-
Log in to the Duo Admin Panel and navigate to Devices → Hardware Tokens in the left sidebar.
-
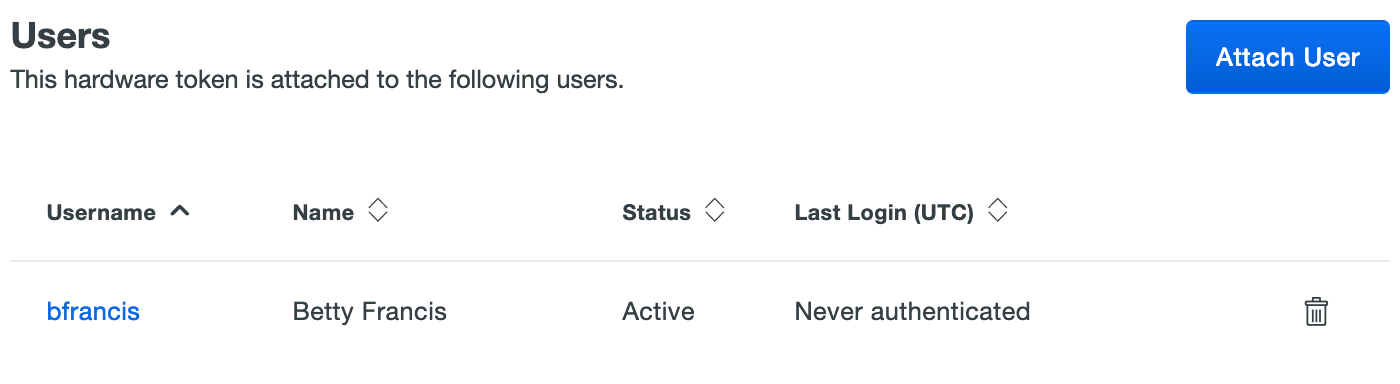
Click on the serial number of a token to access the token's properties page. On the token's properties page, scroll down to the "Users" table and click the Attach User button.
-
Select a Duo user from the drop-down list and click Attach.
-
The token's properties page now lists the attached user.
Assigning a Hardware Token to an Administrator
Role required: Owner.
Duo Premier, Advantage, and Essentials plan customers may assign a hardware token to an Administrator to permit token passcode authentication when logging in to the Duo Admin Panel. OTP-generating hardware tokens (but not U2F-only security keys) may be used for administrator logins.
Only account owners may modify other administrator accounts to add hardware token authenticators. A hardware token may be assigned to multiple administrator users.
To attach a token to an administrator:
-
Log in to the Duo Admin Panel and navigate to Users → Administrators → Administrators in the left sidebar.
-
Click on the administrator's user name to view details.
-
Scroll down to the "Secondary authentication" section and click the drop-down menu to see a list of available hardware tokens. You can also search for a token by typing in the serial number.
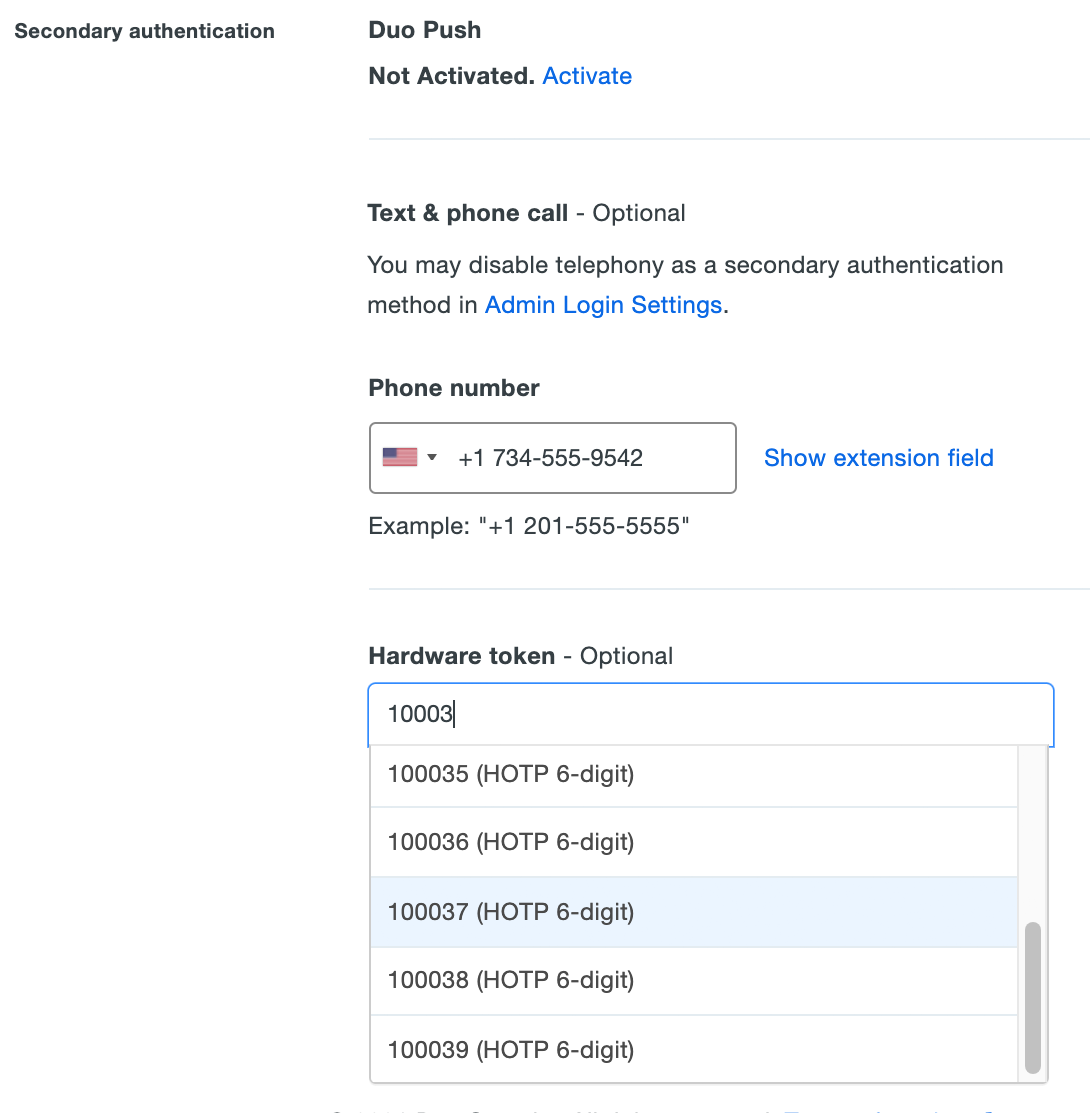
Click a token to select it, and then click Save Changes at the bottom of the page.
-
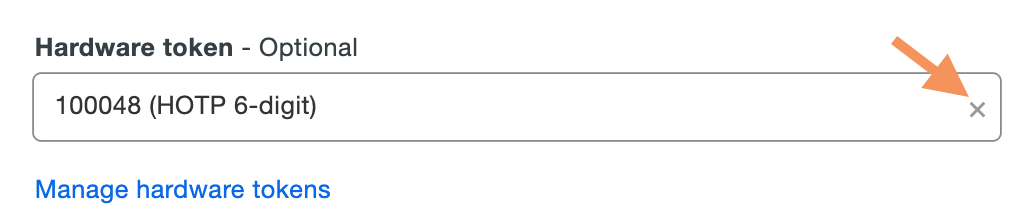
The administrator's properties page shows the newly added token. Click the Remove link to the right to remove the hardware token from the administrator's account.
Resynchronizing Tokens
Hardware tokens may occasionally become out of sync with Duo's service. When this happens, passcodes generated by the token fail to authenticate the user. You can manually resynchronize HOTP hardware tokens purchased from Duo or third-party vendors from the Admin Panel. TOTP tokens imported into Duo cannot be resynchronized.
To resynchronize a HOTP hardware token:
-
Log in to the Duo Admin Panel and navigate to Devices → Hardware Tokens in the left sidebar.
-
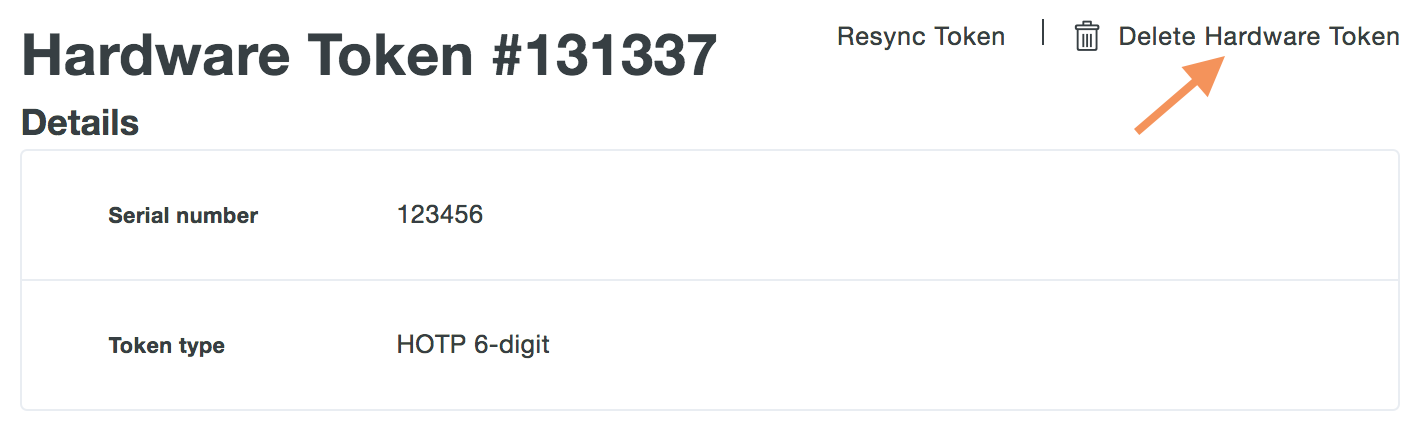
Click on the Serial Number of a token to access the token's properties page. Once on the token's properties page, click the Resync Token button near the top of the token's properties page.

-
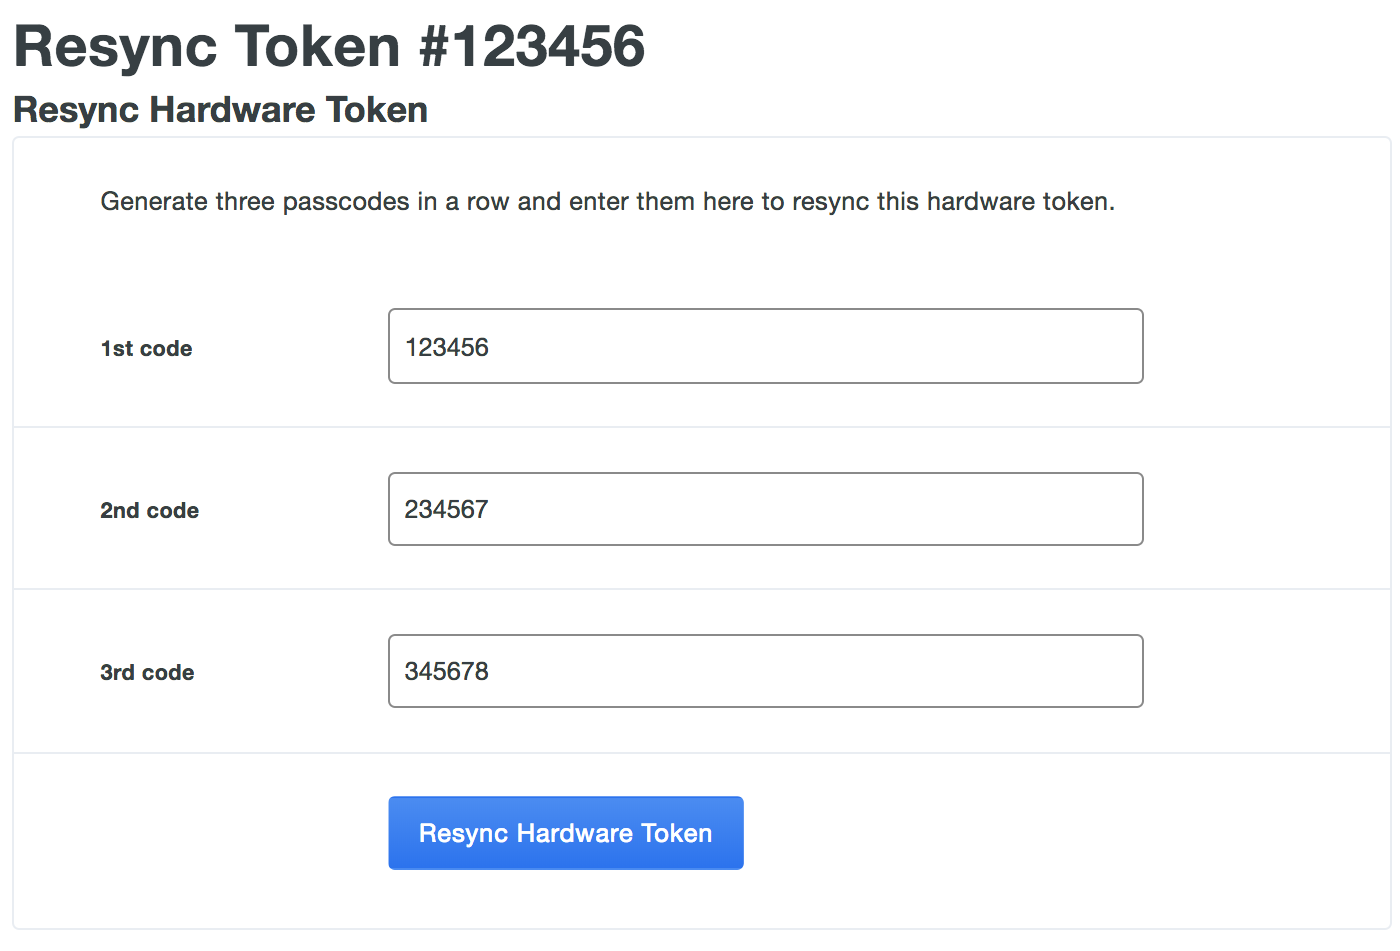
Enter the code displayed on the token as the 1st code. Advance to the next token code and enter that number as the 2nd code. Advance to the next token code one more time and enter that number as the 3rd code. Click the Resync Hardware Token button after entering all three token codes.
Deleting Tokens
You may delete third-party hardware tokens you previously imported into Duo (but not D100 tokens purchased from Duo).
Deleting a token in this manner removes it from all associated users immediately. If those users still need to authenticate to Duo, ensure that they have another authentication device attached to their user accounts.
To delete a third-party hardware token:
-
Log in to the Duo Admin Panel and navigate to Devices → Hardware Tokens in the left sidebar.
-
Click on the Serial Number of a token to access the token's properties page. Once on the token's properties page, click the Delete Hardware Token button near the top of the token's properties page.
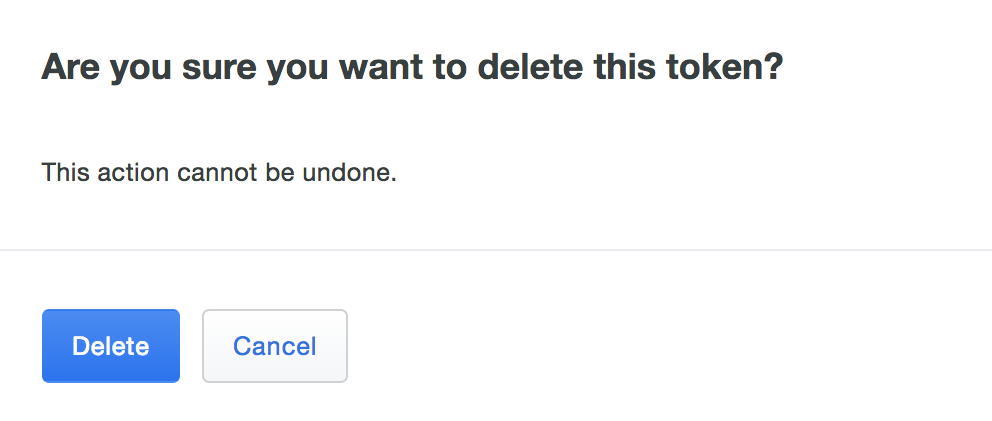
Confirm deletion of the hardware token.
If a user has started a remembered device session for any browser-based application and you delete or remove a hardware token from that user from the Admin Panel, the session will be revoked and the user will have to perform two-factor authentication again the next time they try to log into a browser-based application with that remembered devices policy.
Managing WebAuthn Devices
The Web Authentication API, or WebAuthn for short, lets services utilize device authenticators — portable ones like security keys or built-in ones like Apple's Touch ID — to authenticate users using a public-private keypair instead of a password.
If you permit use of WebAuthn authentication methods in the traditional Duo Prompt, Duo recommends configuring allowed hostnames for your protected applications before onboarding your end users.
Duo supports a variety of WebAuthn secondary authentication methods when logging in using the browser-based Duo Prompt. Please refer to WebAuthn Browser Support to see the minimum browser versions supported.
When WebAuthn security keys and Touch ID are enabled in your application's effective authentication methods policy, end users can self-enroll security keys via the Duo enrollment prompt or device management portal.
When a user enrolls a security key in Chrome or Edge, it is "dual-enrolled" as both a U2F and a WebAuthn device. The end user can authenticate using that security key in any supported browser. Logging in with Chrome or Edge using a security key that was initially enrolled in a browser other than these two does not initiate this dual-enrollment.
When a user enrolls a security key in a supported browser other than Chrome/Edge, it is enrolled only as a WebAuthn device (no dual-enrollment). It can be used to authenticate in any supported browser.
Duo administrators may enroll roaming authenticators like WebAuthn security keys and U2F security keys (which will be registered as WebAuthn) for end users, and also delete any type of U2F or WebAuthn device after registration from the Duo Admin Panel. Duo administrators can not enroll platform authenticators like Touch ID or Windows Hello on behalf of users.
Listing WebAuthn Devices
-
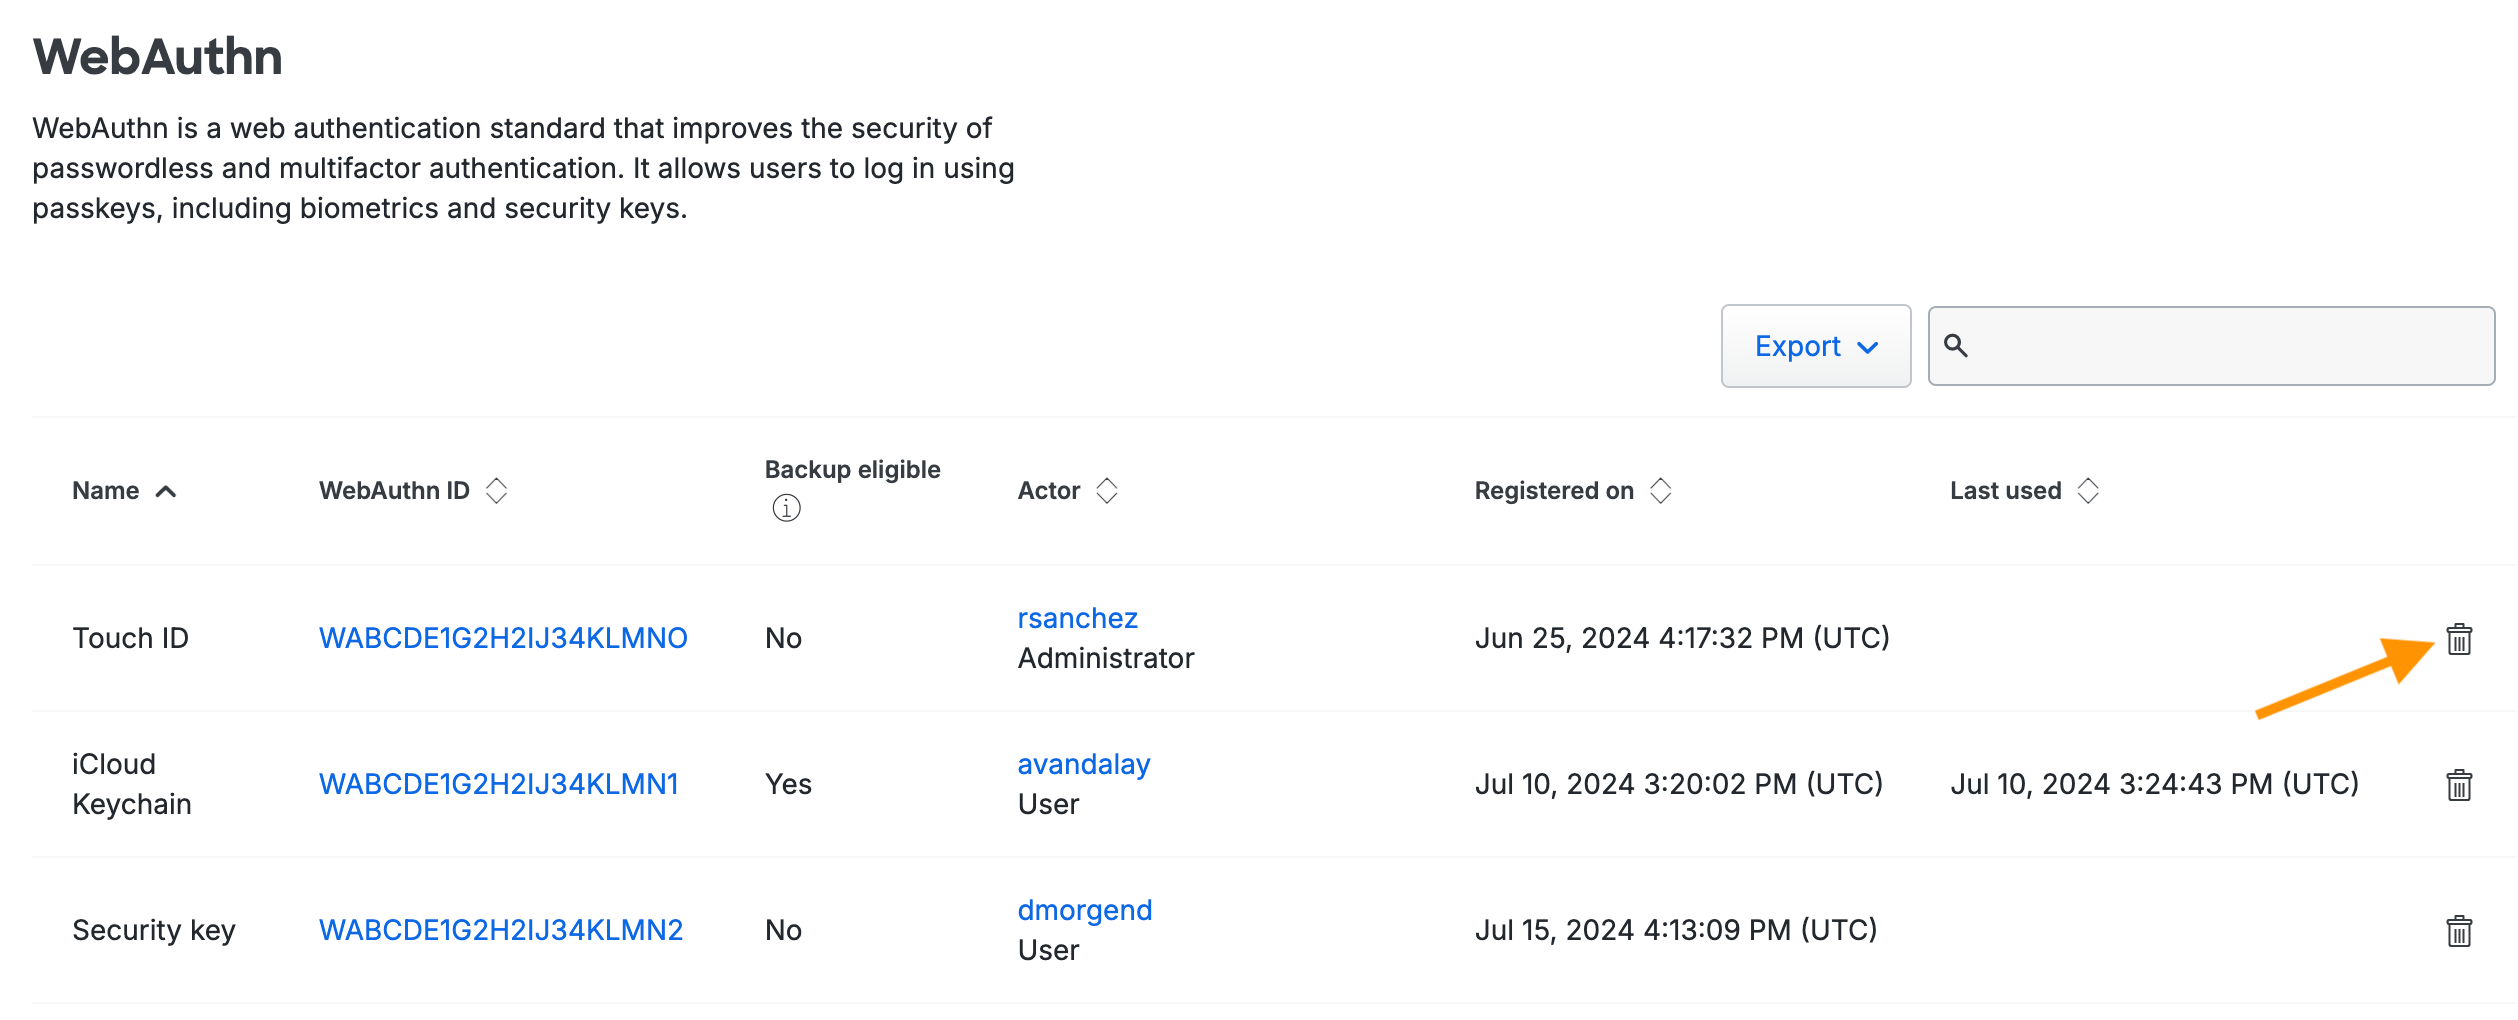
Log in to the Duo Admin Panel and navigate to Devices → WebAuthn in the left sidebar. A list of registered WebAuthn security keys/passkeys and U2F devices is shown, along with the associated end users.
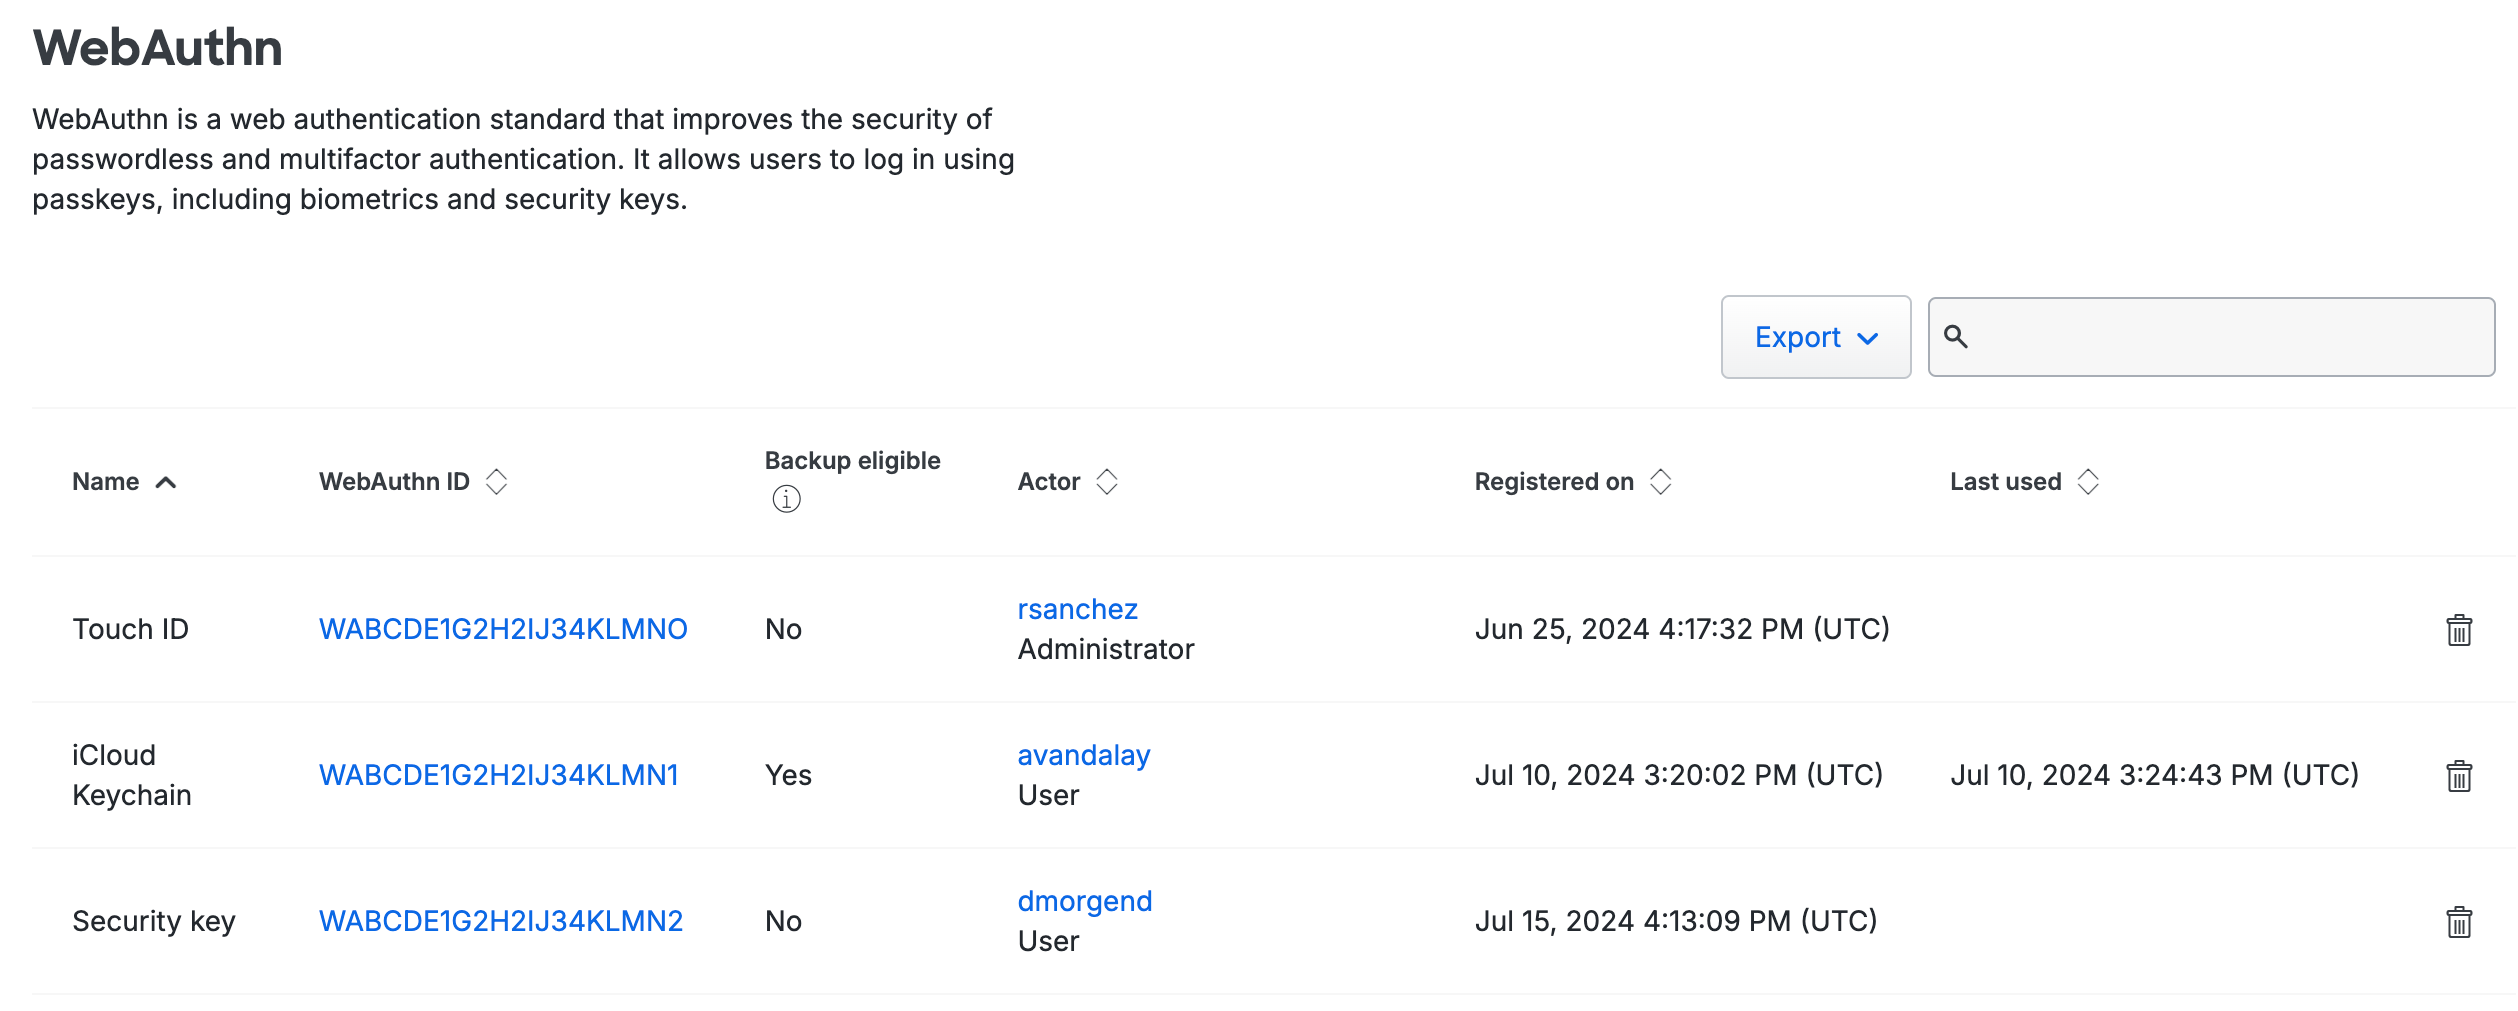
Passkeys and security keys attached to administrators are viewable only to admins with the Owner role and will display "Administrator" under the "Actor" column.
Click the Export button in the upper right side of the WebAuthn devices list and select CSV, JSON, or PDF to download a a list of devices. You can also select URL to obtain a direct link to your current view. If you've filtered your current view, the report only includes the filtered results.
-
Click on any user's name in the list to view additional information about that user.
-
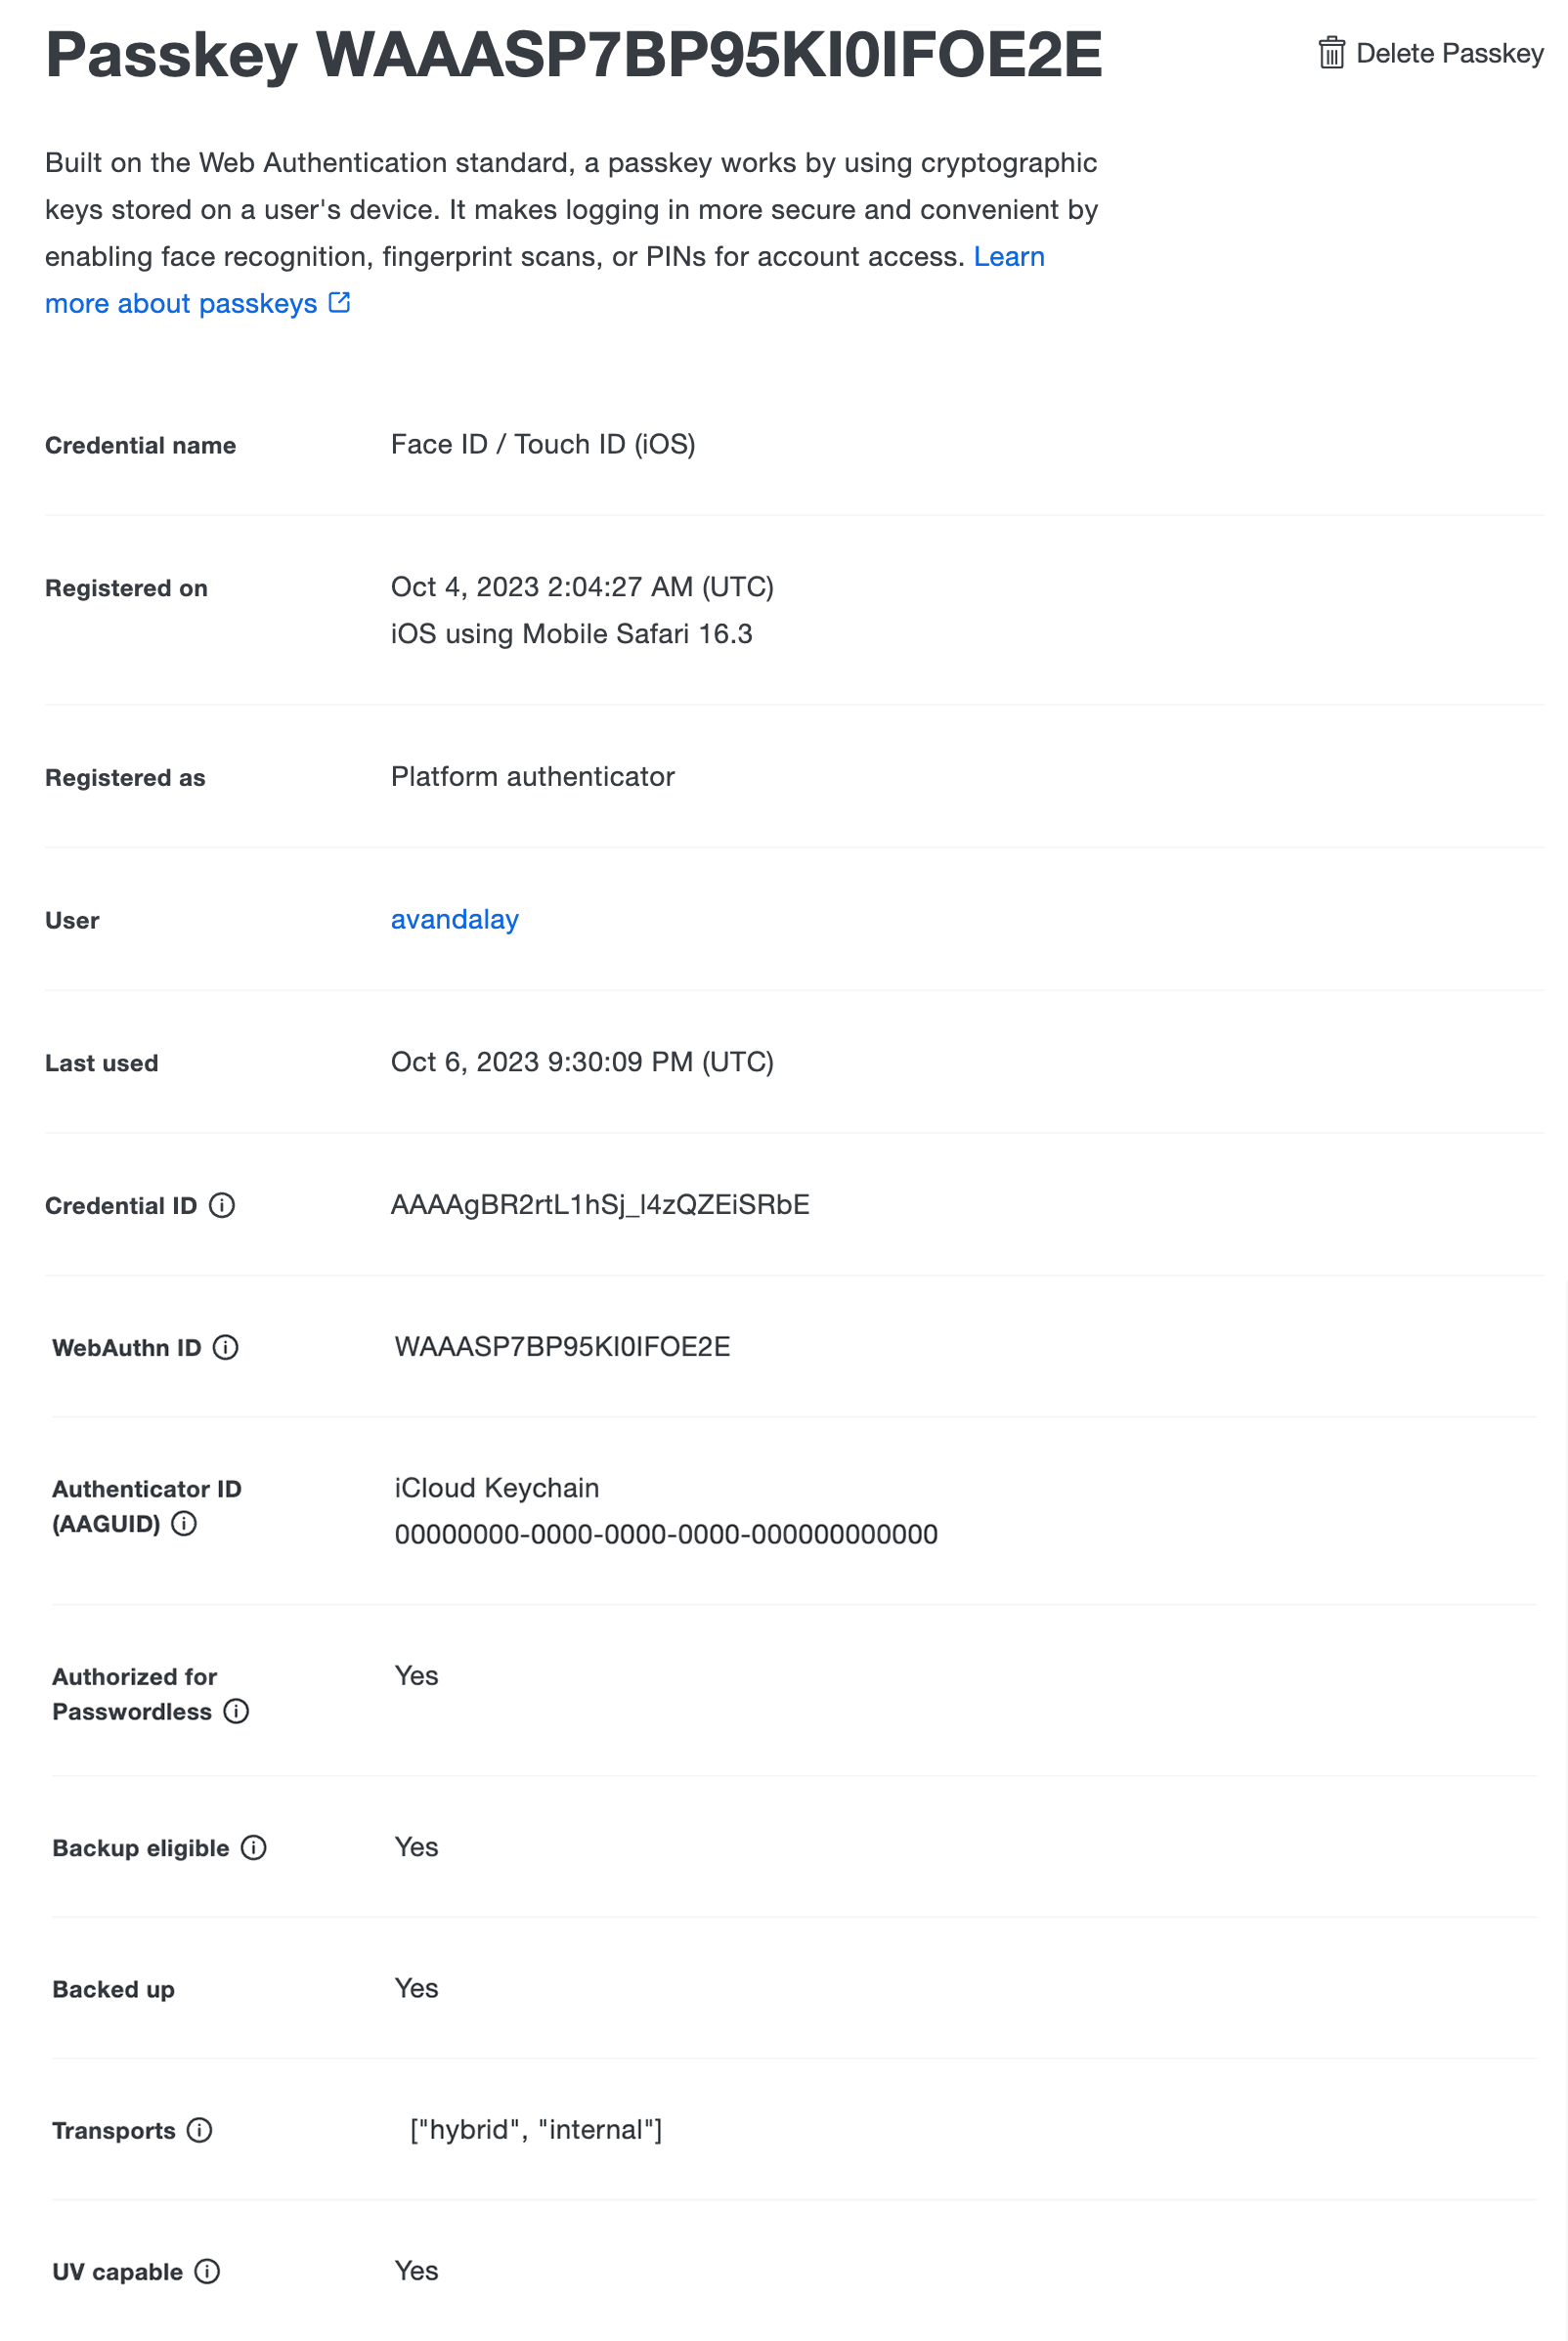
Click on any device's WebAuthn ID in the list to view additional information about that passkey.
Assigning a WebAuthn Security Key to an End User
Role required: Owner, Administrator, User Manager, Security Analyst, or Help Desk.
Before your users can utilize WebAuthn or U2F security keys for authentication, you must make sure you've enabled WebAuthn security keys in your Duo policies.
You might want to enroll a security key on behalf of a Duo user (for example, if you're on-boarding new hires ahead of their start dates). You can do this from the Admin Panel. Before you start, you need to have the security key to be assigned in hand as you'll need to physically tap it to complete registration.
Duo admins may enroll WebAuthn or U2F security keys from the Admin Panel. U2F keys will be added as WebAuthn devices. These keys may be used in any supported browser (Chrome, Edge (based on Chromium), Firefox, or Safari).
You must use Chrome, Edge (based on Chromium), Firefox, or Safari to add WebAuthn security keys on behalf of users.
To assign a security key to an end user:
-
Insert the security key into an available slot on your computer.
-
Log in to the Duo Admin Panel and navigate to Users → Users in the left sidebar (you must be directly logged in as an administrator for that Duo customer account).
-
Select a user by clicking their username. Scroll down to the "WebAuthn" table on the user's properties page and then click the Add Security Key button.

-
A pop-up dialog asks you to touch the security key to enroll it.
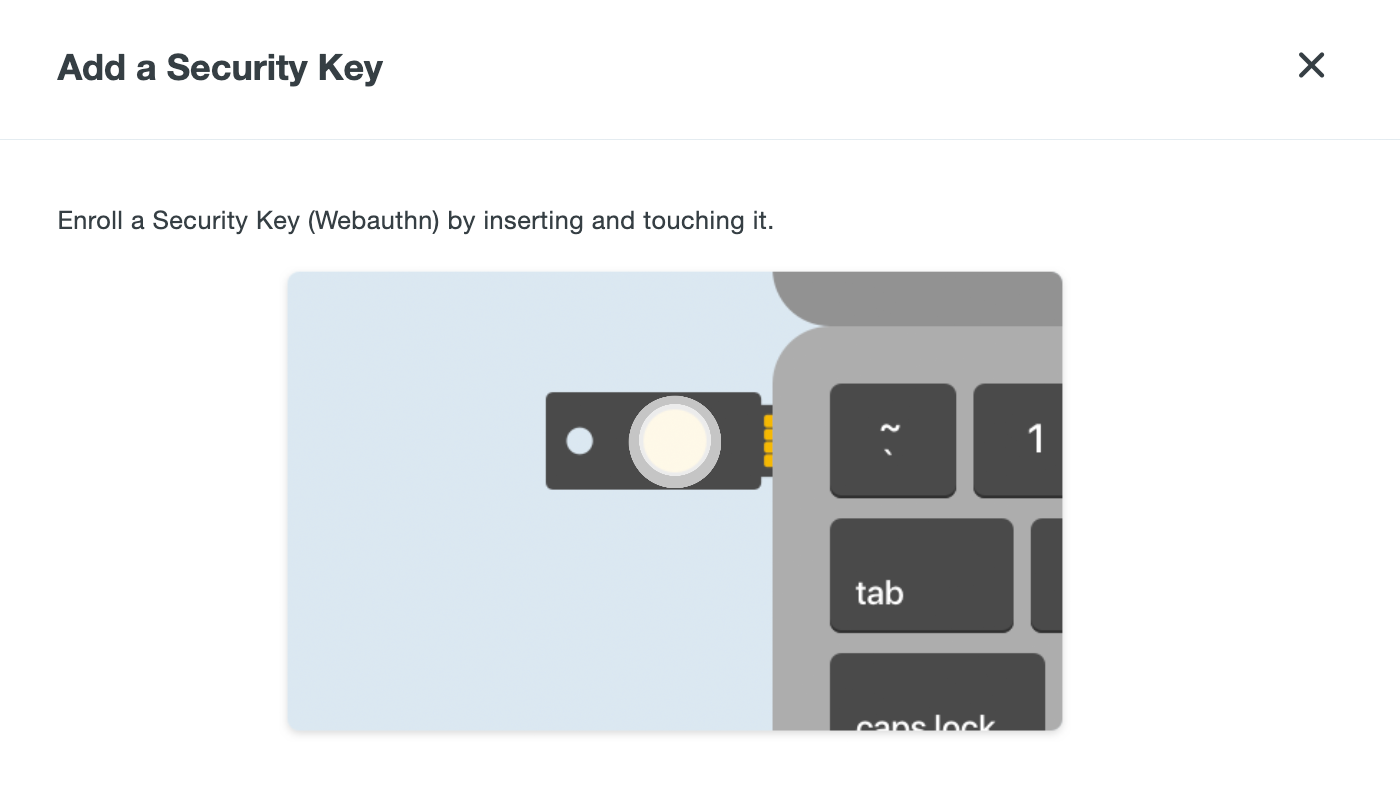
Tap the security key inserted in your computer.
-
Follow the browser prompts to complete enrollment of the user's security key, allowing Duo to access information about the user's security key during setup.
-
The user's properties page now lists the newly added security key.

-
Remove the security key from your computer and deliver it to the end user.
Duo admins can only enroll one security key on behalf of a user, but end users can enroll additional tokens themselves via self-service device management. A Duo user can have up to 100 U2F tokens or security keys.
It's not possible to move existing enrolled security keys between Duo users. If you want to reassign a security key from one user to another, you must delete the key from the first user, and then perform enrollment again on behalf of the second user.
Assigning a Passkey to an Administrator
Role required: Owner.
Duo administrators can add passkeys for other administrators. An example situation where this might be useful is if you want to pre-register a removable security key as a passkey for a new Duo admin and then give them that security key so they can log in to the Admin Panel from their own computer.
Only account owners may modify other administrator accounts to add passkey authenticators. A passkey device can be shared between an end-user account and an administrator account, but must be registered separately for each.
To attach a passkey to an administrator:
-
Log in to the Duo Admin Panel and navigate to Users → Administrators → Administrators in the left sidebar.
-
Click on the administrator's user name to view details.
-
Scroll down to the "Secondary Authentication" section and click Add Passkey.
-
Insert or attach the passkey to your computer and complete passkey registration.
-
You'll see the new passkey listed as an authentication device for that administrator.
Deleting WebAuthn Authenticators or U2F Tokens
Role required: Owner, Administrator, User Manager, Security Analyst, or Help Desk. Only an Owner may delete a passkey attached to another administrator.
-
Log in to the Duo Admin Panel and navigate to Devices → WebAuthn in the left sidebar.
-
Locate the device ID or the user whose WebAuthn or U2F device you want to delete in the table, and then click the trash can icon on the right.
-
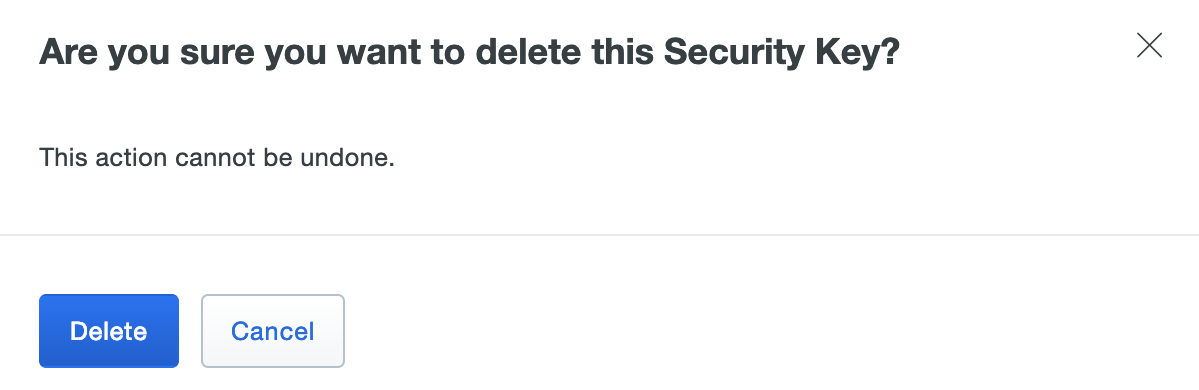
Confirm deletion of the WebAuthn authenticator.
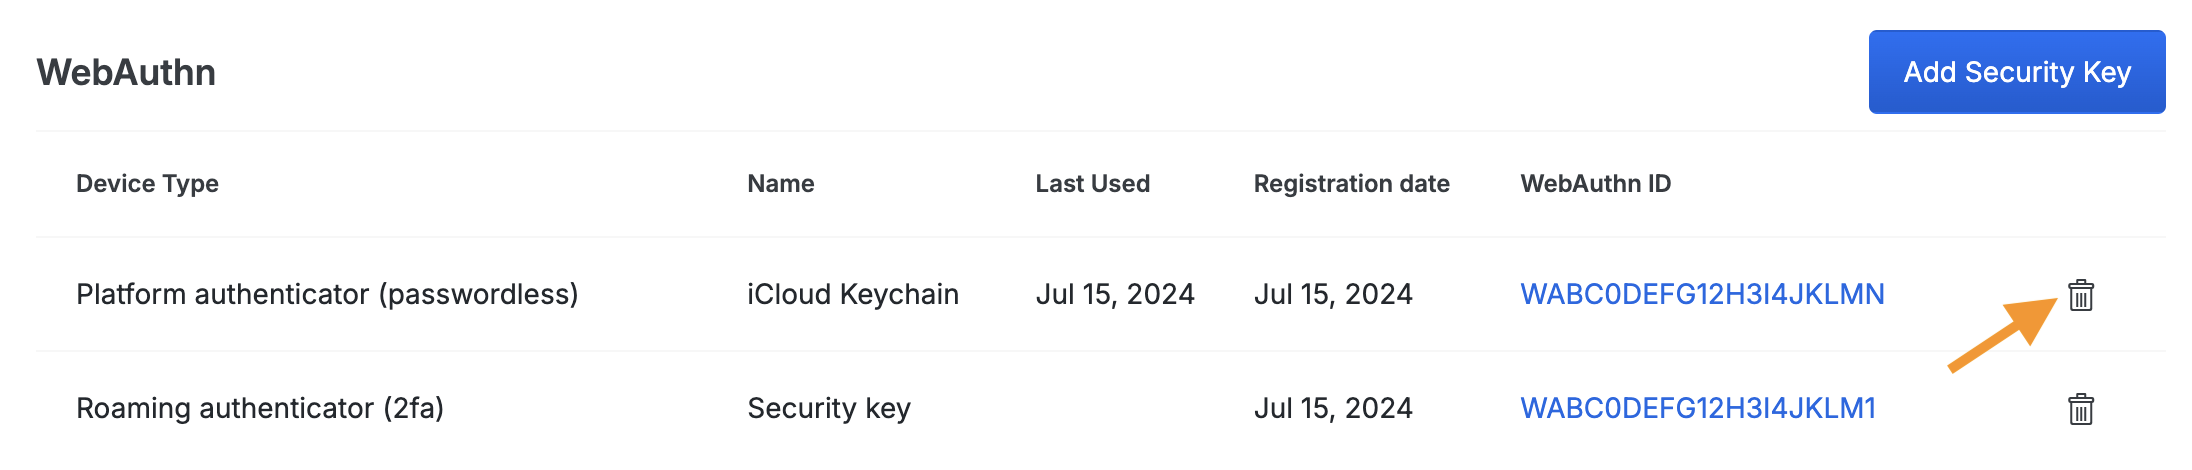
You can also delete a U2F or WebAuthn device directly from a Duo user's page. Scroll down to the WebAuthn table and click the trash icon to remove a device.
If a user has started a remembered device session for any browser-based application and you delete or remove a WebAuthn authenticator or U2F token from that user from the Admin Panel, the session will be revoked and the user will have to perform two-factor authentication again the next time they try to log into a browser-based application with that remembered devices policy.
Manage Duo Desktop Authenticators
Plan required: Duo Essentials, Duo Advantage, or Duo Premier.
Duo supports using Duo Desktop for authentication when logging in using the Duo Universal Prompt. When Duo Desktop authentication is enabled in your application's effective authentication methods policy, end users can self-enroll Duo Desktop as an authentication method via the Duo enrollment prompt or self-service portal. Using Duo Desktop for authentication is only available for end users; administrators cannot log into the Duo Admin Panel with Duo Desktop.
List Duo Desktop Authenticators
-
Log in to the Duo Admin Panel and navigate to Devices → Duo Desktop Authenticators. A list of Duo Desktop Authenticators are shown, along with the attached end user.
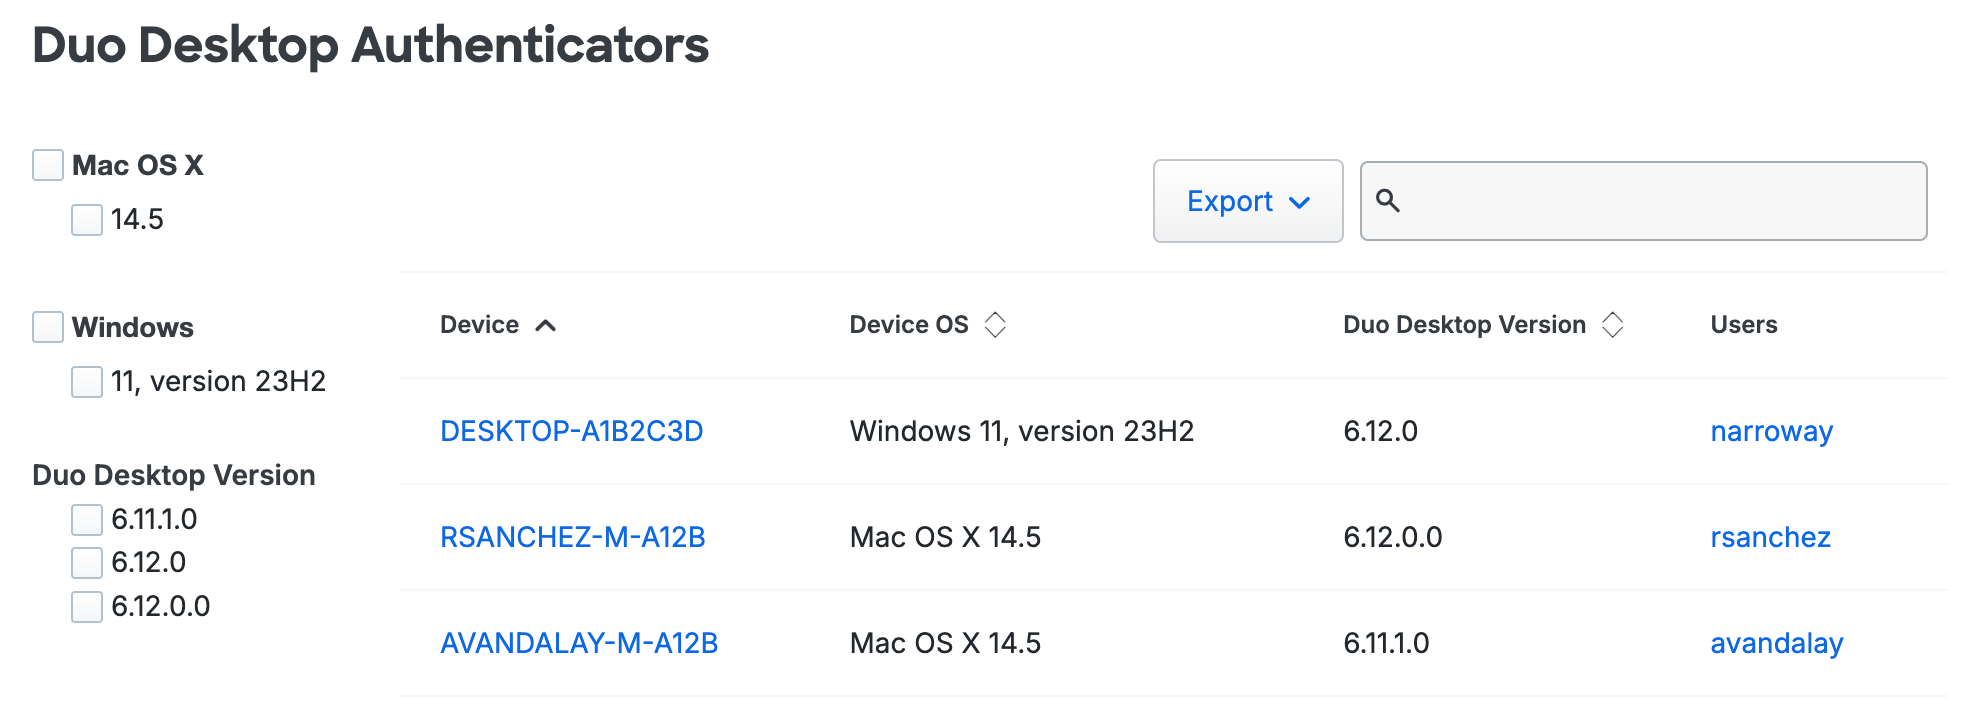
Click the Export button in the upper right side of the desktops list and select from the available export options, which may include CSV or JSON, to download a copy of the desktops list.
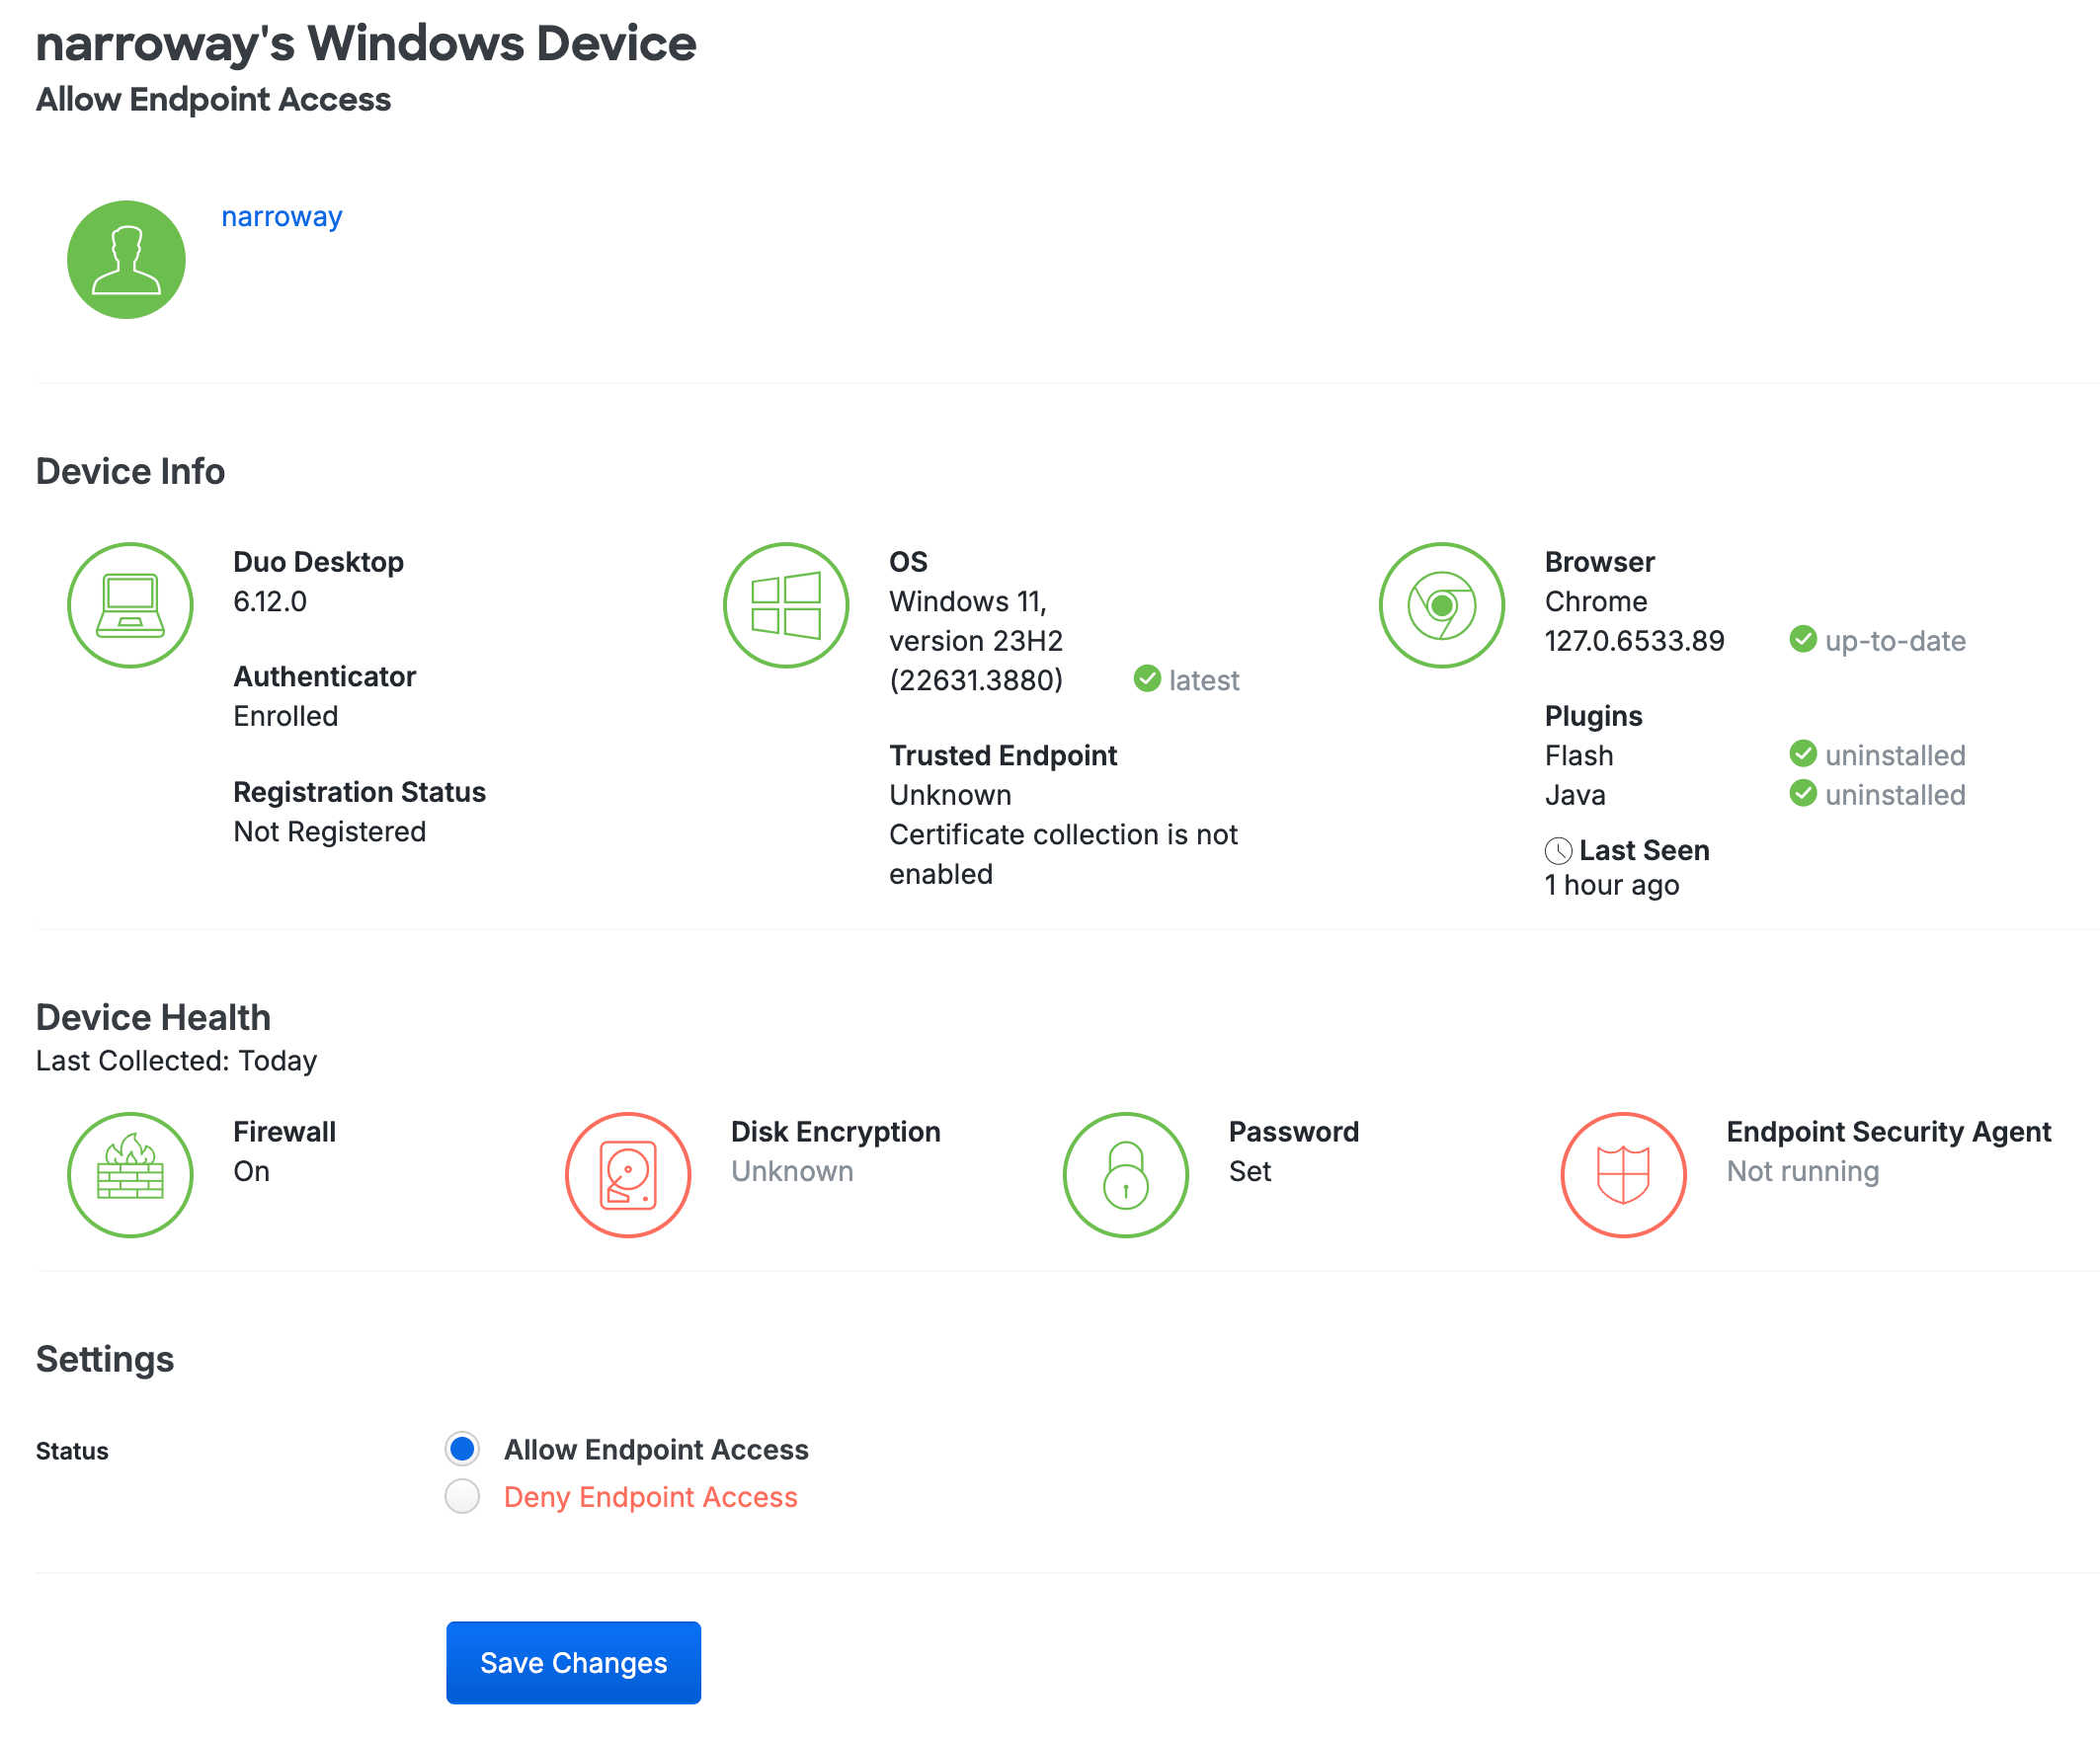
-
Select an authenticator by clicking the identifier in the "Device" column. This loads the endpoint's details page for that computer. You can view which users have authenticated to Duo using that endpoint, as well as the operating system, browser, plugin, trusted endpoint, device health, and Duo Desktop authentication information. This page is not available for Essentials customers.
Delete a Duo Desktop Authenticator For a User
Role required: Owner, Administrator, User Manager, Security Analyst, or Help Desk.
Duo Desktop authenticators can be deleted from the user's properties page:
-
Log in to the Duo Admin Panel and navigate to Users → Users in the left sidebar.
-
Select a user by clicking their username. Scroll down to the Desktop Authenticators table and click the trash icon to remove a device.

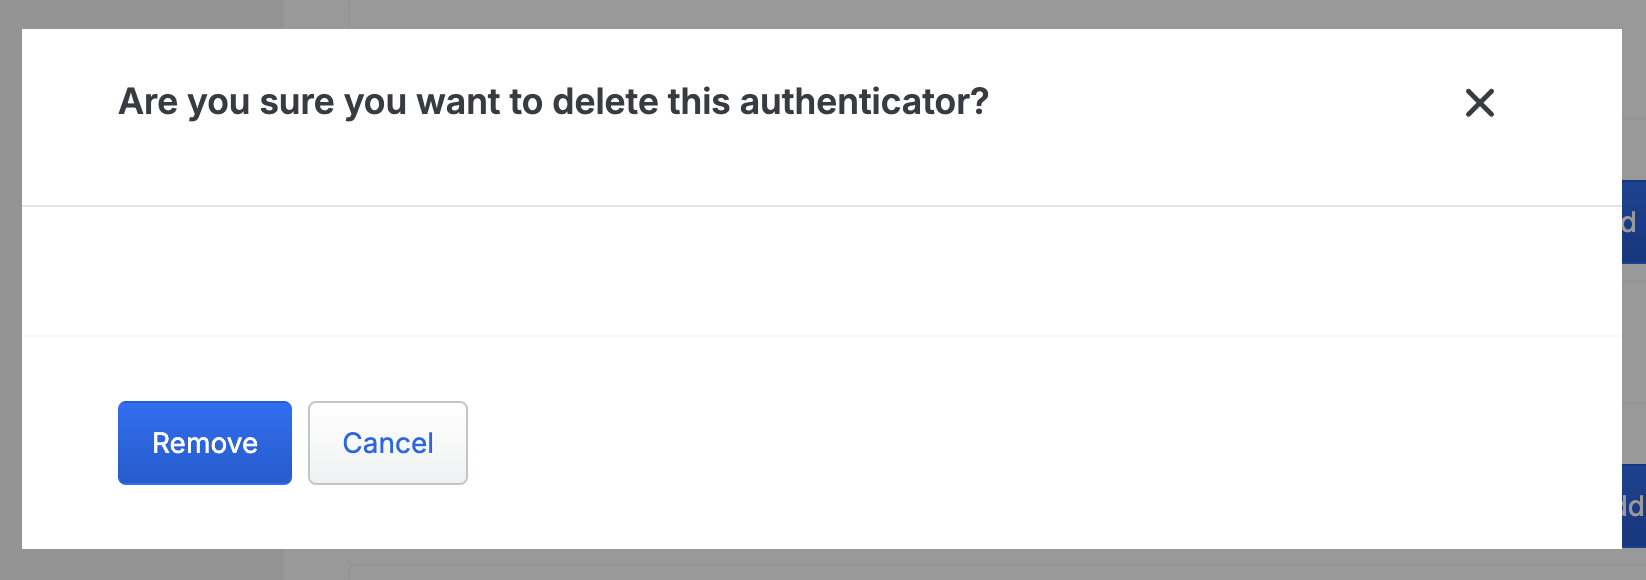
-
Confirm deletion of the Duo Desktop authenticator. This will remove the computer from the "Duo Desktop Authenticators" page; the "Endpoints" details will still be available.
Note: You can't add a desktop for Duo Desktop authentication for a user.
Endpoints
Review operating system, browser, and third-party plugin version information for end user devices accessing Duo by navigating to Devices → Endpoints in the Duo Admin Panel. Enable self-remediation to notify users to update browsers and plugins. Prevent access to your protected applications from clients with outdated software. Block known endpoints from accessing resources. Some controls available without installing additional agents or monitors. Learn more about Endpoints.
Duo Desktop Registered Devices
You can review your registered devices and their associated users by navigating to Devices → Duo Desktop Device Registration in the Duo Admin Panel. Learn more about registered devices.
Device Insight
Track the mobile devices and computer endpoints used through your organization to access Duo-protected applications and approve two-factor authentication requests by navigating to Devices → Device Insight in the Duo Admin Panel. Learn more about Device Insight.
Troubleshooting
Need some help? Try searching our Knowledge Base articles or Community discussions. For further assistance, contact Support.