Duo Two-Factor Authentication with LDAPS for Juniper Secure Access SSL VPN (Deprecated)
Last updated:
End of Support Information
Direct LDAP connectivity to Duo for Juniper SA SSL VPN reached the end of support on March 30, 2024 and reached end-of-life status on February 20, 2025. Customers may not create new Juniper SSL VPN applications and users of existing LDAPS configurations may no longer authenticate.
The recommended migration path is to deploy Duo Single Sign-On for Ivanti Connect Secure to protect Juniper SA SSL VPN with Duo Single Sign-On, our cloud-hosted identity provider featuring Duo Central and the Duo Universal Prompt.
Another alternative to direct LDAPS connections is adding Duo authentication to Juniper SA SSL VPN using RADIUS and the Duo Authentication Proxy, for example, RADIUS with Automatic Push for Juniper SA SSL VPN. See the "Related" links to the left to explore more RADIUS configurations.
Please visit the article Guide to end of life for the Duo LDAP cloud service (LDAPS) used to provide 2FA for Cisco ASA, Juniper Networks Secure Access, and Pulse Secure Connect Secure SSL VPN for further details, and review the Duo End of Sale, Last Date of Support, and End of Life Policy.
The instructions for this solution were removed on November 21, 2024. Customers who had this configuration deployed before then and need to refer to the original instructions to execute the migration to a supported solution may contact Duo Support.
Troubleshooting
Need some help? Take a look at the Juniper Frequently Asked Questions (FAQ) page or try searching our Juniper Knowledge Base articles or Community discussions. For further assistance, contact Support.
Network Diagram
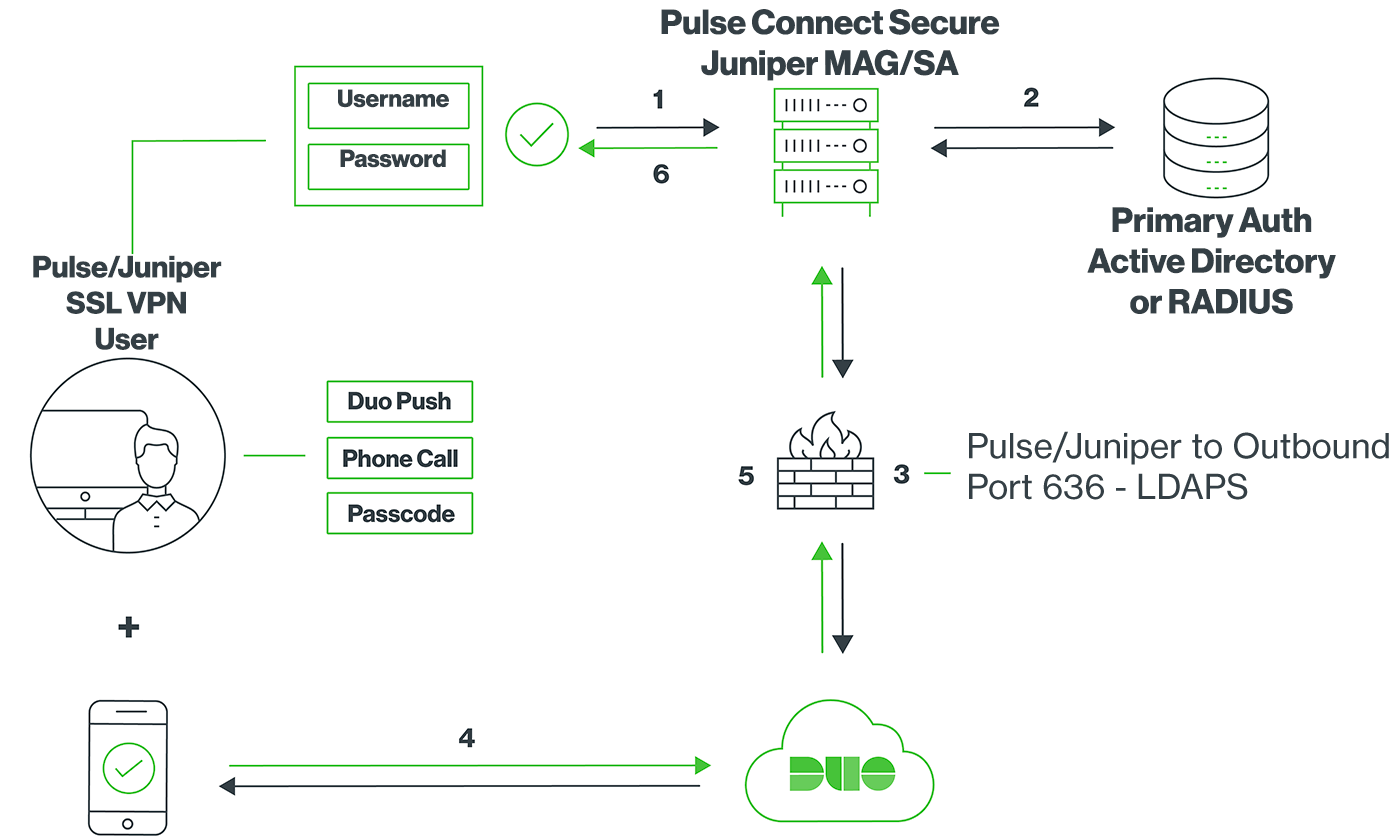
- SSL VPN connection initiated
- Primary authentication
- Juniper MAG/SA connection established to Duo Security over TCP port 636
- User completes Duo two-factor authentication via the interactive web prompt served from Duo's service or text response to the MAG/SA and their selected authentication factor.
- Juniper MAG/SA receives authentication response
- SSL VPN connection established