Duo Single Sign-On for Cisco ASA with Secure Client
Last updated:
Overview
Duo's SAML SSO for ASA supports inline self-service enrollment and the Duo Prompt for Secure Client and web-based SSL VPN logins. This deployment option requires that you have a SAML 2.0 identity provider (IdP) in place that features Duo authentication, like Duo Single Sign-On. Primary and Duo secondary authentication occur at the identity provider, not at the ASA itself.
Minimum Supported ASA and Client Versions
Cisco ASA SSO requires ASA version of 9.7.1.24, 9.8.2.28, 9.9.2.1, or higher of these releases, or 9.10 and later, plus AnyConnect 4.6 or later or Secure Client. Prior versions of ASA firmware and Secure Client do not support SAML login or use a different browser experience. Add Duo protection to earlier ASA versions with our ASA LDAPS SSL VPN or ASA RADIUS with AnyConnect configurations.
Familiarize yourself with the limitations of ASA SAML 2.0 authentication by reviewing the Use Single Sign-On with Clientless SSL VPN documentation in the Cisco ASA Series VPN CLI Configuration Guide.
Trusted Endpoints Support
Be aware of these AnyConnect client minimum version requirements for Duo's Trusted Endpoints certificate detection.
| Operating System | AnyConnect Version |
|---|---|
| Windows | AnyConnect 4.7.04056 or later |
| macOS | AnyConnect 4.8.00175 or later |
| iOS | AnyConnect 4.8.00807 or later |
Trusted Endpoints detection which does not rely on certificates has no dependency on a specific client app version.
WebAuthn Support
The ASA SAML login experience supports use of Duo WebAuthn authentication methods like Touch ID and security keys for client logins under the following conditions:
- The device has been updated to ASA 9.17 firmware or later.
- The ASA VPN tunnel group has external browser support enabled.
- Access devices use AnyConnect 4.10.04065 or later or Secure Client.
- Duo Universal Prompt is enabled for the Duo SSO Cisco ASA integration as noted in the setup instructions in this document.
With all requirements in place, ASA VPN SSO logins launch in the client's external browser instead of an embedded browser, allowing WebAuthn functionality in the Duo Universal Prompt. This also extends Duo Passwordless to client logins.
About Duo Single Sign-On
Duo Single Sign-On is our cloud-hosted SSO product which layers Duo's strong authentication and flexible policy engine on top of Cisco ASA logins. Duo Single Sign-On acts as an identity provider (IdP), authenticating your users using existing on-premises Active Directory (AD) or another SSO IdP. Duo SSO prompts users for two-factor authentication and performs endpoint assessment and verification before permitting access to Cisco ASA.
Duo Single Sign-On is available in Duo Premier, Duo Advantage, and Duo Essentials plans, which also include the ability to define policies that enforce unique controls for each individual SSO application. For example, you can require that Salesforce users complete two-factor authentication at every login, but only once every seven days when accessing Cisco ASA. Duo checks the user, device, and network against an application's policy before allowing access to the application.
Configure Single Sign-On
Before configuring Cisco ASA with Duo SSO using Security Assertion Markup Language (SAML) 2.0 authentication you'll first need to configure a working authentication source.
Once you have your SSO authentication source working, continue to the next step of creating the Cisco ASA application in Duo.
Create the Cisco ASA Application in Duo
-
Log in to the Duo Admin Panel and navigate to Applications → Application Catalog.
-
Locate the entry for Cisco ASA with the "SSO" label in the catalog. Click the + Add button to start configuring Cisco ASA. See Protecting Applications for more information about protecting applications with Duo and additional application options. You'll need the information on the Cisco ASA page later to complete your setup.
-
No active Duo users can log in to new applications until you grant access. Update the User access setting to grant access to this application to users in selected Duo groups, or to all users. Learn more about user access to applications. If you do not change this setting now, be sure to update it so that your test user has access before you test your setup.
This setting only applies to users who exist in Duo with "Active" status. This does not affect application access for existing users with "Bypass" status, existing users for whom the effective Authentication Policy for the application specifies "Bypass 2FA" or "Skip MFA", or users who do not exist in Duo when the effective New User Policy for the application allows access to users unknown to Duo without MFA.
Duo Universal Prompt
The Duo Universal Prompt provides a simplified and accessible Duo login experience for web-based applications, offering a redesigned visual interface with security and usability enhancements.
| Universal Prompt | Traditional Prompt |
 |
 |
We've already updated the Duo Cisco ASA application hosted in Duo's service to support the Universal Prompt, so there's no action required on your part to update the application itself. If you created your Cisco ASA application before March 2024, you can activate the Universal Prompt experience for users from the Duo Admin Panel. Cisco ASA applications created after March 2024 have the Universal Prompt activated by default.
If you created your Cisco ASA application before March 2024, it's a good idea to read the Universal Prompt Update Guide for more information, about the update process and the new login experience for users, before you activate the Universal Prompt for your application.
Activate Universal Prompt
Activation of the Universal Prompt is a per-application change. Activating it for one application does not change the login experience for your other Duo applications.
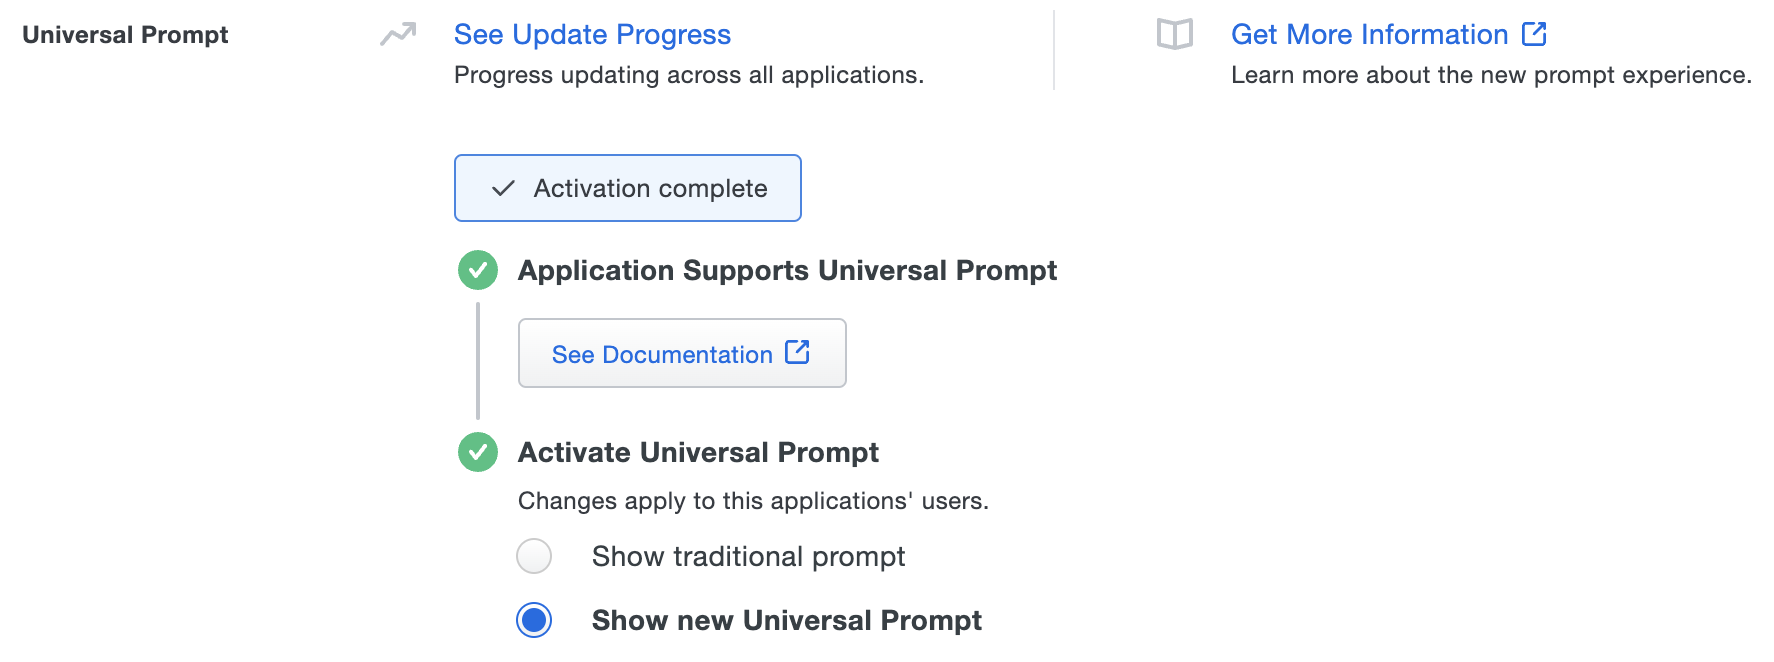
The "Universal Prompt" area of the application details page shows that this application is "Ready to activate", with these activation control options:
- Show traditional prompt: Your users experience Duo's traditional prompt via redirect when logging in to this application.
- Show new Universal Prompt: (Default) Your users experience the Universal Prompt via redirect when logging in to this application.
The application's Universal Prompt status shows "Activation complete" here and on the Universal Prompt Update Progress report.
Should you ever want to roll back to the traditional prompt, you can return to this setting and change it back to Show traditional prompt. However, this will still deliver the Duo prompt via redirect, not in an iframe. Keep in mind that support for the traditional Duo prompt ended for the majority of applications in March 2024.
Universal Update Progress
Click the See Update Progress link to view the Universal Prompt Update Progress report. This report shows the update availability and migration progress for all your Duo applications. You can also activate the new prompt experience for multiple supported applications from the report page instead of visiting the individual details pages for each application.
Configure Cisco ASA SSO
Add Duo Single Sign-On to Cisco ASA as a new single sign-on provider. The Cisco ASA can be configured through the Cisco Adaptive Security Device Manager (ASDM) or the command-line interface (CLI).
Cisco Adaptive Security Device Manager (ASDM)
Upload Certificate
-
Click Download certificate next to "Identity Provider Certificate" under Downloads on the details page for your application in the Duo Admin Panel to download the Duo Single Sign-On certificate file.
-
Connect to your Cisco ASA through your ASDM and log in as an administrative user.
-
Click on the Configuration button at the top of the screen.
-
Click Device Management in the bottom left-hand side of the screen.
-
In the navigation bar on the left side expand Certificate Management and then click CA Certificates
-
On the "CA Certificates" page click Add. A new window will pop-up.
-
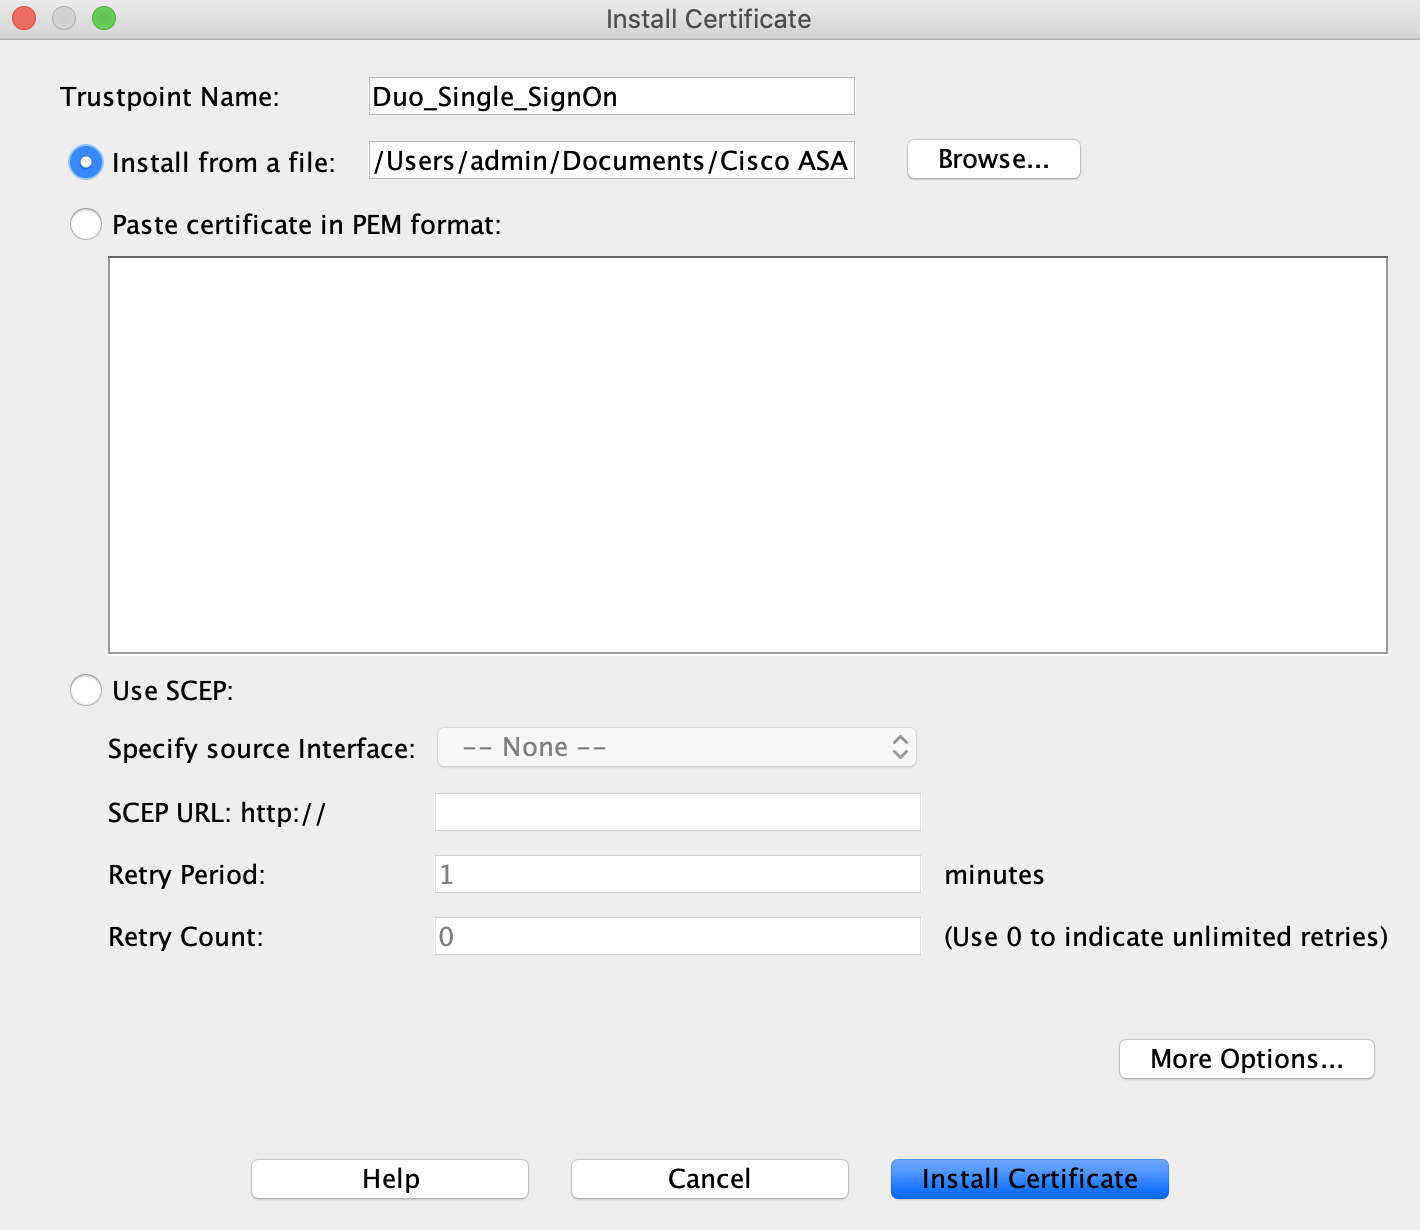
On the "Install Certificate" page type Duo_Single_SignOn into the "Trustpoint Name" field.
-
While the "Install from a file" option is selected click Browse…. A new window will pop-up.
-
Navigate to the location where you saved the certificate file.
-
Click Install Certificate. You’ll see a pop-up that says "Certificate installed Successfully". Click OK.
-
Click Save at the top of the screen.
Configure Secure Client Connection Profile
-
While logged into the Cisco ASDM click Remote Access VPN at the bottom of the screen.
-
On the left-hand navigation expand Network (Client) Access and click on Secure Client Connection Profiles.
-
Under "Connection Profiles" double-click the Tunnel Group you'd like to protect with SSO. A new window will pop-up.
-
Make sure the Tunnel Group has an Alias set.
-
Under "Authentication" click the drop-down next to "Method" and select SAML.
-
Under "SAML Identity Provider" click Manage… next to "SAML Server**. A new window will pop-up.
-
On the "Configure SSO Servers SAML" screen click Add. A new window will pop-up.
-
On the "Add SSO Server" page copy the Entity ID from the Duo Admin Panel Metadata section and paste it into the Cisco ASA IDP Entity ID field.
Example: https://sso-abc1def2.sso.duosecurity.com/saml2/sp/DIABC123678901234567/metadata
-
Next to Sign In URL select https from the drop-down. Copy the Sign In URL from the Duo Admin Panel Metadata section and paste it into the Cisco ASA Sign In URL field. Remove the https:// from the pasted URL.
Example: sso-abc1def2.sso.duosecurity.com/saml2/sp/DIABC123678901234567/sso
-
Next to Sign Out URL select https from the drop-down. Copy the Sign Out URL from the Duo Admin Panel Metadata section and paste it into the Cisco ASA Sign Out URL field. Remove the https:// from the pasted URL.
Example: sso-abc1def2.sso.duosecurity.com/saml2/sp/DIABC123678901234567/slo
-
Next to Base URL select https from the drop-down. Enter the publicly resolvable hostname of your Cisco ASA into the field.
Example: vpn.example.com
-
Select Duo_Single_SignOn from the drop-down next to Identity Provider Certificate.
-
Select the SSL certificate used for the Cisco ASA itself from the drop-down next to Service Provider Certificate.
Important: You may need to update this selection when your SSL certificate expires or you change your Cisco ASA to use a new certificate. -
Leave the Request Signature set to None.
-
Type 300 into the Request Timeout field.
-
Leave all other options at their default setting.
-
Click OK to return to the "Configure SSO Servers SAML" page.

-
Click OK to return to the "Add Secure Client Connection Profile" page.
-
Make sure the Entity ID of the SSO Server you just configured is selected in the drop-down next to SAML Server.
-
Continue filling out the page and click OK.
-
Click Apply.
-
Click Save to write all changes to the ASA device memory.
Learn more about Cisco ASA SSO at Cisco Support.
Command Line Interface (CLI)
Upload Trustpoint Certificate
-
In the Duo Admin Panel under "Downloads", click Copy certificate.
-
SSH into your ASA and access the config terminal.
login as: asaadmin asaadmin@ciscoasa's password: Type help or '?' for a list of available commands. ciscoasa> enable Password: ******** ciscoasa# configure terminal ciscoasa(config)# -
Enter the following to begin uploading the Duo Single Sign-On certificate:
ciscoasa(config)#crypto ca trustpoint Duo_Single_SignOn ciscoasa(config-ca-trustpoint)# -
Enter the commands below. When prompted paste the copied certificate file text into your terminal. Type quit on its own line and then hit return.
ciscoasa(config-ca-trustpoint)# enrollment terminal ciscoasa(config-ca-trustpoint)# crypto ca authenticate Duo_Single_SignOn Enter the base 64 encoded CA certificate. End with the word "quit" on a line by itself -----BEGIN CERTIFICATE----- MIIDDTCCAfWgAwIBAgIUEkFOP84CnkHz016GOcgiqbqqZzQwDQYJKoZIhvcNAQEL BQAwNjEVMBMGA1UECgwMRHVvIFNlY3VyaXR5MR0wGwYDVQQDDBRESUdHUDNCSlFQ OVRJWDM5N0NXVjAeFw0yMDAzMDUxNDE3MzlaFw0zODAxMTkwMzE0MDdaMDYxFTAT BgNVBAoMDER1byBTZWN1cml0eTEdMBsGA1UEAwwURElHR1AzQkpRUDlUSVgzOTdD V1YwggEiMA0GCSqGSIb3DQEBAQUAA4IBDwAwggEKAoIBAQC0Uvap+tymeCVLo6ed kQ8Jg+eBUyaSZGRmAHOtuKZR+KJZ+N02ew+P5fA6P7Oli9ppT3LLp3L4Tx40lZwi i7dC8oSVPMFgQFy/bUW/+rcF6yz1AZVGTJmAriDO8AlCOmevBNTczJnsSrJ2Kol+ bc7A1wm1ffb6M2LsHpKrdipokMeqztYTMOdNoxAxJk7M7DsItHoatyYd5fXm3HHb ce0bISNq3Nt7QEq9TPbAk6gJ8SpIY96s60qZ1YpZvIO4UrdkTFXXC3VklK7xpxEc JwlZf1IFgoAczo3wPO71A9zZPNAU34qAm4S/y05WUyzusbvISlMfNfgoLn0EeXiW Gvs/AgMBAAGjEzARMA8GA1UdEwEB/wQFMAMBAf8wDQYJKoZIhvcNAQELBQADggEB AGVK+GEjcycIKEKLxfXEghvra2Yq8pPNCdFIJGvgbj50EG9EGW1EB/Orj8MQ8Z+k 5GDdo4kHvWajc2LCnVIL4cn008A838pXXDRLq50Hdy4+RcAbkNRB0pBB2PaE7lzo euK89oj3oSTLKs6juvMZFJxBnrCLKFLuR62aWzVjwiYItnfu4t1mtaCqeNrmM50Y Ba1GL/+O6ROghuGJuFK9fIhTbvz/ipKAC/b2tOUgRvU7izcdELkDER+vmXU4ji/a NwTj+2Edi4Z6yV1bxILblkvkcpvof+o+XiIgQArV8qoXnB5wAWwEe3qnvrz1q/m3 Hm13Z1Hr1/P00/6v1uIN20o= -----END CERTIFICATE----- quit -
You will be asked to accept the certificate. Type yes.
INFO: Certificate has the following attributes:
Fingerprint:     ca20076b b1daa7f8 76d535c6 8e404ccd
Do you accept this certificate? [yes/no]: yes

Trustpoint CA certificate accepted.

% Certificate successfully imported
ciscoasa(config)#
Find SSL Certificate
-
Enter the following command to print a list of all the certificates uploaded to the Cisco ASA. Locate the Trustpoint certificate used to serve SSL for your Cisco ASA. Make note of it as you'll need it later.
ciscoasa(config)# show crypto ca trustpoints

Trustpoint SSL_Cert_For_Site:
    Subject Name:
    cn=COMODO RSA Domain Validation Secure Server CA
    o=COMODO CA Limited
    l=Salford
    st=Greater Manchester
    c=GB
        Serial Number: 1a2b3ccd4556788d123a4bcda56bc78
    Certificate configured.

Trustpoint Duo_Single_SignOn:
    Subject Name:
    cn=DIGGP3BJQP9TIX397CWV
    o=Duo Security
        Serial Number: 12414e3fce029e41f3d35e8639c822a9baaa6734
    Certificate configured.
Add Duo Single Sign-On as an SSO Server
-
Enter config-webvpn and then copy the Entity ID from the Duo Admin Panel Metadata section and paste it into the server like the exmaple below.
Example: https://sso-abc1def2.sso.duosecurity.com/saml2/sp/DIABC123678901234567/metadata
ciscoasa(config)# webvpn ciscoasa(config-webvpn)# saml idp https://sso-abc1def2.sso.duosecurity.com/saml2/sp/DIABC123678901234567/metadata ciscoasa(config-webvpnsaml-idp)# -
Copy the Sign In URL from the Duo Admin Panel Metadata section and enter it as the url sign-in.
Example: https://sso-abc1def2.sso.duosecurity.com/saml2/sp/DIABC123678901234567/sso
ciscoasa(config-webvpnsaml-idp)# url sign-in https://sso-abc1def2.sso.duosecurity.com/saml2/sp/DIABC123678901234567/sso -
Copy the Sign Out URL from the Duo Admin Panel Metadata section and enter it as the url sign-out.
Example: https://sso-abc1def2.sso.duosecurity.com/saml2/sp/DIABC123678901234567/slo
ciscoasa(config-webvpnsaml-idp)# url sign-out https://sso-abc1def2.sso.duosecurity.com/saml2/sp/DIABC123678901234567/slo -
Configure the Base URL of your Cisco ASA.
Example: vpn.example.com.
ciscoasa(config-webvpn-saml-idp)# base-url https://vpn.example.com -
Set the trustpoint certificate you uploaded earlier for the SSO server.
ciscoasa(config-webvpn-saml-idp)# trustpoint idp Duo_Single_SignOn
ciscoasa(config-webvpn-saml-idp)# trustpoint sp SSL_Cert_For_Site
ciscoasa(config-webvpn-saml-idp)#
Important: You may need to update this selection when your SSL certificate expires or you change your Cisco ASA to use a new certificate. -
Set the timeout for when a pending SSO login is no longer valid. We recommend setting it to 300 seconds.
ciscoasa(config-webvpn-saml-idp)# timeout assertion 300 -
Set Force Re-Authentication to false.
ciscoasa(config-webvpn-saml-idp)# no force re-authentication -
Exit saml-idp mode and verify that your configuration looks like the example below.
ciscoasa(config-webvpn-saml-idp)# exit
ciscoasa(config-webvpn)# show webvpn saml idp
saml idp https://sso-abc1def2.sso.duosecurity.com/saml2/sp/DIABC123678901234567/metadata
url sign-in https://sso-abc1def2.sso.duosecurity.com/saml2/sp/DIABC123678901234567/sso
url sign-out https://sso-abc1def2.sso.duosecurity.com/saml2/sp/DIABC123678901234567/slo
base-url https://vpn.example.com
trustpoint idp Duo_Single_SignOn
trustpoint sp SSL_Cert_For_Site
no signature
no force re-authentication
timeout assertion 300
ciscoasa(config-webvpn)#
Set Tunnel Group to use SSO
Now that you've added Duo Single Sign-On as an SSO server in Cisco ASA you need to set a tunnel group to use Duo Single Sign-On for authentication.
-
Create a tunnel group that will be used for SSO by using the commands below:
- Replace "cloud-idp-sso" with the name of the tunnel group you'd like to use.
- Replace "cloud_idp" with the alias name you'd like to use.
- Replace https://sso-abc1def2.sso.duosecurity.com/saml2/sp/DIABC123678901234567/metadata with the Entity ID from the Duo Admin Panel Metadata section.
ciscoasa(config) webvpn ciscoasa(config-webvpn)# tunnel-group-list enable ciscoasa(config-webvpn)# tunnel-group cloud-idp-sso type remote-access ciscoasa(config)# tunnel-group cloud-idp-sso webvpn-attributes ciscoasa(config-tunnel-webvpn)# authentication saml ciscoasa(config-tunnel-webvpn)# group-alias cloud_idp enable ciscoasa(config-tunnel-webvpn)# saml identity-provider https://sso-abc1def2.sso.duosecurity.com/saml2/sp/DIABC123678901234567/metadata -
Continue configuring your new tunnel group with any additional settings.
Learn more about Cisco ASA SSO at Cisco Support.
Update the Cisco ASA Application in Duo
-
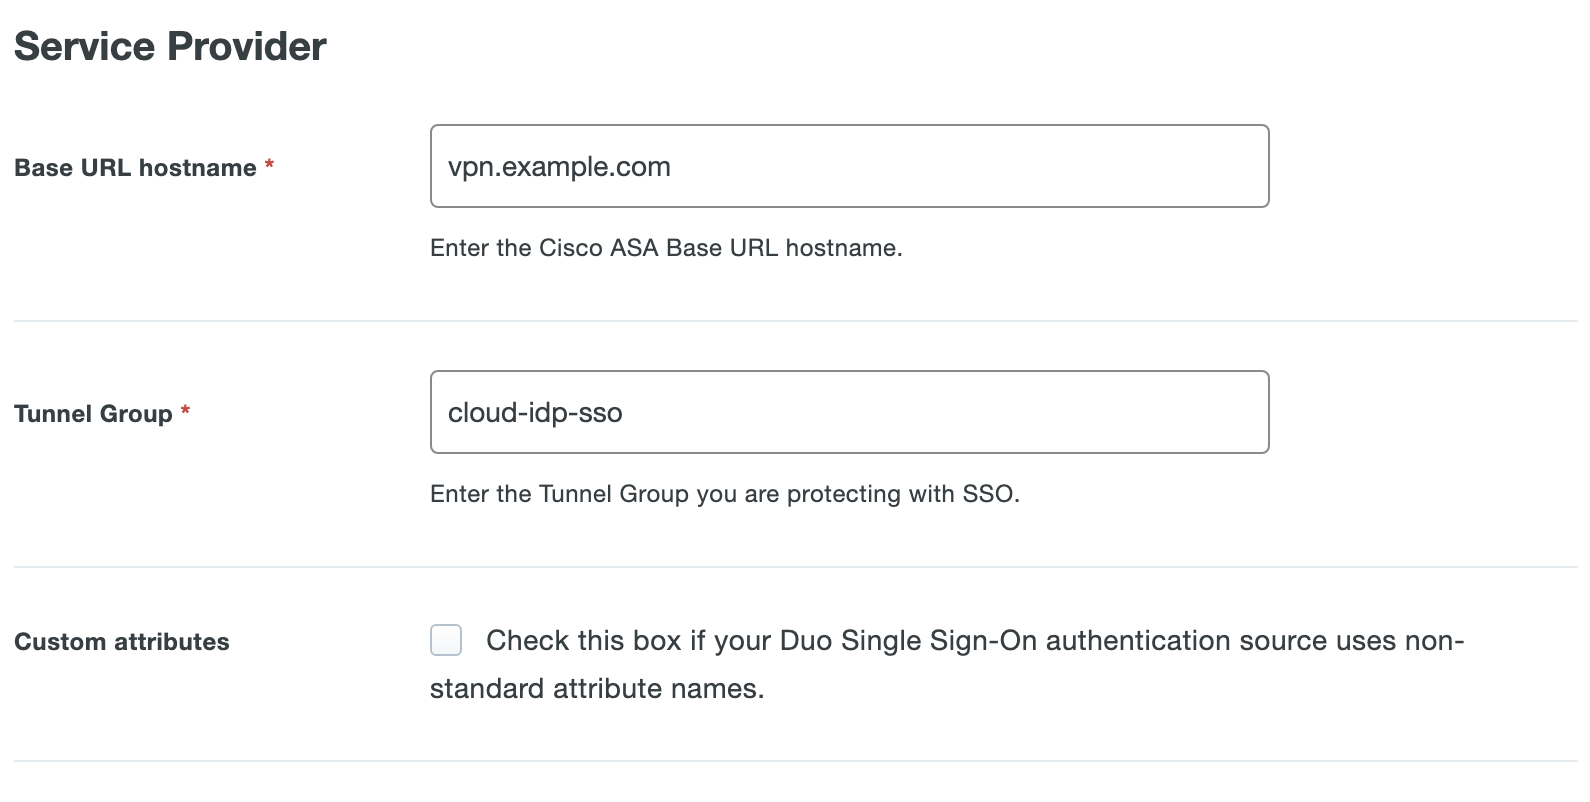
Return to the Duo Admin Panel with the Cisco ASA application open. Find the Service Provider section.
-
Enter the base URL of your Cisco ASA that you entered above as the Base URL hostname. For example, if your Cisco ASA base URL is https://vpn.example.com then enter vpn.example.com.
-
Enter the tunnel group of your Cisco ASA that you entered above as the Tunnel Group. The tunnel group name is case-sensitive and must match. For example, if your tunnel group is cloud-idp-sso then enter cloud-idp-sso.
-
Cisco ASA uses the Mail attribute when authenticating. We've mapped the <Email Address> attribute to external authentication source attributes as follows:
Default Attribute Active Directory SAML IdP <Email Address> mail Email If you are using a non-standard email attribute for your authentication source, check the Custom attributes box and enter the name of the attribute you wish to use instead.
-
You can adjust additional settings for your new SAML application at this time — like changing the application's name from the default value, enabling self-service, or assigning a group policy.
-
Scroll to the bottom of the page and click the Save button.
Verify SSO
You can log into your Cisco ASA using your organization’s login page e.g. https://vpn.example.com. Select the tunnel group and click Login. This redirects you to Duo Single Sign-On to begin authentication.
Active Directory Login
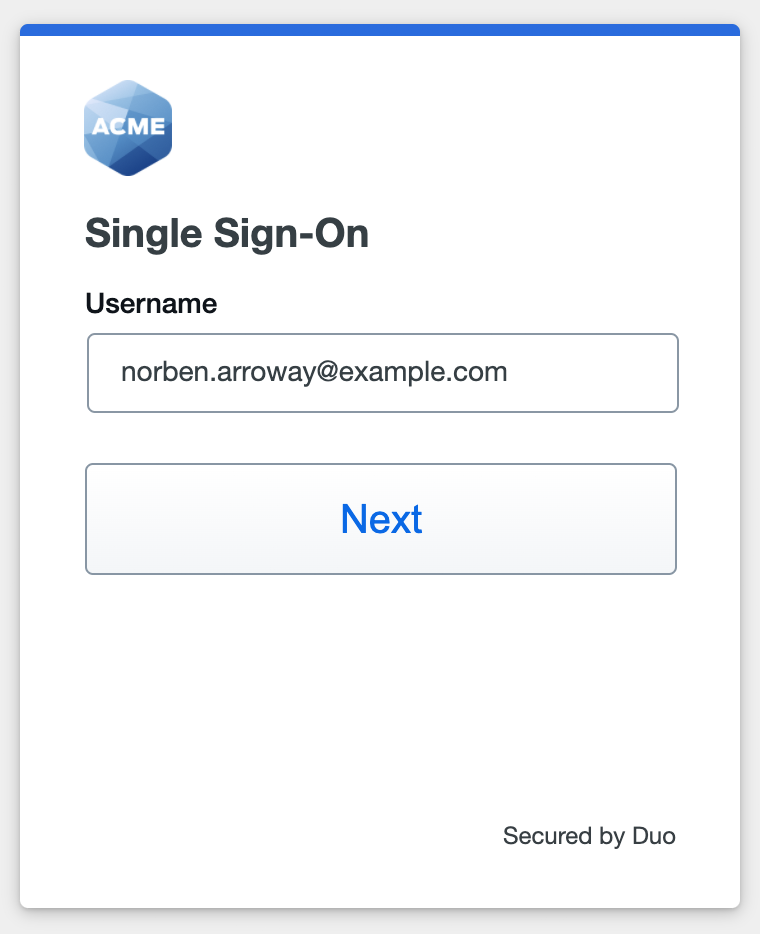
With Active Directory as the Duo SSO authentication source, enter the primary username (email address) on the Duo SSO login page and click or tap Next.
Enter the AD primary password and click or tap Log in to continue.
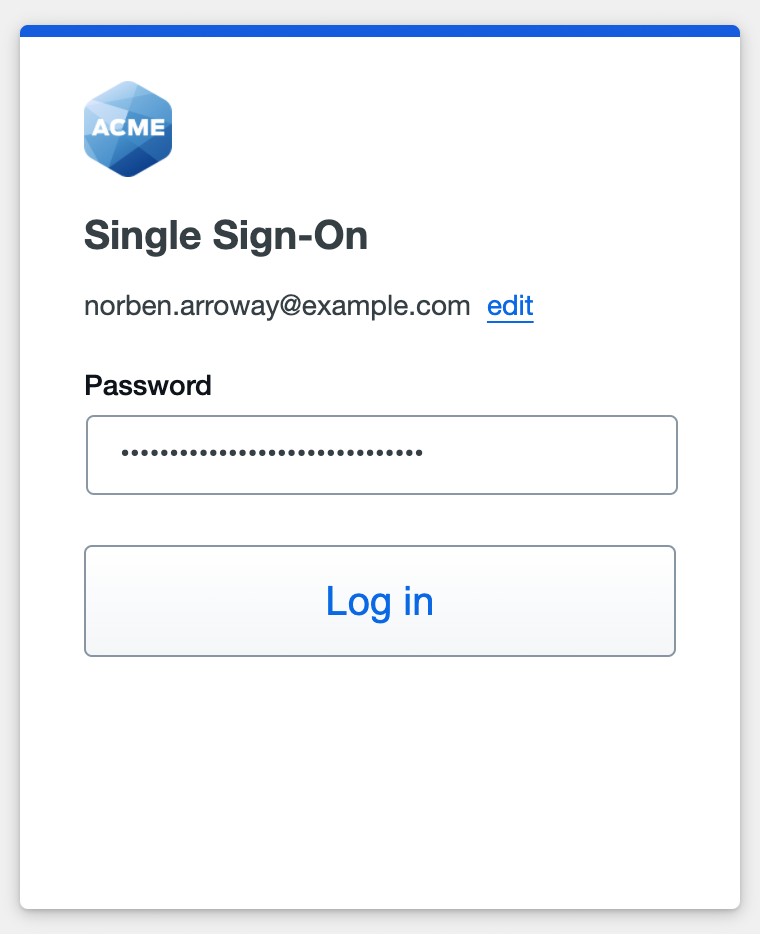
Enable Duo Passwordless to log in to Duo SSO backed by Active Directory authentication without entering a password in the future.
SAML Login
The SAML login experience depends on your Duo SSO routing rules configuration.
With another SAML identity provider as the only enabled Duo SSO authentication source and the default routing rule in place, Duo SSO immediately redirects the login attempt to that SAML IdP for primary authentication. Users do not see the Duo SSO primary login screen.
If you have multiple enabled SAML authentication sources or custom routing rules in place, then users enter their primary username (email address) on the Duo SSO login page and then will be redirected to the correct external SAML identity provider.
Duo Authentication
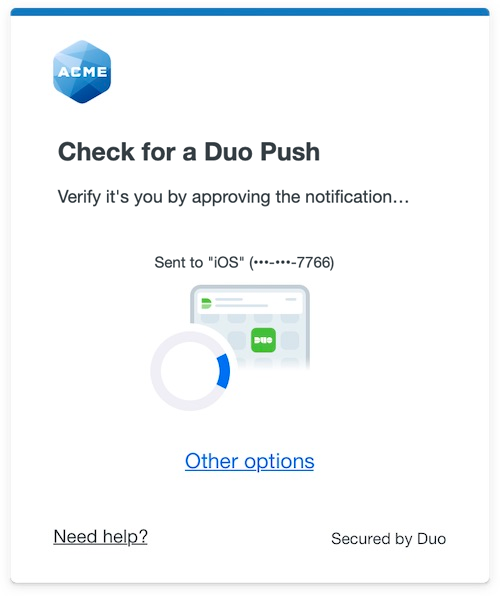
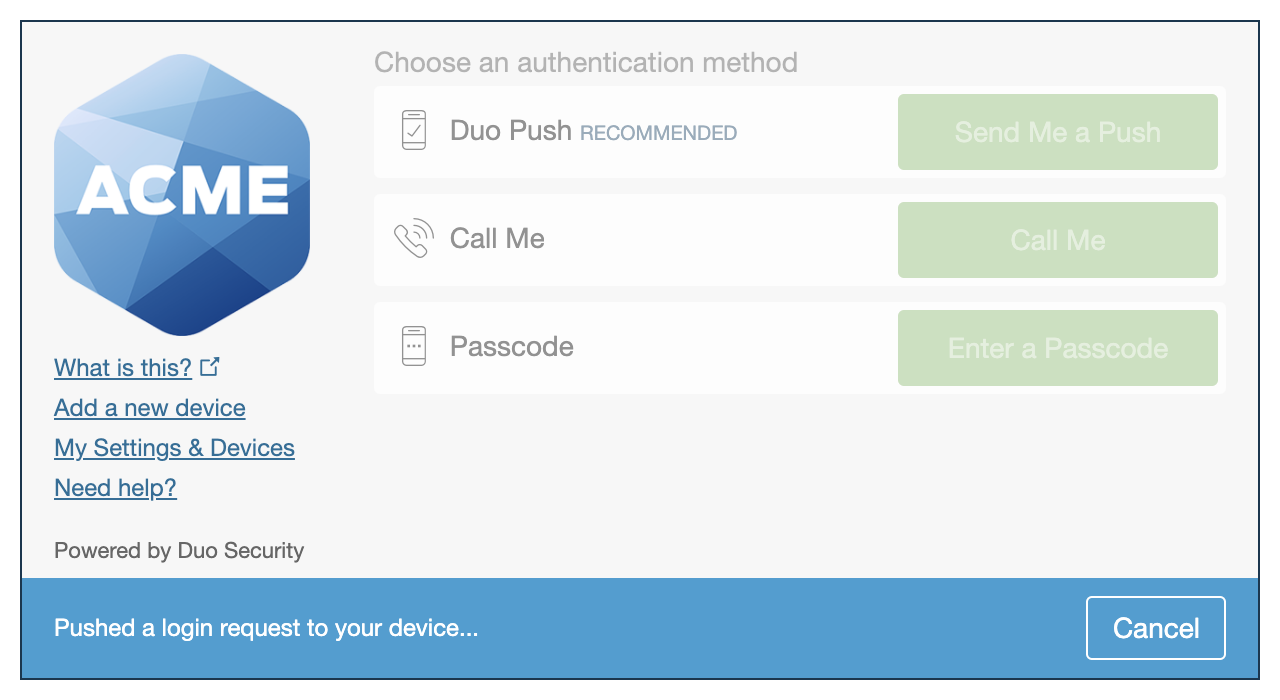
Successful verification of your primary credentials by Active Directory or a SAML IdP redirects back to Duo. Complete Duo two-factor authentication when prompted and then you'll return to Cisco ASA to complete the login process.
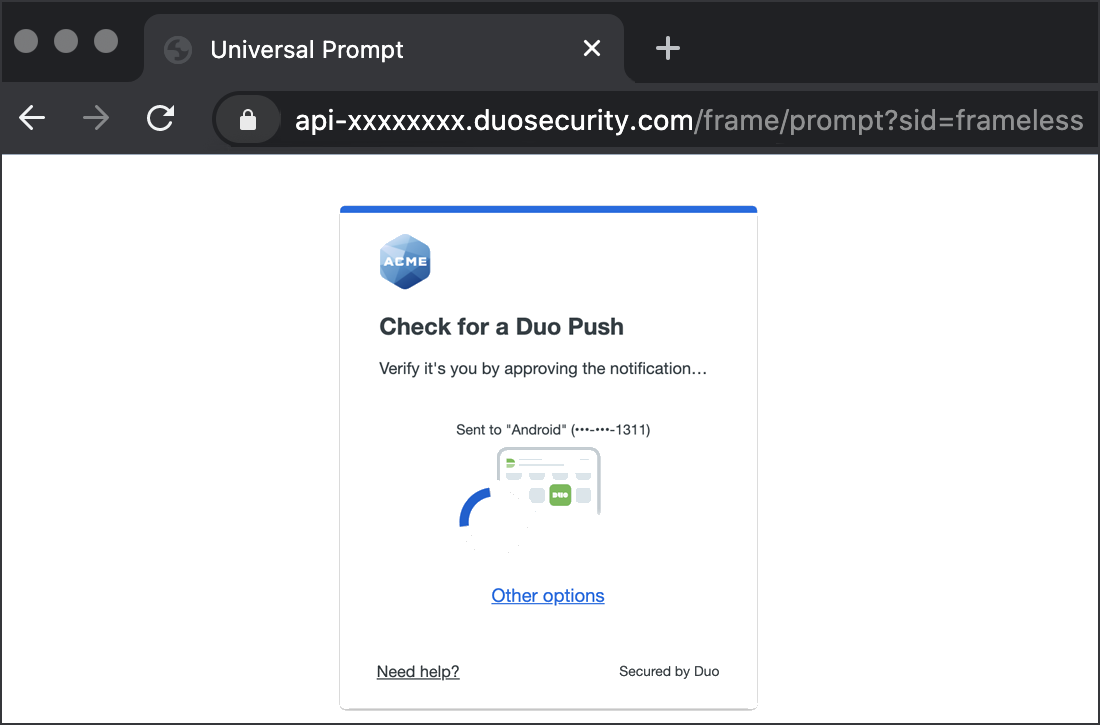
* Universal Prompt experience shown.
You can also log into Cisco ASA using Duo Central, our cloud-hosted portal which allows users to access all of their applications in one spot. Link to Cisco ASA in Duo Central by adding it as an application tile. Once the tile has been added, log into Duo Central and click the tile for IdP-initiated authentication to Cisco ASA.
Cisco AnyConnect mobile or desktop apps require version 4.6 or higher. Select your tunnel group from your client and click Login. You will be redirected to authenticate to Duo Single Sign-On.
Congratulations! Your Cisco ASA users now authenticate using Duo Single Sign-On.
See the full user login experience, including expired password reset (available for Active Directory authentication sources) in the Duo End User Guide for SSO.
Grant Access to Users
If you did not already grant user access to the Duo users you want to use this application be sure to do that before inviting or requiring them to log in with Duo.
Enable Remembered Devices
To minimize additional Duo two-factor prompts when switching between Cisco ASA and your other Duo Single Sign-On SAML applications, be sure to apply a shared "Remembered Devices" policy to your SAML applications.
Use of remembered devices with AnyConnect or Secure Client has the same deployment requirements as WebAuthn Support.
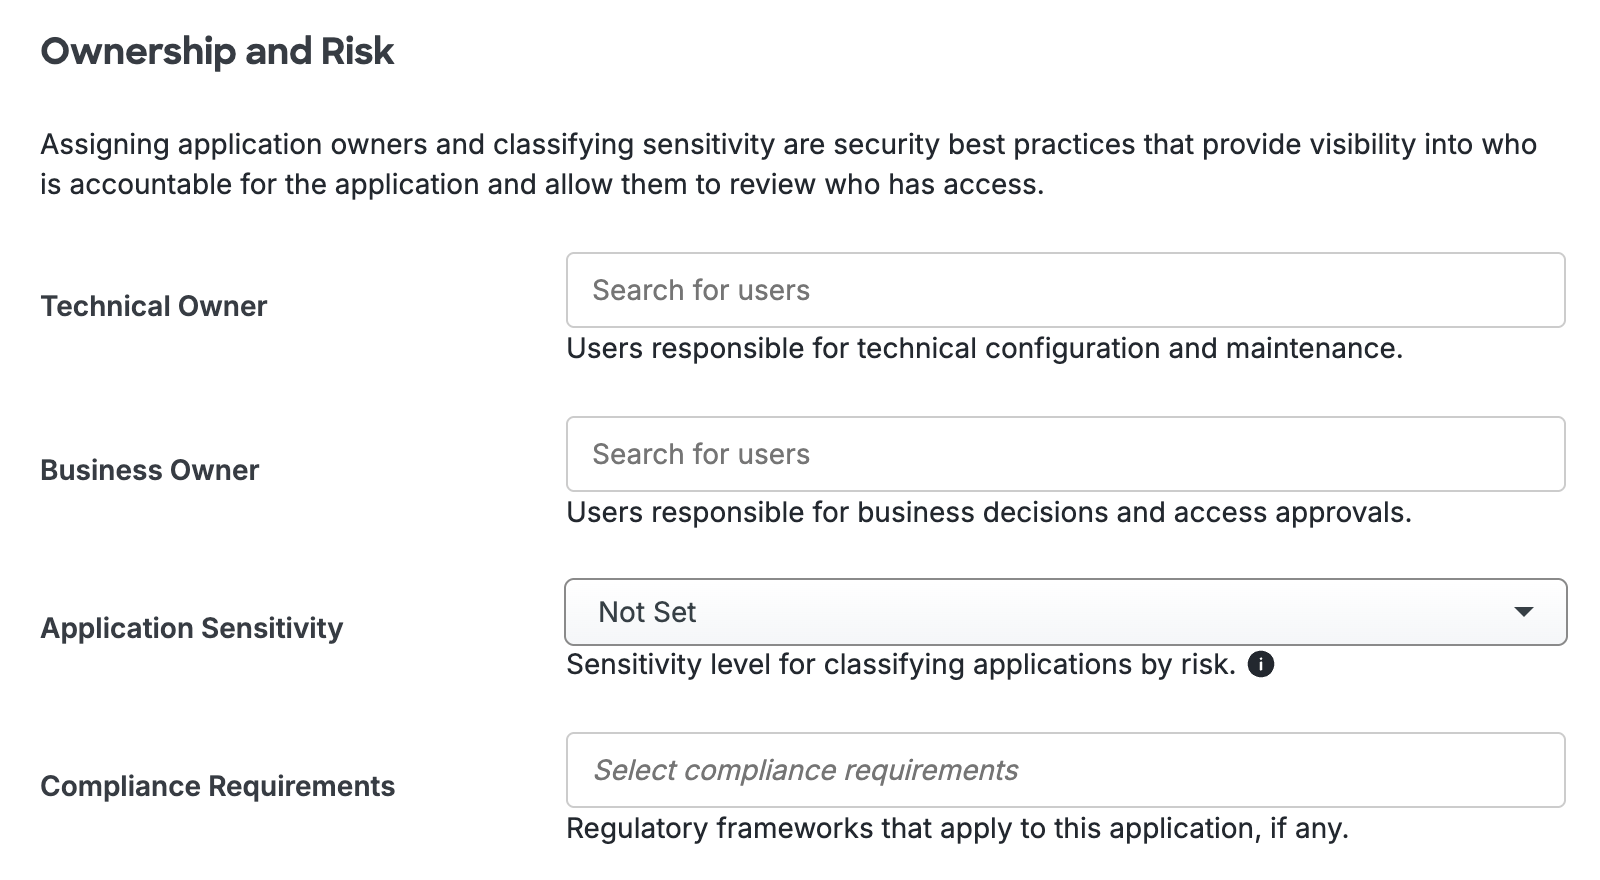
Add Ownership and Risk Information
Go to the "Ownership and Risk" section of the application's page in the Duo Admin Panel to assign application owners and classify the application's risk level. Cisco Identity Intelligence automatically imports this information to populate relevant fields for Duo Advantage and Premier customers. Duo Essentials plans exclude Cisco Identity Intelligence features.
You may set any of the following:
- Technical Owner: Search for and assign Duo users responsible for technical configuration and maintenance of this application.
- Business Owner: Search for and assign Duo users responsible for business decisions and access approvals related to this application.
- Application Sensitivity: Select this application's risk level from the drop-down list. Default: Not Set.
- Compliance Requirements: Select any applicable regulatory frameworks for this application (SOX (Sarbanes-Oxley), HIPAA, PCI-DSS, etc.) from the list.
Scroll to the bottom of the page and click Save to apply your changes.
Automated Provisioning
This application does not support automated creation and management of users and groups from Duo using SCIM 2.0 provisioning.
Video Overview
Video shows the Duo Admin Panel experience prior to August 2023.
Troubleshooting
Need some help? Try searching our Knowledge Base articles or Community discussions. For further assistance, contact Support.