Duo Trusted Endpoints - Ivanti Neurons for MDM (formerly known as MobileIron Cloud)
Last updated:
Overview
Duo's Trusted Endpoints feature secures your sensitive applications by ensuring that only known devices can access Duo protected services. When a user authenticates via the Duo Prompt, we'll check for the access device's management status. You can monitor access to your applications from trusted and untrusted devices, and optionally block access from devices not trusted by your organization.
Trusted Endpoints is part of the Duo Essentials, Duo Advantage, and Duo Premier plans.
Before enabling the Trusted Endpoints policy on your applications, you'll need to allow REST API access for Duo to your managed mobile devices. This guide walks you through Ivanti Neurons for MDM configuration for Android and iOS mobile devices.
These instructions are for the cloud-hosted Ivanti Neurons for MDM service, formerly known as MobileIron Cloud and Ivanti Secure UEM. If you are using Ivanti Endpoint Manager Mobile, see our instructions for the on-premises MDM instead.
Mobile Trusted Endpoints and Verified Duo Push: Trusted endpoint verification of iOS and Android devices with Duo Mobile uses the standard Duo Push approval process and will not prompt for a Duo Push verification code, even if the effective authentication methods policy for the user and application has "Verified Duo Push" enabled.
Prerequisites
- Access to the Duo Admin Panel as an administrator with the Owner, Administrator, or Application Manager administrative roles.
- An Ivanti Neurons Secure UEM license
- Access to the Ivanti Neurons for MDM admin portal as an administrator with the rights to create roles, accounts, certificate authorities, device profiles, and enroll devices.
Android Configuration
Duo determines trusted device status on Android devices using Duo Mobile installed and activated for Duo Push on a given device to verify device information. To enable this verification you'll need to grant Duo read-only access to those devices via your Ivanti Neurons for MDM's API access.
You must have already configured Android Enterprise and Work Profiles in Ivanti Neurons for MDM.
Create the Ivanti Neurons for MDM Integration
- Log in to the Duo Admin Panel and navigate to Devices → Trusted Endpoints.
- If this is your first management integration, click the Get started button at the bottom of the Trusted Endpoints introduction page. If you're adding another management integration, click the Add Integration button you see at the top of the page instead.
- On the "Add Trusted Endpoint Integrations" page, locate Ivanti Neurons for MDM in the list of integrations.
- Choose Android from the "Select operating system" drop-down, and then click the Add button.
The new Ivanti Neurons for MDM integration is created in the "Disabled" state. You'll turn it on when you're ready to apply your Duo trusted endpoints policy.
Please note that this integration takes advantage of managed app configuration and therefore Duo Mobile must be installed by your MDM for the device to be considered trusted.
Keep the Duo Admin Panel open in your browser. You'll need to refer back to the Duo Ivanti Neurons for MDM management integration page to complete the Android configuration steps.
Configure Duo Mobile Distribution
-
Log on to the Ivanti Neurons for MDM admin portal as an administrator and choose Apps → App Catalog on the left side of the page.
-
Click the Add button.
-
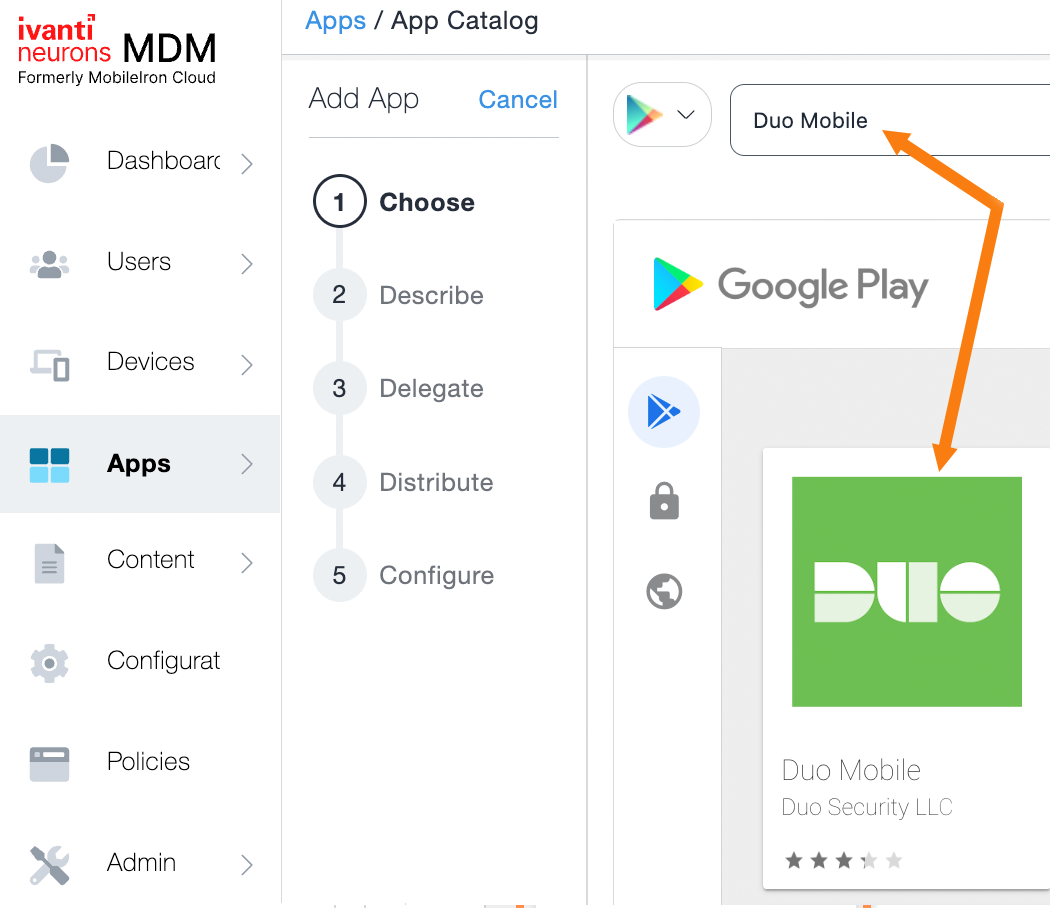
The default app catalog source may be set to the "iOS Store". Click the store drop-down list next to the search box and select the Google Play store from the list.
-
Once you've switched to the Google Play store, search for Duo Mobile, and then click on the Duo Mobile app shown in the search results.
-
Click the APPROVE button. You'll be shown the permissions needed by Duo Mobile. Click APPROVE again to accept these permissions.
-
Leave the "Approval Setting" for Duo Mobile set to the default option: "Keep approved when app requests new permissions." Click SAVE.
-
You'll return to the Duo Mobile application view, but now the app is "APPROVED". Click the Select button.
-
Make any desired app category selections or enter an optional description, and then click Next.
-
Since you already configured Android For Work (per the prerequisites), skip any further App Delegation and click Next.
-
Choose the user groups or individuals to whom you want to distribute Duo Mobile. Click Next.
-
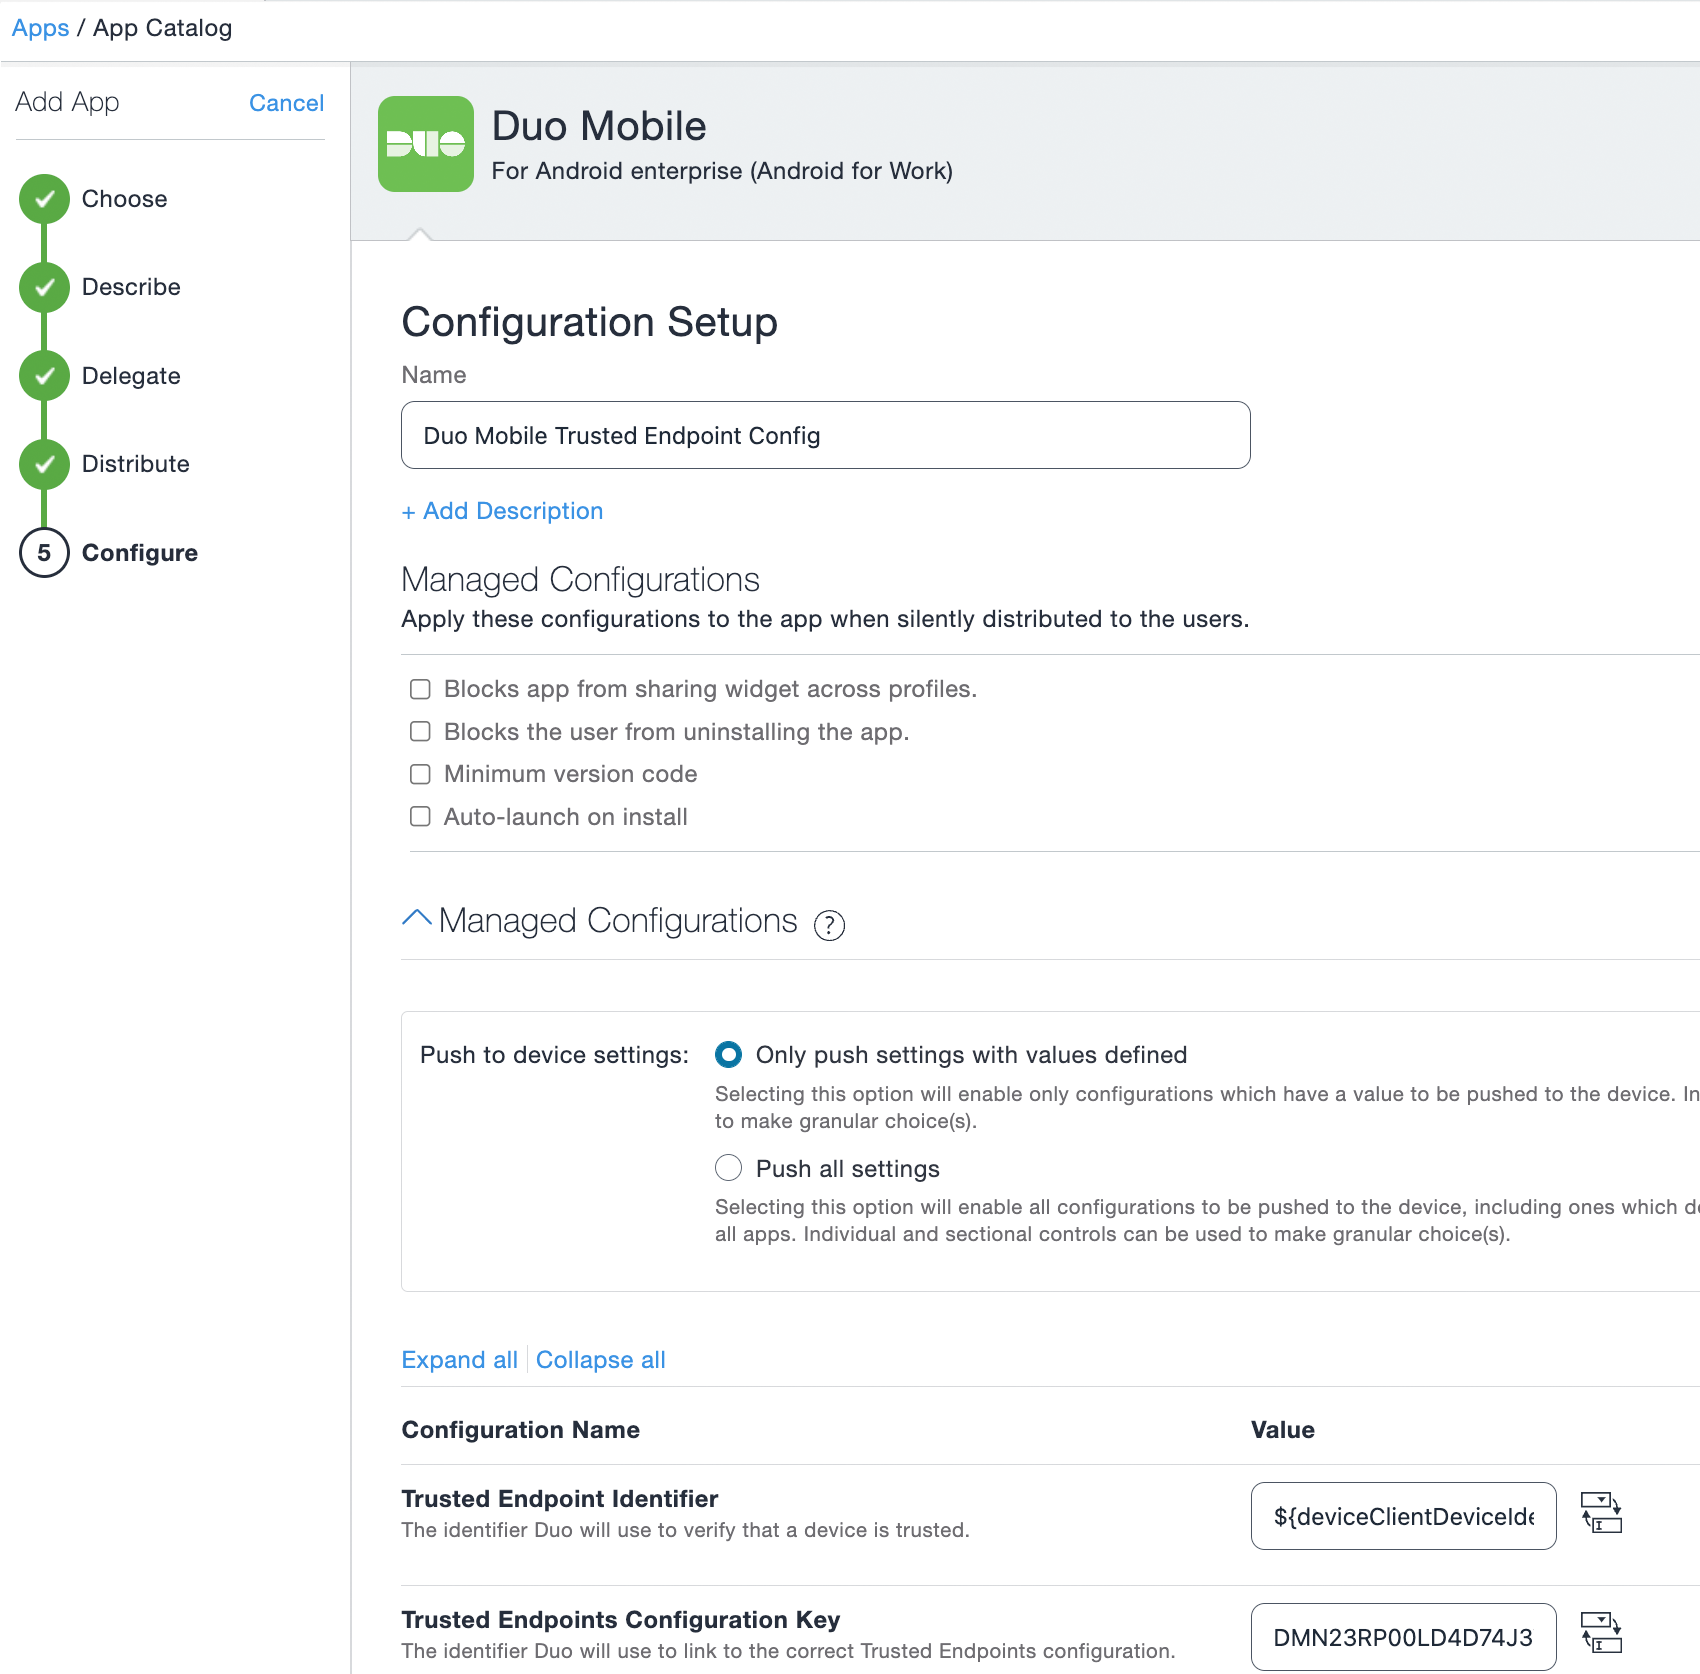
Click the plus sign button to the right of Managed Configurations for Android to create a new configuration.
-
Give the configuration a unique name, such as "Duo Mobile Trusted Endpoint Config".
-
In the "Managed Configurations" section, locate the "Trusted Endpoint Identifier" field and enter ${deviceClientDeviceIdentifier} as the value.
-
Return to the Duo Admin Panel. Copy the Trusted Endpoints configuration key value (it will look similar to DPK0W0KLPJLOGSKHTDD) and paste it into the Ivanti Neurons for MDM Trusted Endpoints Configuration Key field.
-
Click Next and then click Done.
Create a Duo API Account
-
While still logged into Ivanti Neurons for MDM as an administrator, navigate to the Users page.
-
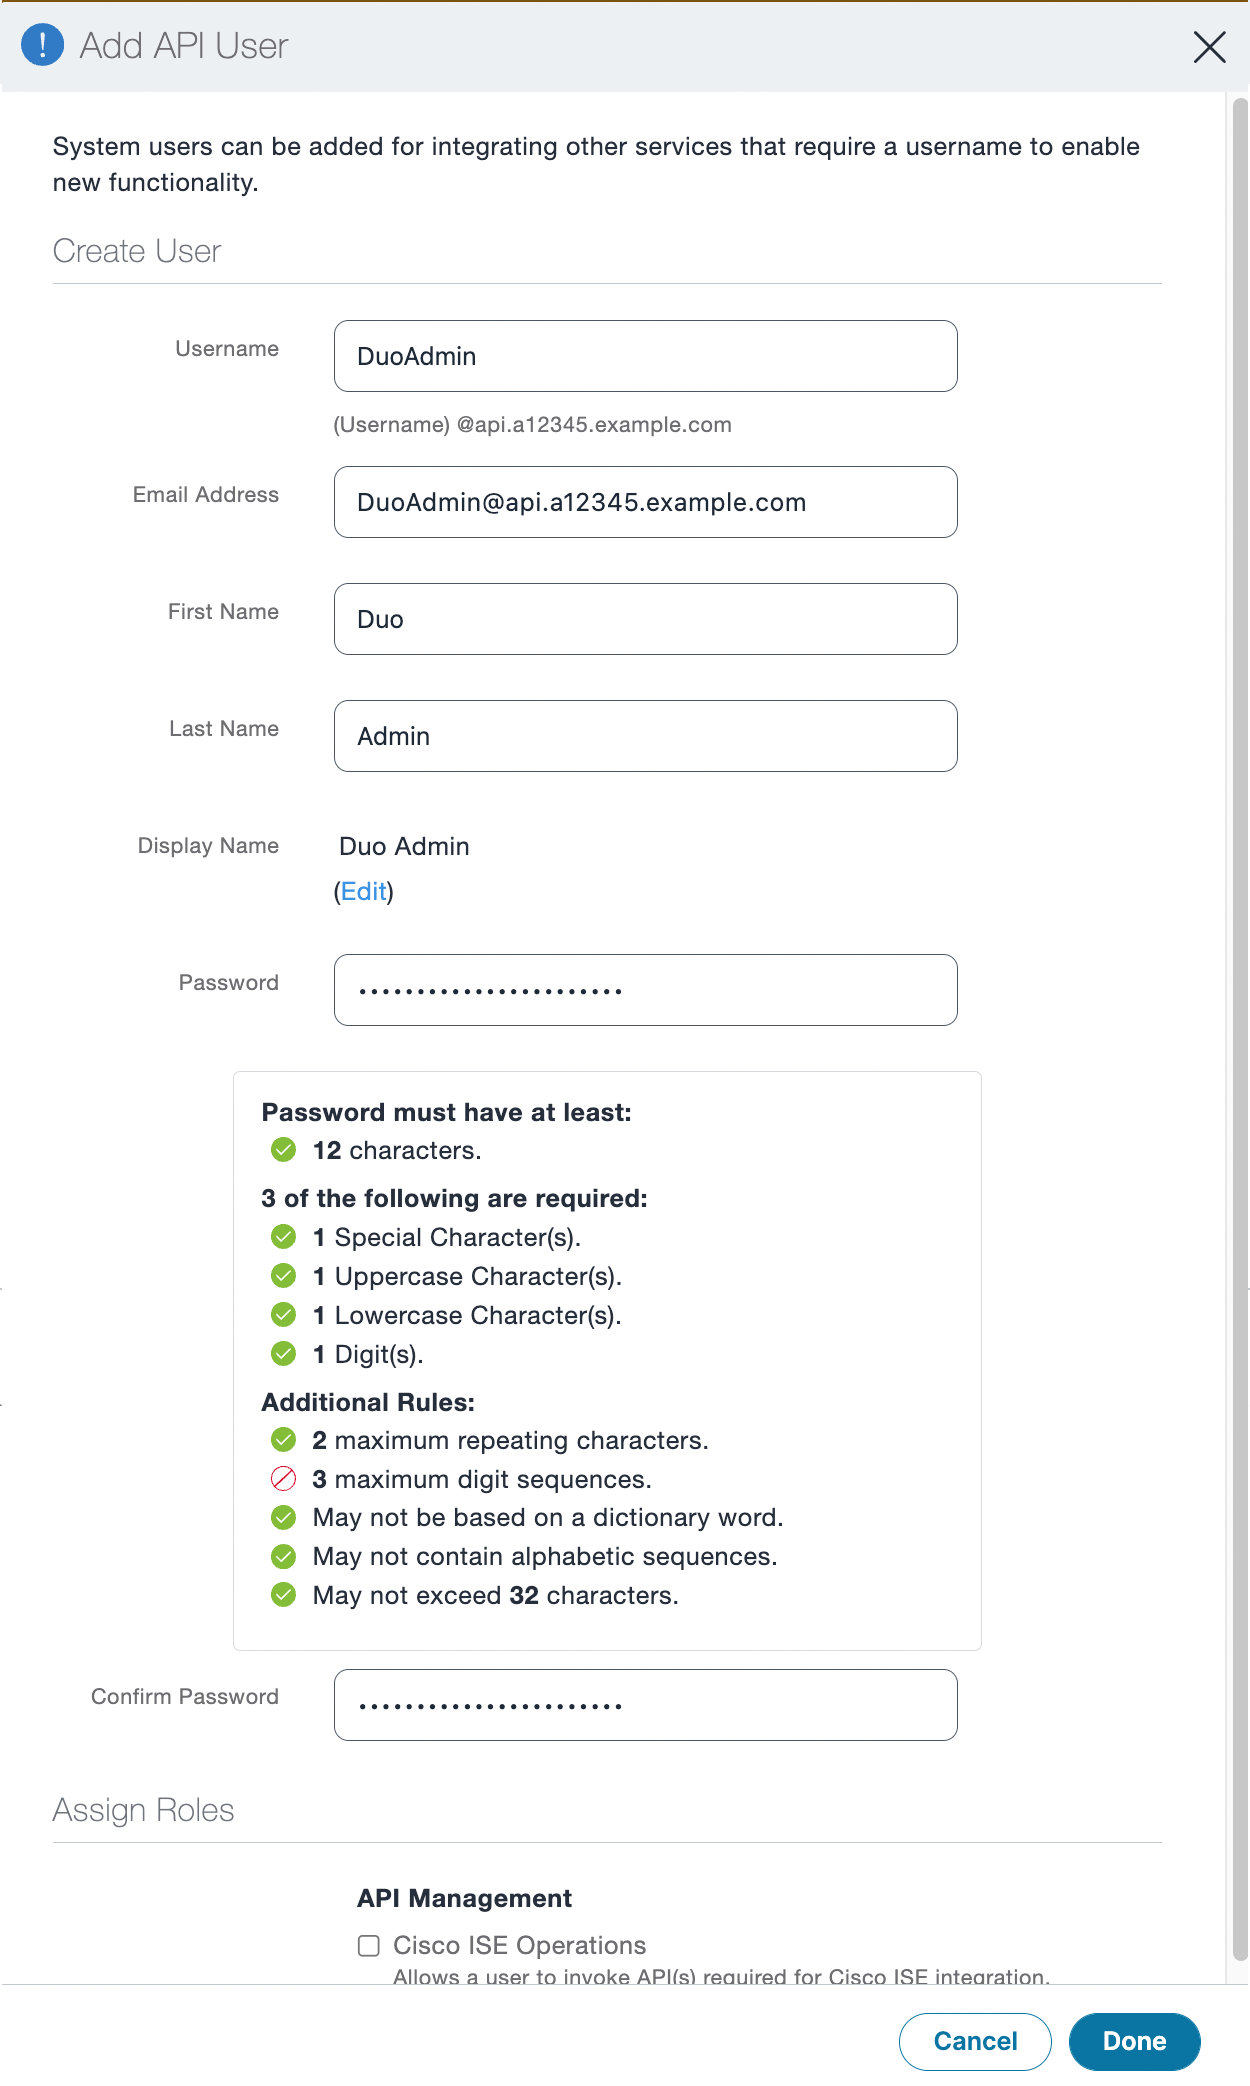
Click the Add button and choose API User on the pop-up menu.
-
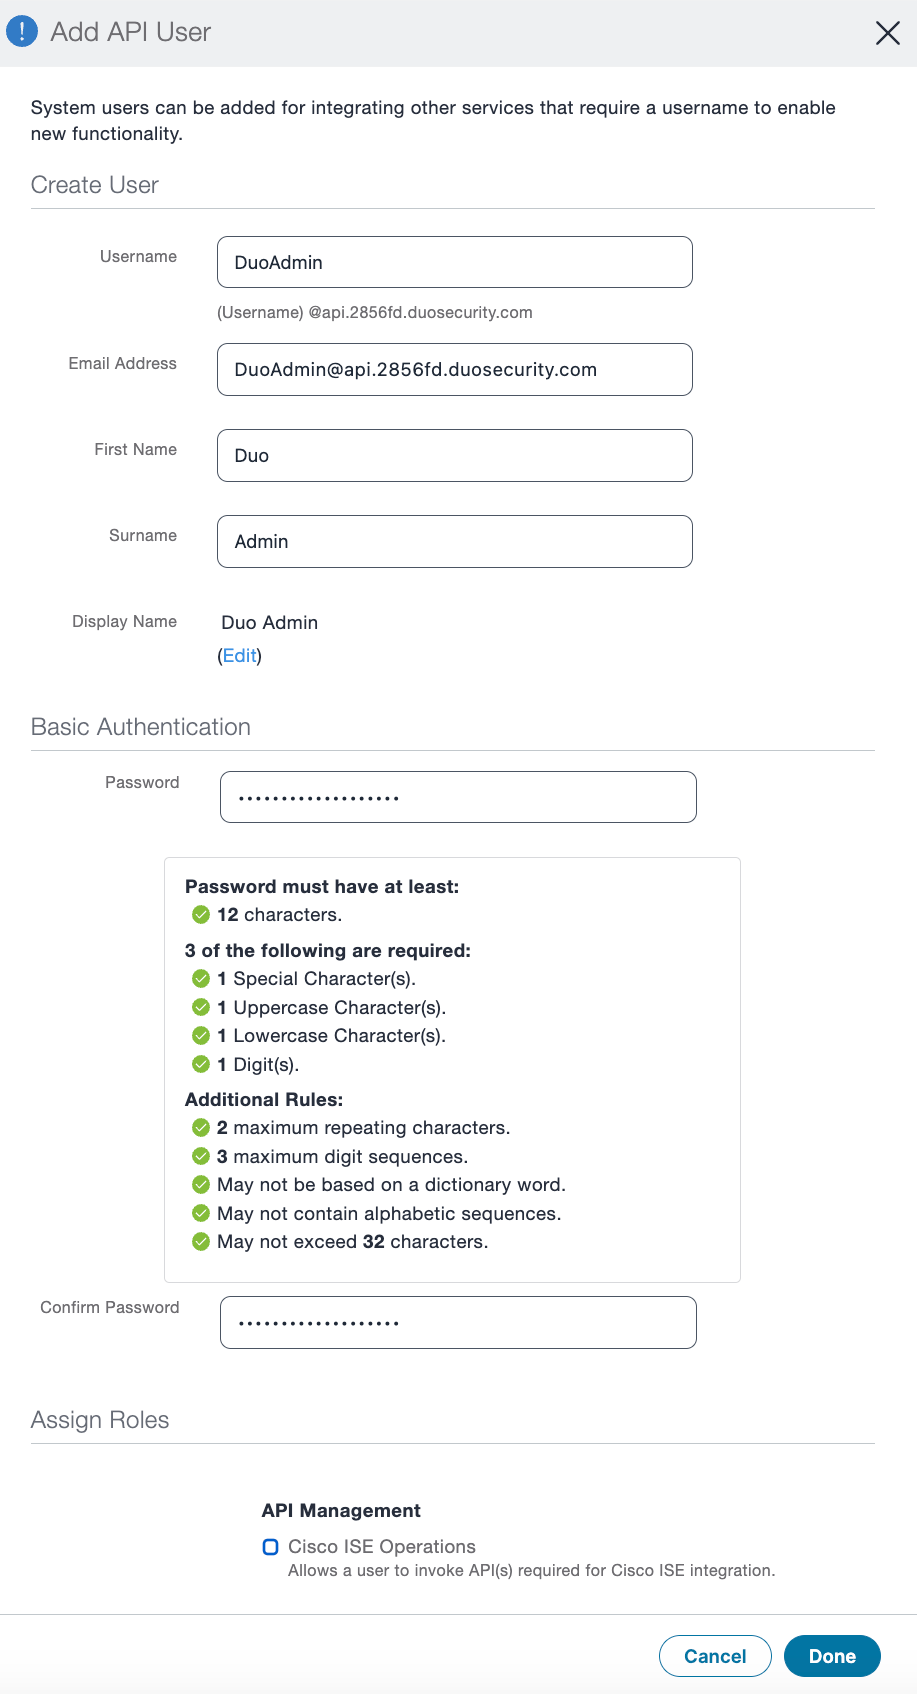
Enter the following information on the "Basic" tab form:
Username Enter the desired Duo account username. First Name and Surname Enter a first and last name for the Duo API user (e.g. "Duo" "Admin"). Email Address This will be automatically populated with the Ivanti Neurons for MDM email address. Password and Confirm Password Enter and confirm a strong password for the Duo admin user. -
Click the Done button to create the Duo API user.
-
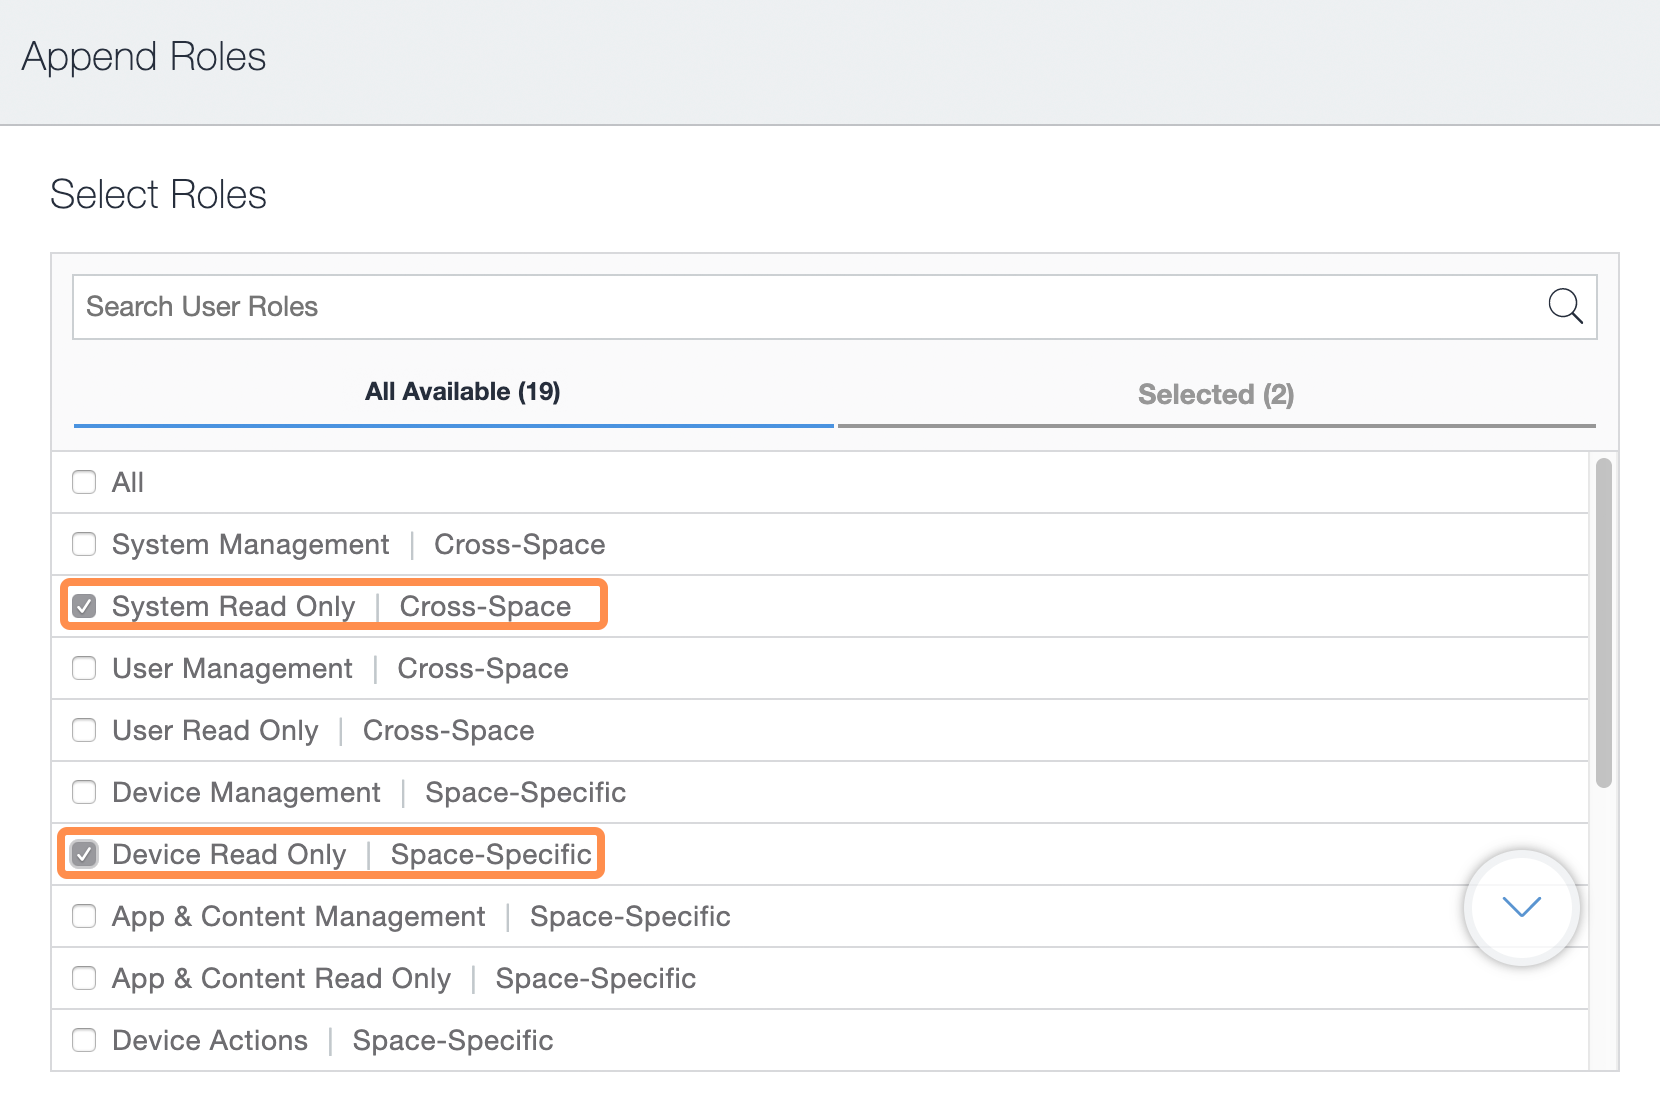
Select the Duo API Admin user you just created by checking the box to the left of the username in the list of users. Click the Actions button and then click Append Roles. If you are viewing the details of the new Duo API user, click the Assign Roles icon underneath the user status information.
-
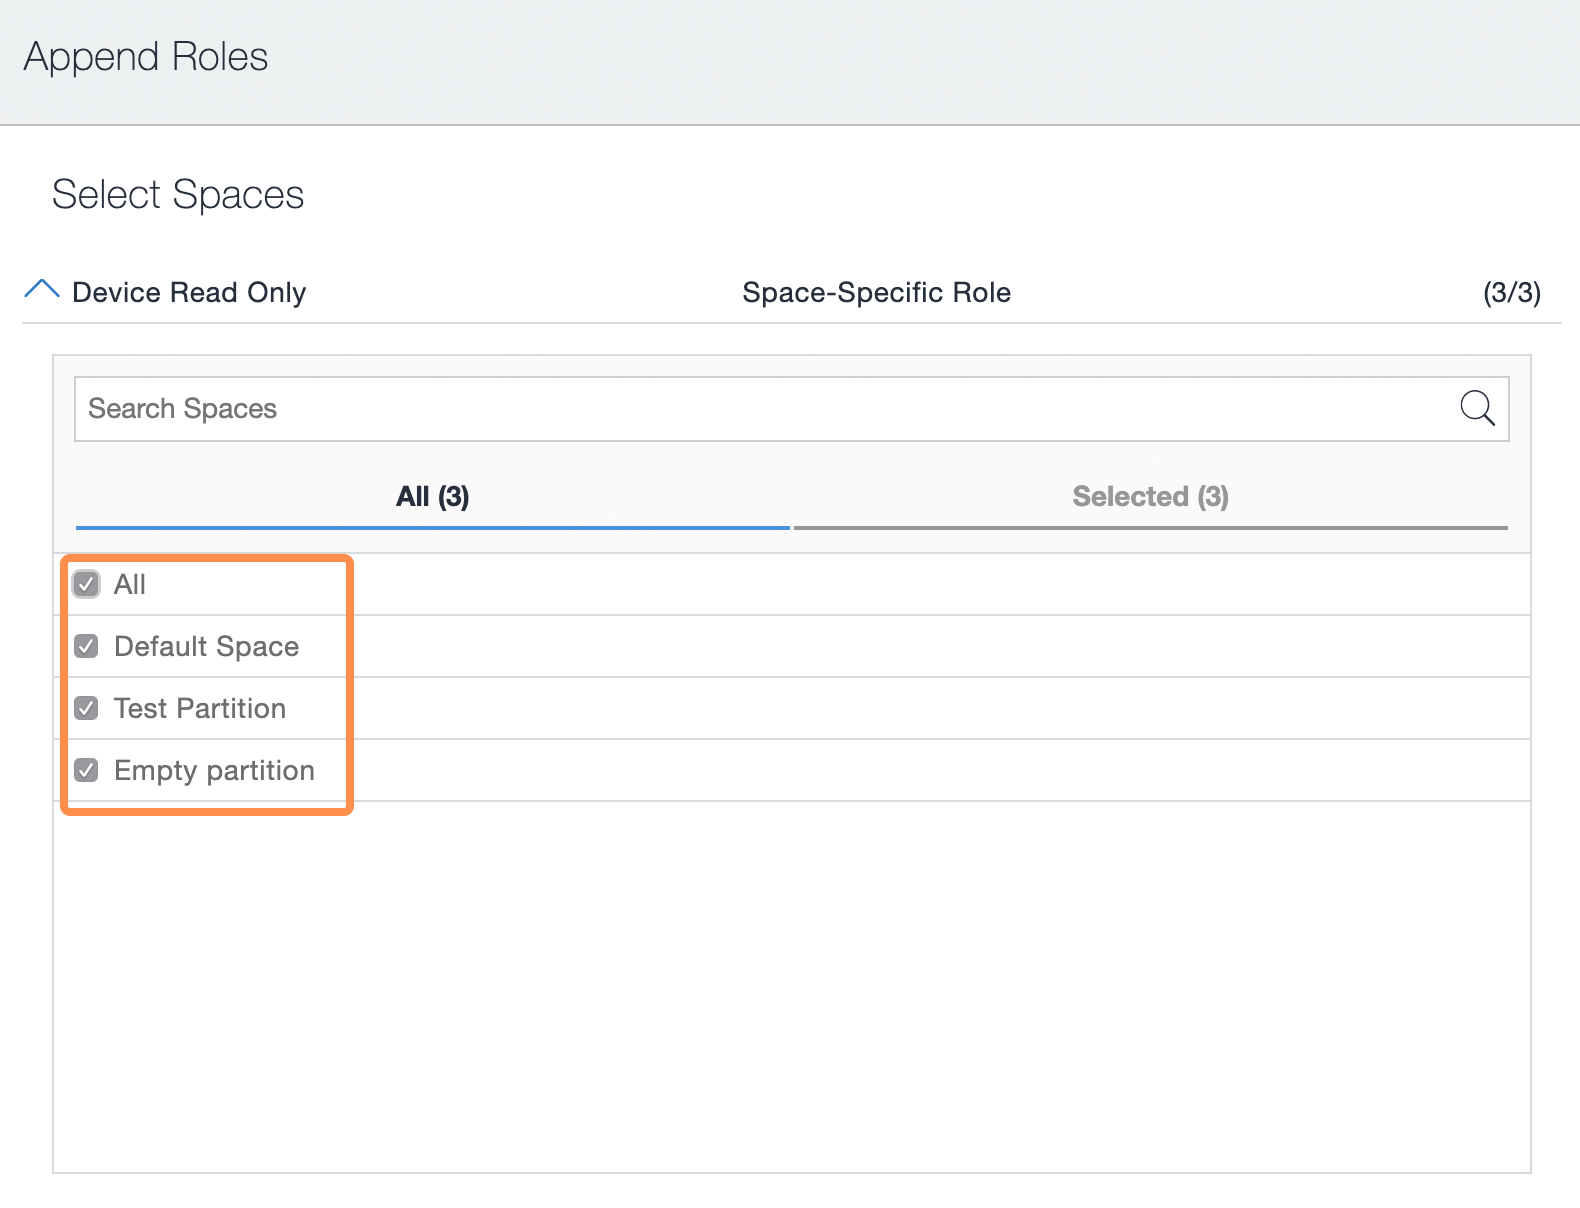
On the "Append Roles" or "Assign Roles to" page, check the boxes for the User Roles System Read Only (which also automatically includes "User Read Only") and Device Read Only. Click Next.
-
If you have additional spaces in your organization other than the "Default Space" make your appropriate selections from the available spaces and partitions for the "Device Read Only" role and then click Next.
-
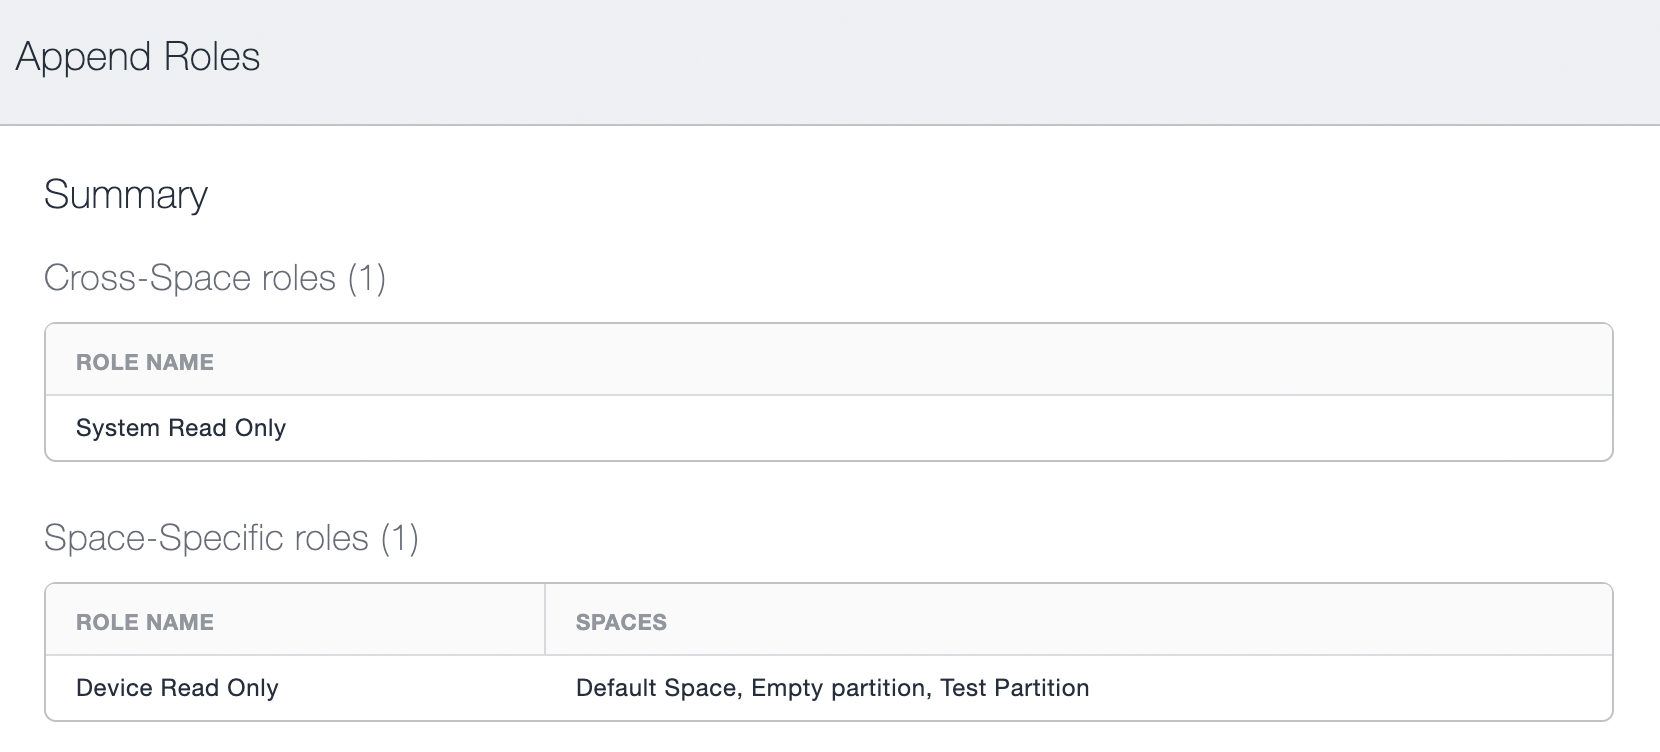
Confirm your role and space selections and then click Done to assign the role privileges to the Duo API user.
Enter Ivanti Neurons Info in Duo
-
Return to the Duo Admin Panel. Enter the following information into the blank fields in the "API Details" section:
User Email Address Enter the email address (which is also the username) of the Duo API user you created in Ivanti Neurons for MDM. User Password Enter the password for the Duo API user you created in Ivanti Neurons for MDM. Ivanti Neurons for MDM Domain Name Enter your organization's Ivanti Neurons domain. For example, acmecorp.mobileiron.com. -
Click the Test Configuration button to verify Duo's API access to your Ivanti Neurons for MDM instance. You'll receive a "Configuration Successful!" message if everything's correct. If the test fails, verify that you completed the Ivanti Neurons for MDM configuration steps and entered the right information in the Duo Admin Panel.
-
After you successfully test your configuration, click the Save & Configure button.
At this point the configured integration is disabled and applies to no users until you finish your deployment.
Verify Android Device Information with Search
After you configure the connection between Ivanti Neurons for MDM and Duo you can verify that a given device's information is being pulled into Duo by searching for the device identifier from the Duo Admin Panel. See Search for Device Identifiers to learn how.
iOS Configuration
Duo determines trusted device status on iOS devices by leveraging the installed and activated Duo Mobile application on a given device to verify device information. To enable this verification you'll need to grant Duo read-only access to those devices via your Ivanti Neurons for MDM's API access.
Before proceeding, install the Apple MDM Certificate for Ivanti Neurons for MDM to manage iOS devices.
Create the Ivanti Neurons for MDM with App Config Integration
- Log in to the Duo Admin Panel and navigate to Devices → Trusted Endpoints.
- If this is your first management integration, click the Get started button at the bottom of the Trusted Endpoints introduction page. If you're adding another management integration, click the Add Integration button you see at the top of the page instead.
- On the "Add Trusted Endpoint Integrations" page, locate Ivanti Neurons for MDM in the list of integrations.
- Choose iOS from the "Select operating system" drop-down, and then click the Add button.
The new Ivanti Neurons for MDM with App Config integration is created in the "Disabled" state. You'll turn it on when you're ready to apply your Duo trusted endpoints policy.
Please note that this integration takes advantage of managed app configuration and therefore Duo Mobile must be installed by your MDM for the device to be considered trusted.
Keep the Duo Admin Panel open in your browser. You'll need to refer back to the Ivanti Neurons for MDM with App Config management integration page to complete the configuration steps.
Configure Duo Mobile Distribution
-
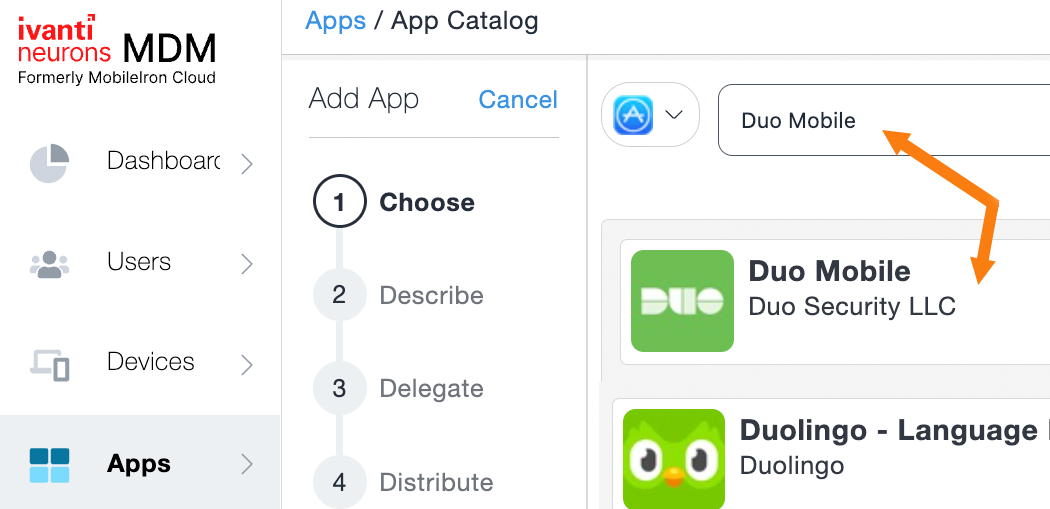
Log on to the Ivanti Neurons for MDM admin portal as an administrator and choose Apps → App Catalog on the left side of the page.
-
Click the Add button.
-
The default app catalog source may be set to the "iOS Store". If not, click the store drop-down list next to the search box and select the iOS Store from the list.
-
Search for Duo Mobile in the iOS Store, and then click on the Duo Mobile app shown in the search results.
-
Click the Next button at the bottom of the page.
-
Set optional information on the "Description" page if you wish. Click Next.
-
Do not make any changes on the "App Delegation" page; click Next.
-
Choose the user groups or individuals to whom you want to distribute the Duo Mobile iOS application, or choose Everyone. Click Next.
-
On the "Configuration" page, click the plus sign next to Install on Device and set the "Configuration Setup" page information as follows:
-
Enter a unique name, like Duo Mobile Trusted Endpoint Config.
-
Toggle the "Device Installation Configurations" setting to On.
-
Check the box to enable Require Installation on device.
-
Check the box next to Enable MDM App Auto-Updates.
-
Check the box next to Convert to Managed App. Note that if Duo Mobile is not managed by Ivanti Neurons for MDM, then Ivanti Neurons for MDM will not be able to send device identifiers to Duo to determine device trust during authentication.
-
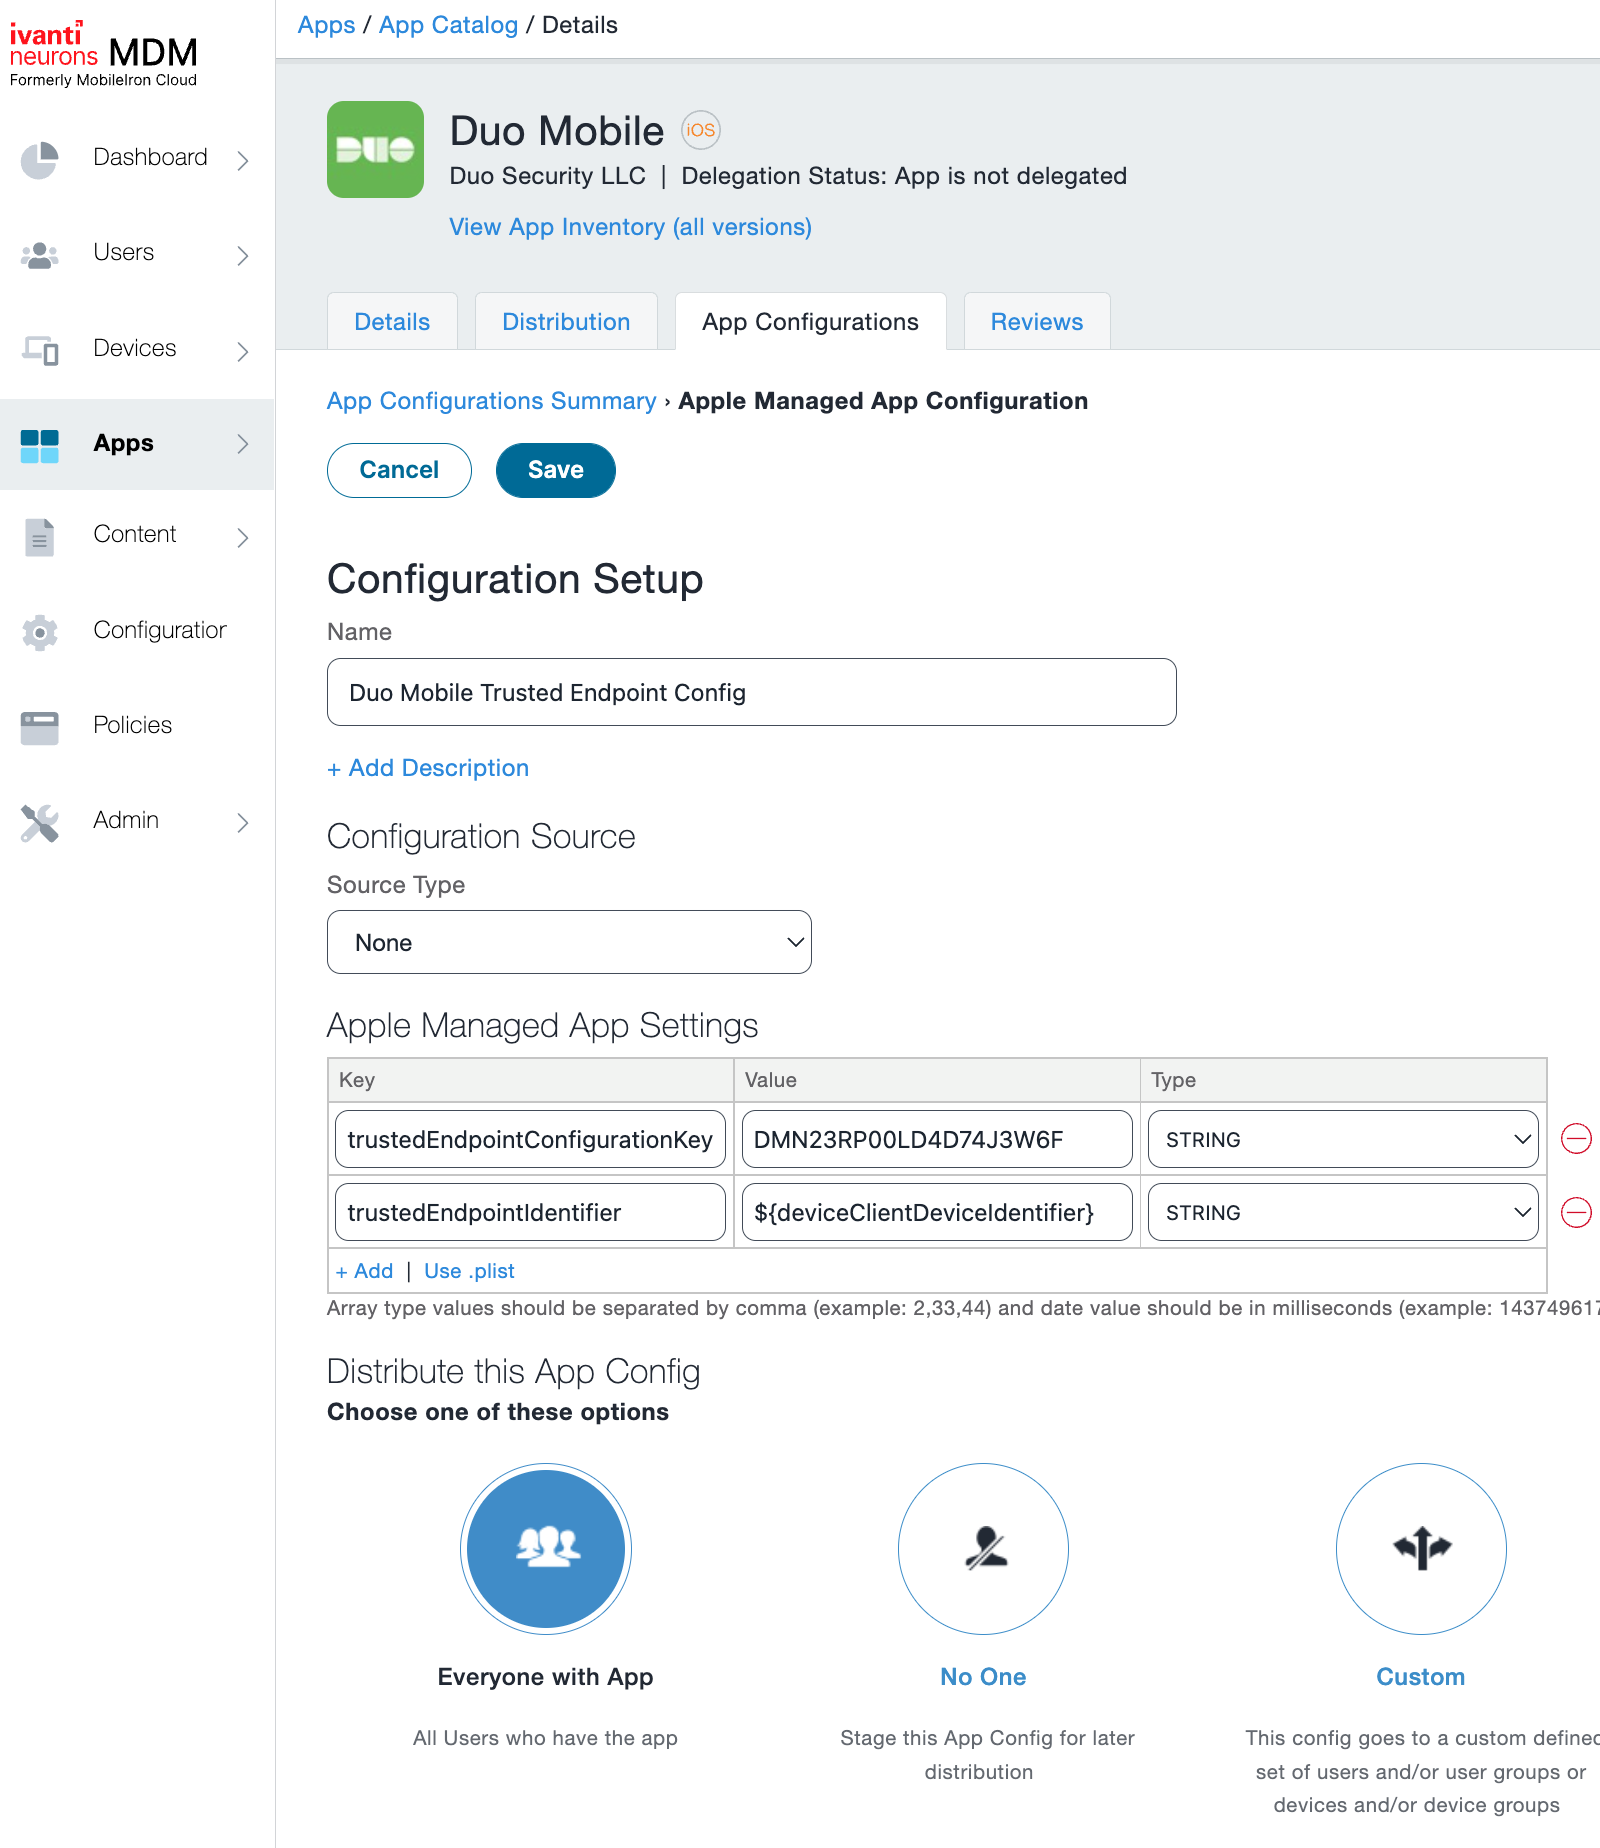
Set "Distribute this App Config" to Everyone with App.
-
-
Click Next when done to return to the "App Configurations" page.
-
Click the plus sign button next to Apple Managed App Configuration to create a new configuration.
-
Give the configuration a unique name, such as "Duo Mobile Trusted Endpoint Config".
-
Return to the Duo Admin Panel. Copy the Key from the "Trusted Endpoints configuration key" section and paste it into the Ivanti Neurons for MDM Key field.
-
Return to the Duo Admin Panel. Copy the Value from the "Trusted Endpoints configuration key" section (it will look similar to DPK0W0KLPJLOGSKHTDD) and paste it into the Ivanti Neurons for MDM Value field.
-
Change the "Type" to STRING.
-
Click +Add to add another configuration item.
-
Return to the Duo Admin Panel. Copy the Key from the "Trusted Endpoints identifier" section and paste it into the Ivanti Neurons for MDM Key field.
-
Return to the Duo Admin Panel. Copy the Value from the "Trusted Endpoints identifier" section (${deviceClientDeviceIdentifier}) and paste it into the Ivanti Neurons for MDM Value field.
-
Change the "Type" to STRING.
-
After adding both configuration items click Next to return to the "App Configurations" page.
-
Click Done to complete the configuration for Duo Mobile.
Create a Duo API Account
-
While still logged into Ivanti Neurons for MDM as an administrator, navigate to the Users page.
-
Click the Add button and choose API User on the pop-up menu.
-
Enter the following information on the "Basic" tab form:
Username Enter the desired Duo account username. First Name and Surname Enter a first and last name for the Duo API user (e.g. "Duo" "Admin"). Email Address This will be automatically populated with the Ivanti Neurons for MDM email address. Password and Confirm Password Enter and confirm a strong password for the Duo admin user. -
Click the Done button to create the Duo API user.
-
Select the Duo API Admin user you just created by checking the box to the left of the username in the list of users. Click the Actions button and then click Append Roles. If you are viewing the details of the new Duo API user, click the Assign Roles icon underneath the user status information.
-
On the "Append Roles" or "Assign Roles to" page, check the boxes for the User Roles System Read Only (which also automatically includes "User Read Only") and Device Read Only. Click Next.
-
If you have additional spaces in your organization other than the "Default Space" make your appropriate selections from the available spaces and partitions for the "Device Read Only" role and then click Next.
-
Confirm your role and space selections and then click Done to assign the role privileges to the Duo API user.
Enter Ivanti Neurons Info in Duo
-
Return to the Duo Admin Panel. Enter the following information into the blank fields in the "API Details" section:
User Email Address Enter the email address (which is also the username) of the Duo API user you created in Ivanti Neurons for MDM. User Password Enter the password for the Duo API user you created in Ivanti Neurons. Ivanti Neurons for MDM Domain Name Enter your organization's Ivanti Neurons for MDM domain. For example, acmecorp.mobileiron.com. -
Click the Test Configuration button to verify Duo's API access to your Ivanti Neurons for MDM instance. You'll receive a "Configuration Successful!" message if everything's correct. If the test fails, verify that you completed the Ivanti Neurons for MDM configuration steps and entered the right information in the Duo Admin Panel.
-
After you successfully test your configuration, click the Save & Configure button.
At this point the configured integration is disabled and applies to no users until you finish your deployment.
Verify iOS Device Information with Search
After you configure the connection between Ivanti Neurons for MDM and Duo you can verify that a given device's information is being pulled into Duo by searching for the device identifier from the Duo Admin Panel. See Search for Device Identifiers to learn how.
Finish Trusted Endpoints Deployment
Once your Ivanti Neurons for MDM managed devices receive the Duo config you can set the Trusted Endpoints policy to start checking for managed device status as users authenticate to Duo-protected services and applications.
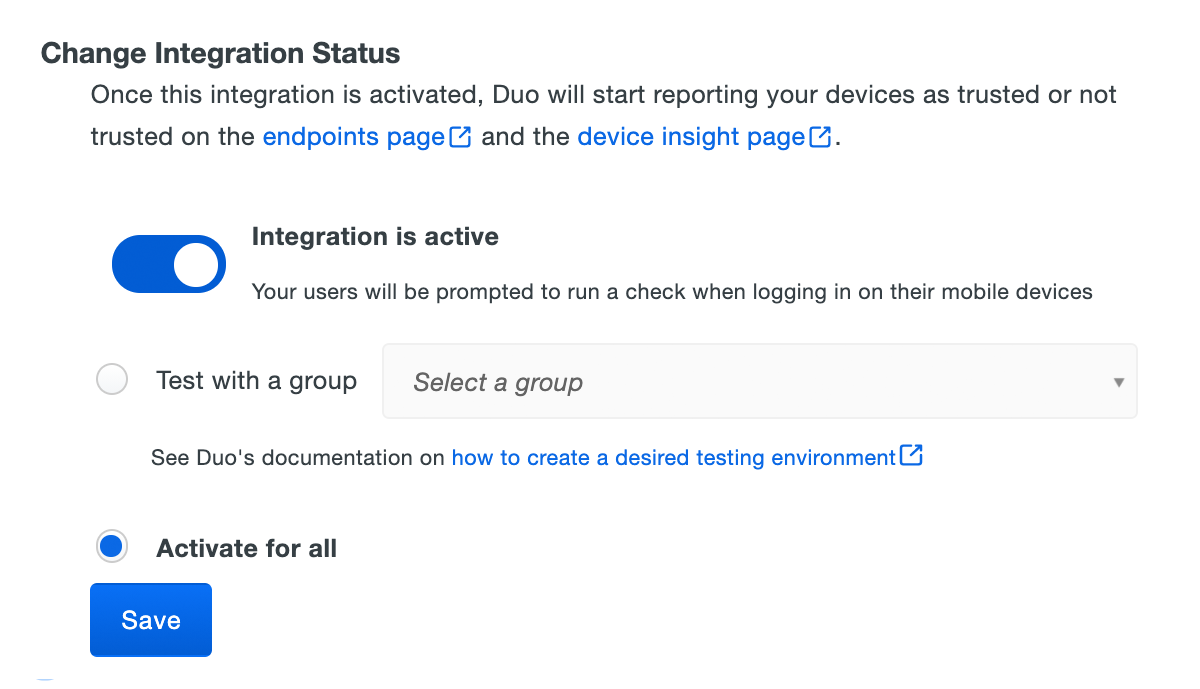
When your trusted endpoints policy is applied to your Duo applications, return to the Ivanti Neurons for MDM trusted endpoint management integration in the Duo Admin Panel. The "Change Integration Status" section of the page shows the current integration status (disabled by default after creation). You can choose to either activate this management integration only for members of a specified test group, or activate for all users. If you created more than one Ivanti Neurons for MDM integration, you must activate each one individually.
Duo Premier and Duo Advantage plans: The Device Insight and Endpoints pages in the Duo Admin Panel show which access devices are trusted/managed.
Verify Your Setup
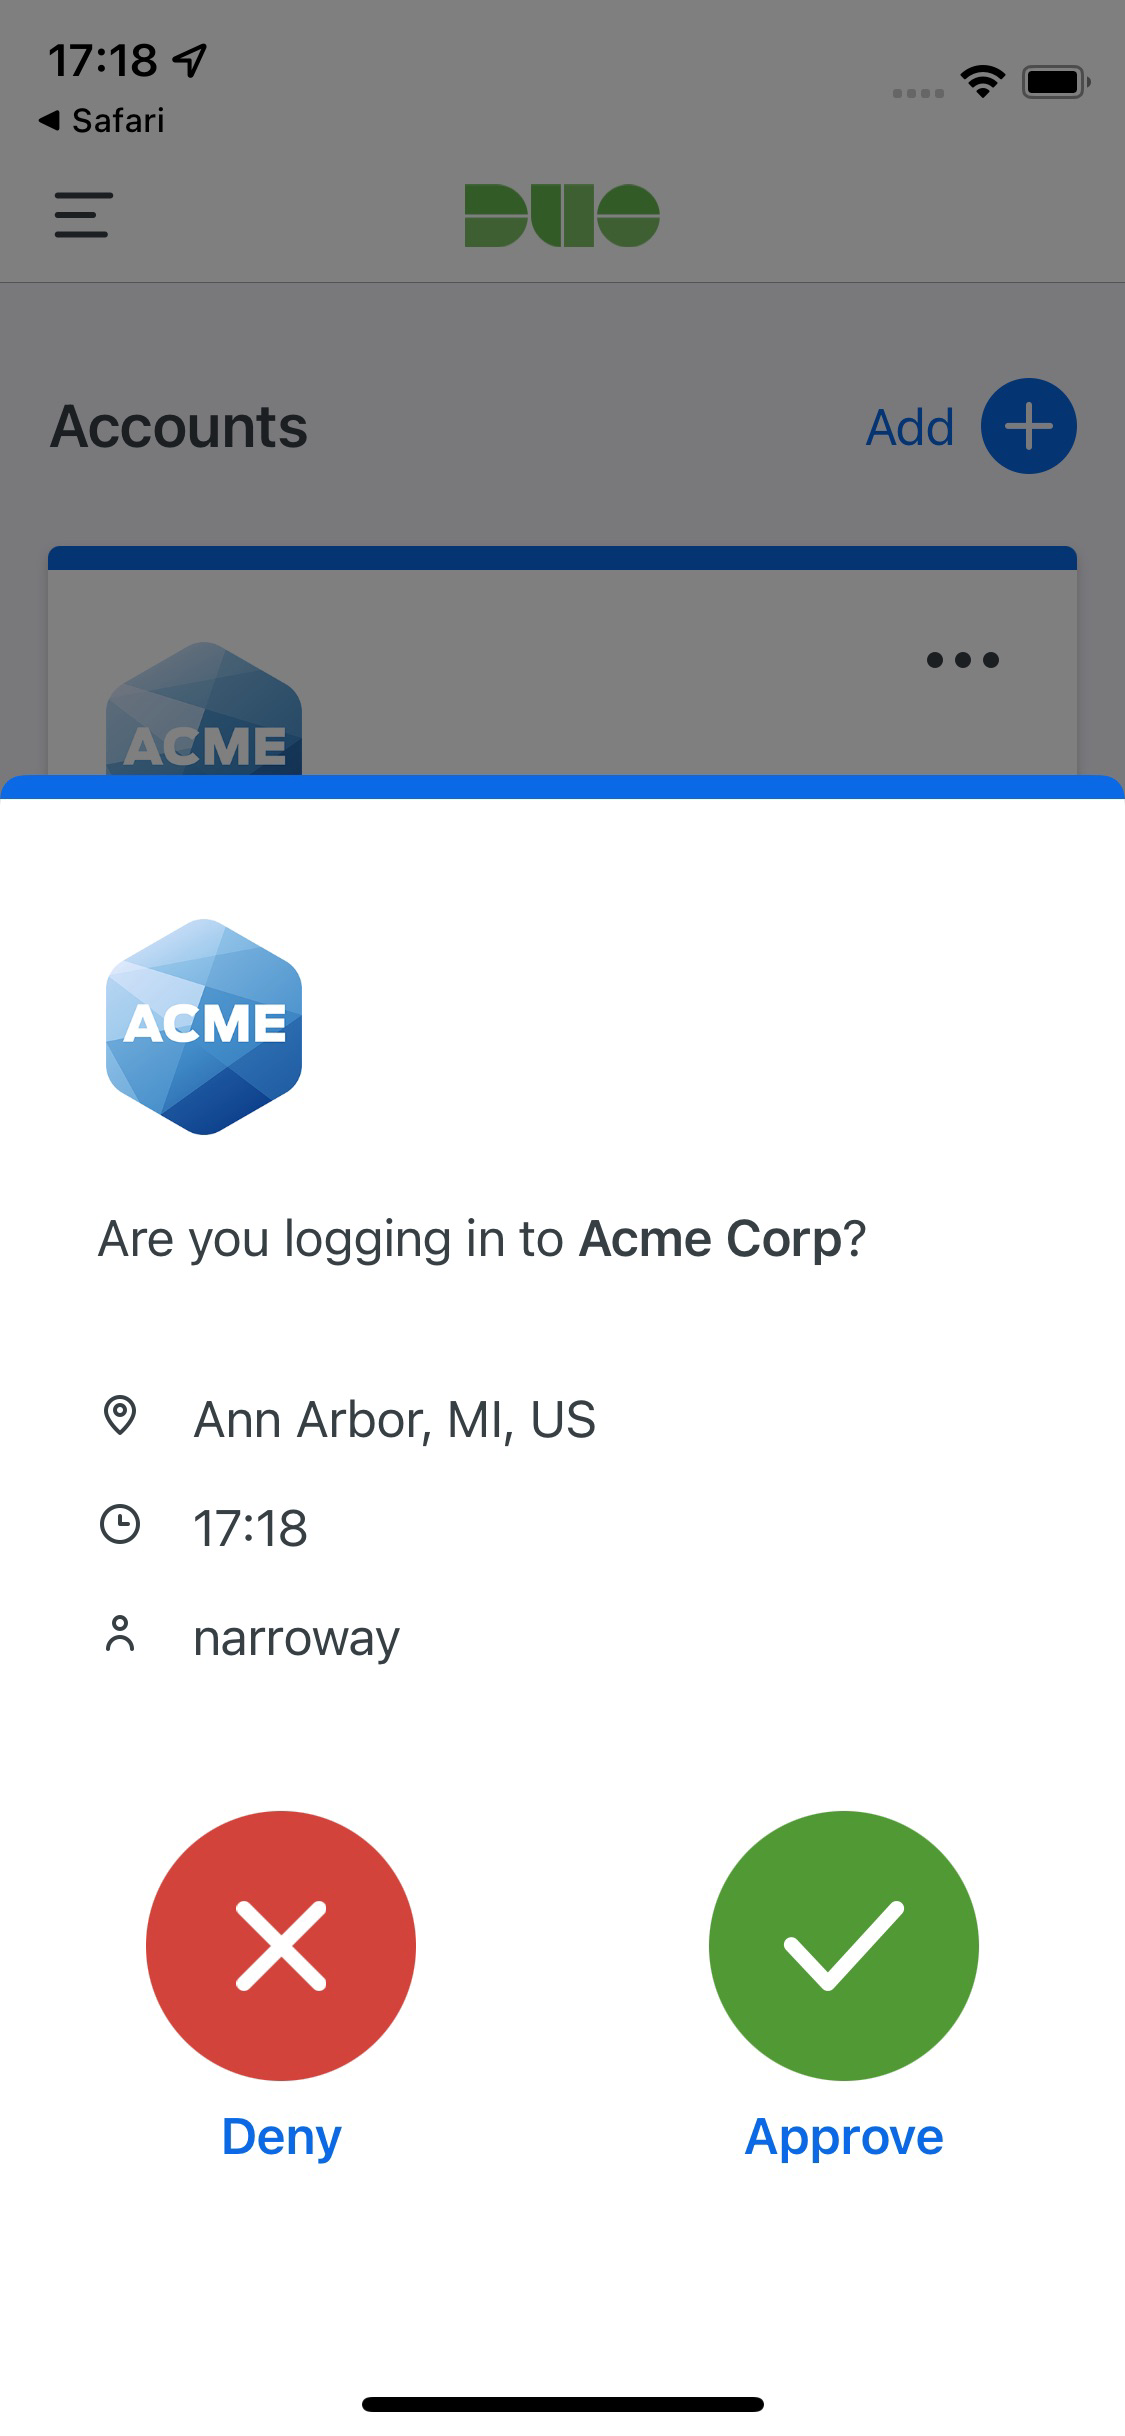
Users with Duo Mobile installed and activated for Duo Push on Android and iOS devices see a device trust dialog when authenticating to a protected resource via the Duo Prompt.
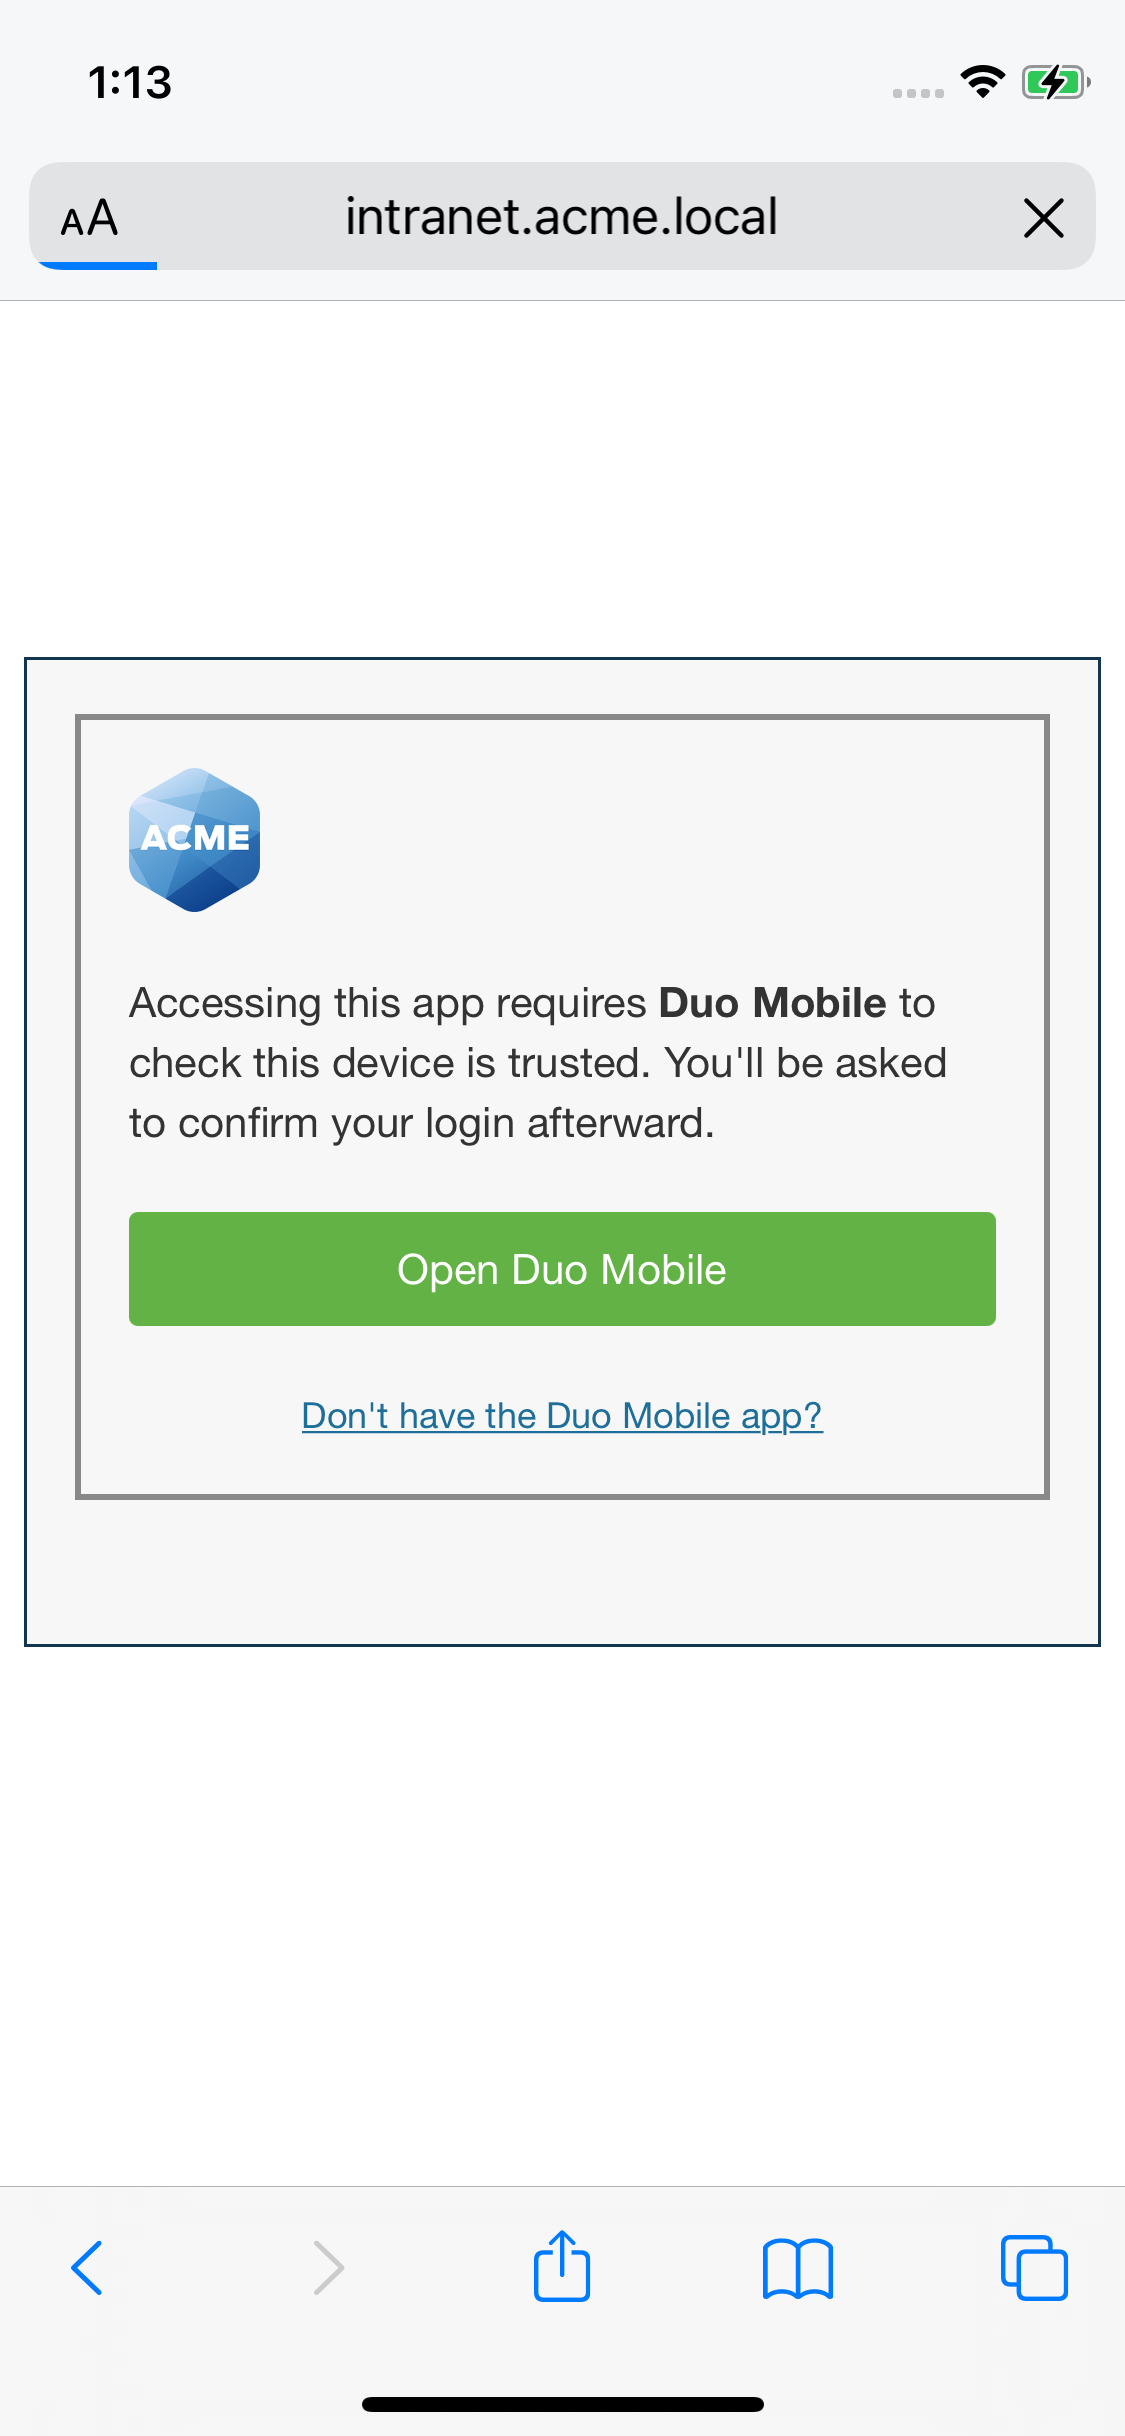
Duo uses the API access you granted in Ivanti Neurons for MDM to perform a permissions check to verify device information.
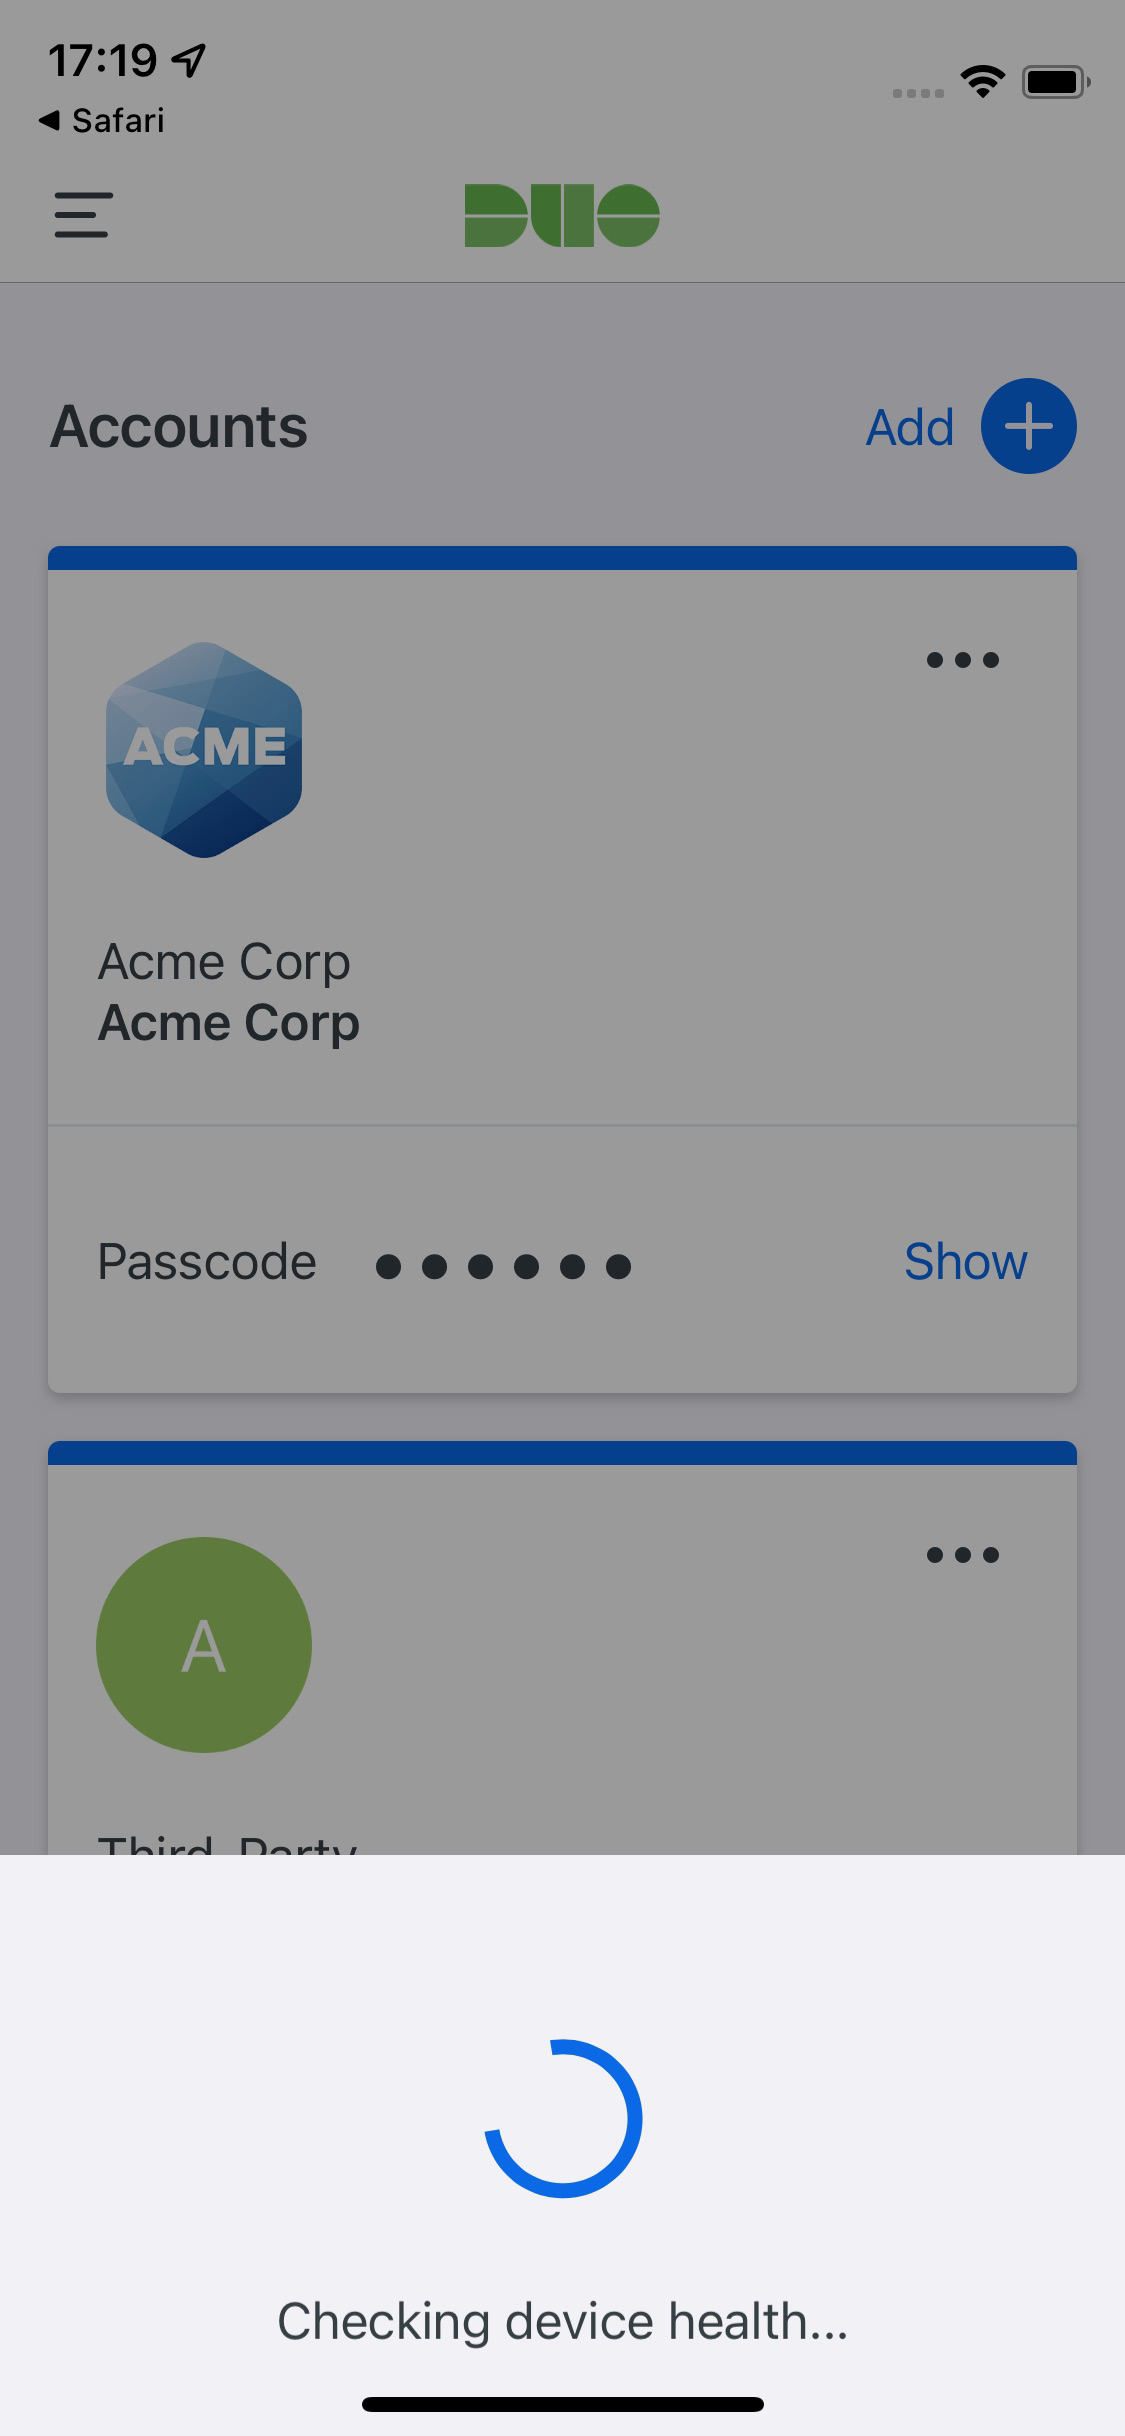
If Duo successfully verifies the device information using the Ivanti Neurons for MDM API access, and the user has Duo Mobile activated for Duo Push, then the user receives a login request on their phone.
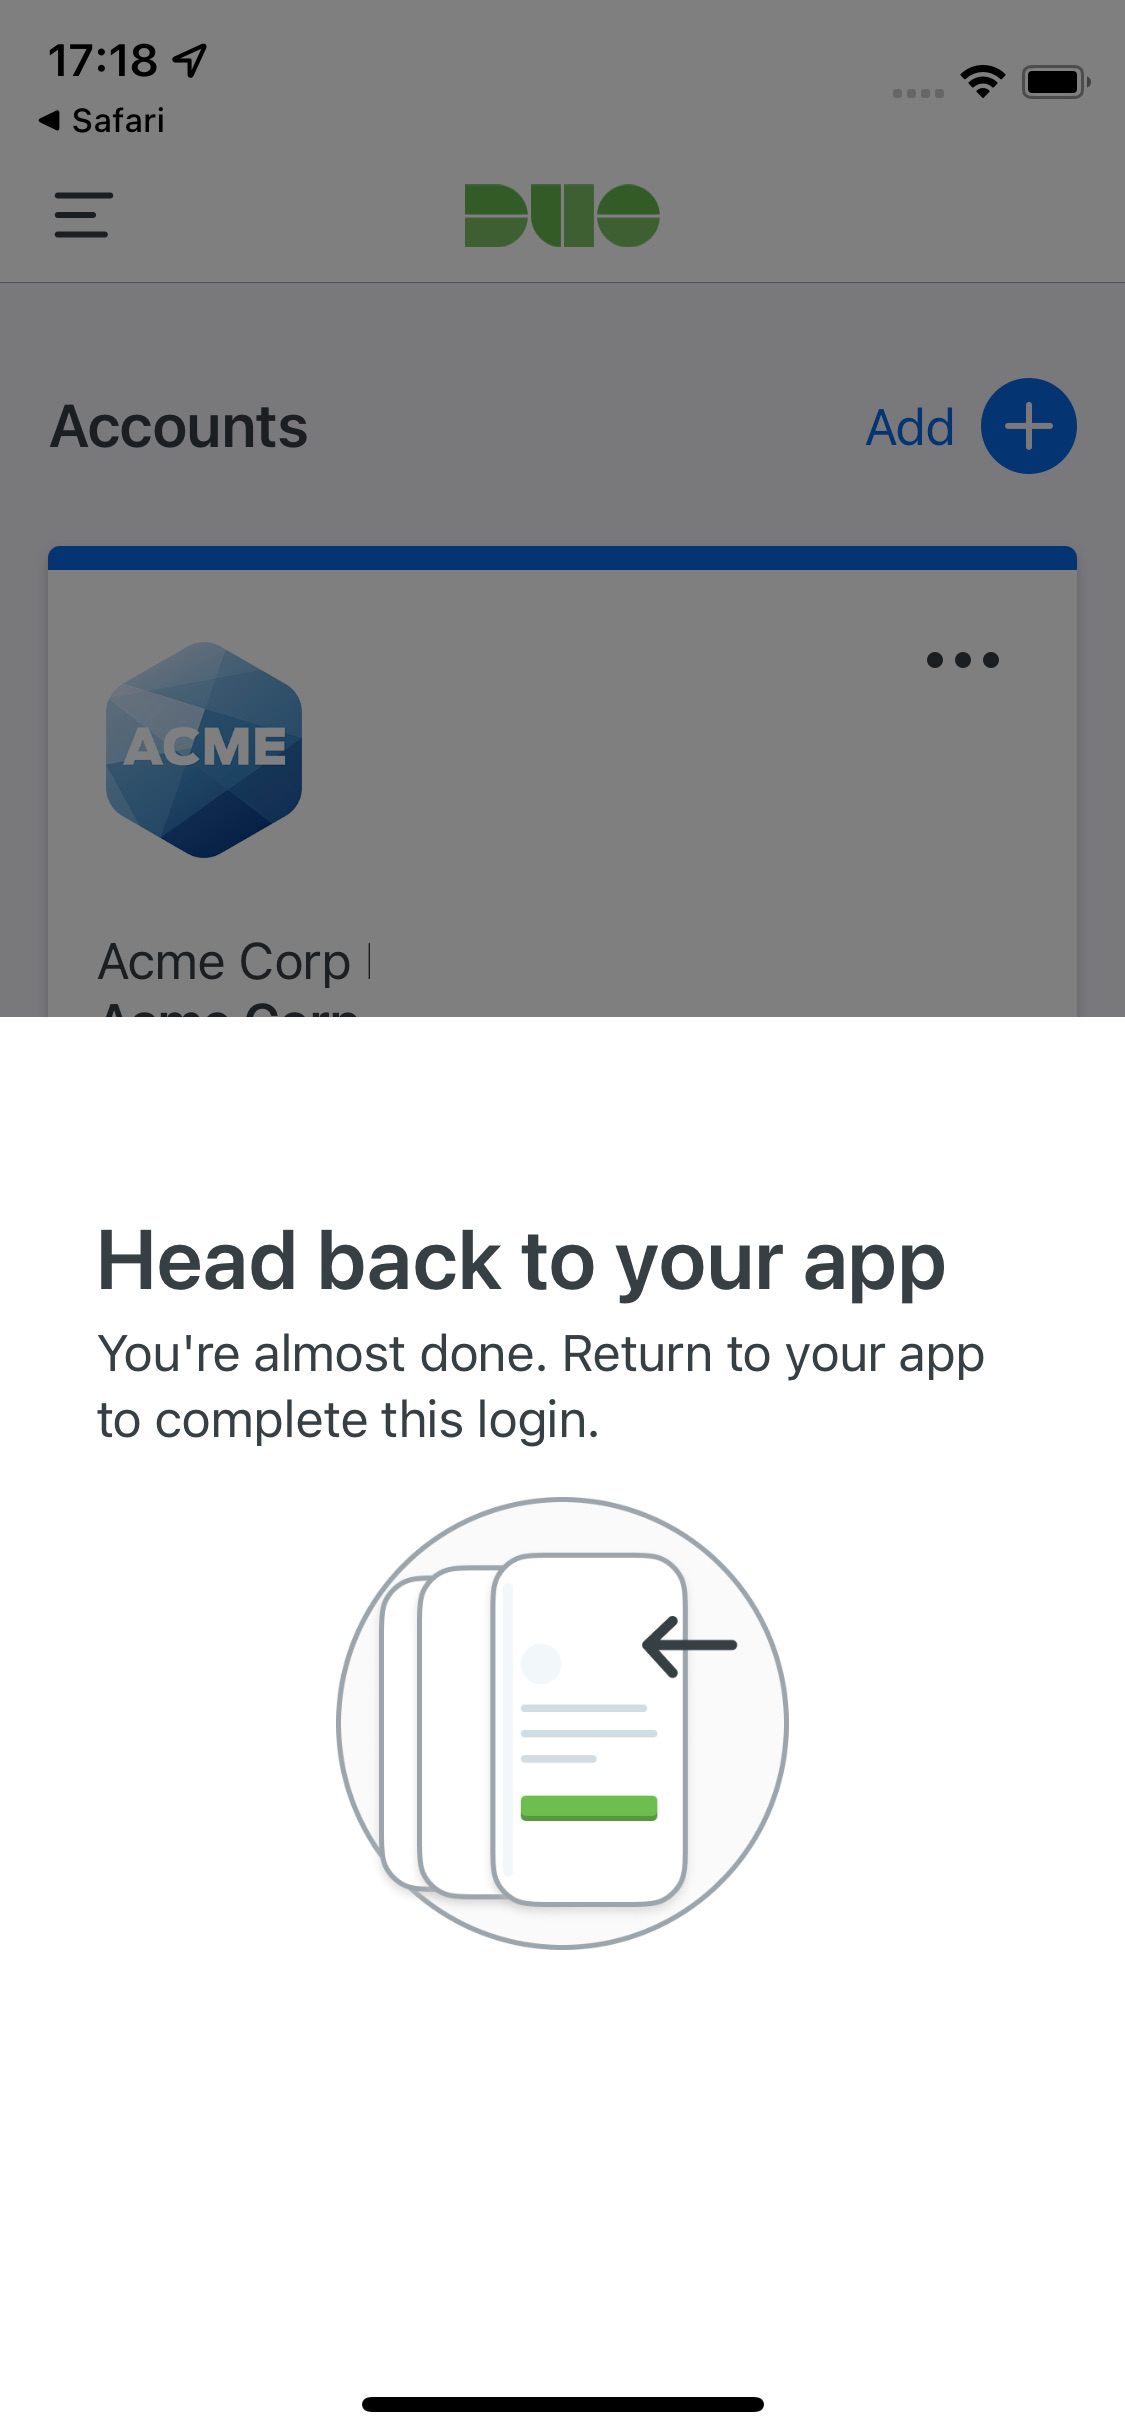
On Android devices, approving the request grants access and returns the user to the protected application. On iOS devices, after approving the Duo authentication request users tap the top-left of the Duo Mobile app to return to the application and complete login. The "Second Factor" logged for these approvals is shown as "Duo Mobile Inline Auth" in the Duo authentication log.
If the user does not have Duo Mobile activated for push, or does not approve the Duo request before it times out, the user returns to the Duo Prompt, where they may select from the available factors to complete 2FA.
Search for Device Identifiers
If you configured Duo Mobile for iOS with App Config or Android to determine device trust, you may want to search for specific device identifiers to verify that the identifier information for a given trusted device exists in Duo. This can be useful to verify a device you expect to be trusted was imported from Ivanti Neurons for MDM into Duo.
To search for a device identifier in Duo:
-
Log in to the Duo Admin Panel and navigate to Trusted Endpoints.
-
Locate the Ivanti Neurons for MDM or Ivanti Neurons for MDM with App Config device management integration you want to search for a device identifier in the list and click on it to view its details.
-
In the Check if devices have synced section, enter the identifier for the device you want to check and click Search.
-
A message appears indicating if the device identifier was either found or not found. If the device identifier is not found, check your Ivanti Neurons for MDM API configuration and wait 24 hours.
Use these instructions to find the device identifier to search in Ivanti Neurons for MDM.
- Log in to the Ivanti Neurons for MDM administration page, navigate to Devices, and select a device to view.
- Under "Overview", see "Settings".
- The "Device Client ID" is the device identifier. Copy this value and use it to perform the search in Duo.
Removing the Ivanti Neurons for MDM Management Integration
Be sure to unassign your trusted endpoints policy from all applications or remove the "Trusted Endpoints" configuration item from your global policy before deleting an existing Ivanti Neurons for MDM integration from "Trusted Endpoints Configuration". You should also disable your Duo admin user in Ivanti Neurons for MDM.
Leaving the policy settings in place after deleting a management tools integration may inadvertently block user access to applications.
Troubleshooting
Need some help? Take a look at our Trusted Endpoints Knowledge Base articles or Community discussions. For further assistance, contact Support.